5 HDFS이용하는 Java Application 구현하기
5.1 소스코드
settings.gradle
rootProject.name = 'hadoop-hdfs-app'build.gradle
plugins {
    id 'java'
}

group 'de.example.hadoop.hdfs'
version '1.0-SNAPSHOT'

repositories {
    mavenCentral()
}

dependencies {
    implementation 'org.apache.hadoop:hadoop-common:3.2.1'
    implementation 'org.apache.hadoop:hadoop-hdfs-client:3.2.1'
}

test {
    useJUnitPlatform()
}
de.example.hadoop.hdfs.InputReadAndFileWriter.java
command line 으로 넘겨온 input을 읽어서 지정된 파일에 write 하는 프로그램.
package de.example.hadoop.hdfs;

import org.apache.hadoop.conf.Configuration;
import org.apache.hadoop.fs.FSDataInputStream;
import org.apache.hadoop.fs.FSDataOutputStream;
import org.apache.hadoop.fs.FileSystem;
import org.apache.hadoop.fs.Path;

public class InputReadAndFileWriter {

    public static void main(String[] args) {
        if (args.length != 2) {
            System.err.println("Usage: InputReadAndFileWriter <filename> <content>");
            System.exit(1);
        }

        String filePath = args[0];
        String contents = args[1];

        try {
            Configuration configuration = new Configuration();
            FileSystem hdfs = FileSystem.get(configuration);

            // Check path & delete if exists
            Path path = new Path(filePath);
            if (hdfs.exists(path)) {
                hdfs.delete(path, true);
                System.out.println("#-#-# " + filePath + " is deleted.");
            }

            // Write contents as file
            FSDataOutputStream outputStream = hdfs.create(path);
            outputStream.writeUTF(contents);
            outputStream.close();
            // input 크기가 크지 않다는 가정. 1000만 line정도 되면 이 과정에서 문제 생길 수 있음


            // 로그 남기기 위해서
            FSDataInputStream inputStream = hdfs.open(path);
            String result = inputStream.readUTF();
            inputStream.close();

            System.out.println("#-#-# Saved contents: " + result);

        } catch (Exception e) {
            e.printStackTrace();
        }
    }
}
arg 두 개 받을 거고 두 개가 아니면 exit(1)
5.2 실행
Jar 를 Primary Node 로 이동
하둡 Primary 노드에 접속해서 경로 생성
cd ~
mkdir /home/hadoop/example/jars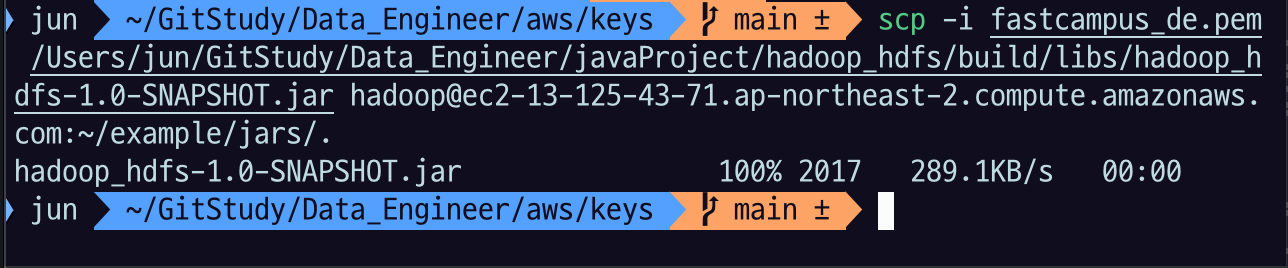
로컬의 jar 를 scp 로 primary 노드로 이동
scp -i $key $project_path/build/libs/hadoop-hdfs-app-1.0-SNAPSHOT.jar hadoop@$primary_node:~/example/jars/.$key: primary node EC2 에 접속할 수 있는 key 파일$project_path: 5.1 을 수행한 java project 의 path$primary_node: primary node의 public dns 또는 ip 주소~/example/jars/.: 저장할 디렉토리
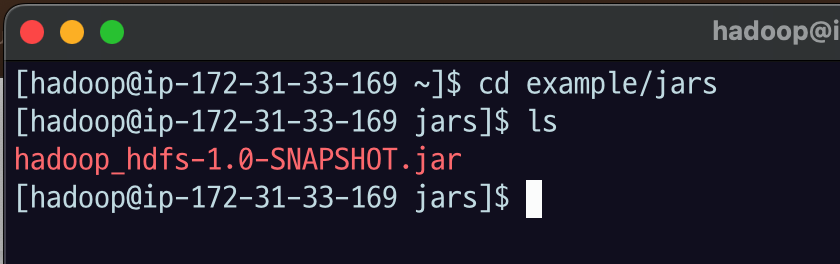
cd example/jars/
ls
로 확인해 보면 파일이 잘 전송된 것을 확인할 수 있다.
Hadoop 명령어로 jar 실행
hadoop jar $jar_file $main_classname $args- 우리가 기본적으로 Java application 만들 때 build.gradle에서 plugins{} 에 id 'application' 넣고 application{} 플러그인에 mainClass.name='' 이런 식으로 매니패스트에 이 메인 클래스 정보가 들어가서 읽을 수 있었다.
- 이런 걸 하지 않아도 되는 대신 하둡에 메인클래스 이름을 알려줘야 함. jar 안에서
$main_classname를 찾아라.- jar 안에 여러 개 main class가 있어도 실행할 때만 메인 클래스를 지정해주면 되니까 괜찮음
$args: 프로그램이 읽을 argument
hadoop jar hadoop-hdfs-app-1.0-SNAPSHOT.jar de.example.hadoop.hdfs.InputReadAndFileWriter /data/example/hdfs/input.txt 'Hello world, hello hdfs!'de.example.hadoop.hdfs.InputReadAndFileWriter: 클래스는 이런 식으로 패키지 이름까지 포함해야 함/data/example/hdfs/input.txt: 내가 지정할 첫 번째 파라미터로 하둡 경로를 쓴다고 했었음'Hello world, hello hdfs!': 내가 저장할 메세지

저장된 컨텐츠의 내용이 출력된다.
hdfs 명령어로 input.txt 파일을 확인해서 저장이 잘 되었는지 확인해보자.
hdfs dfs -ls /data/example
hdfs dfs -head /data/example/input.txt

Data Analytics Engineer 가 되