
HTML 태그 종류
- HTML 태그는 크게 세 가지로 기능, 블록과 인라인, 빈 태그 유무 기준으로 구분할 수 있다.
기능에 따른 분류
- HTML 태그는 제목, 단락, 목차 태그 등으로 문서 전체를 디자인 한다.
- 줄바꿈, 글자 서식 태그 등으로 문서를 디자인
- 링크 태그로 외부 사이트를 연결
- 이미지와 표 태그로 시각적 효과
제목
<h1> ~ <h6>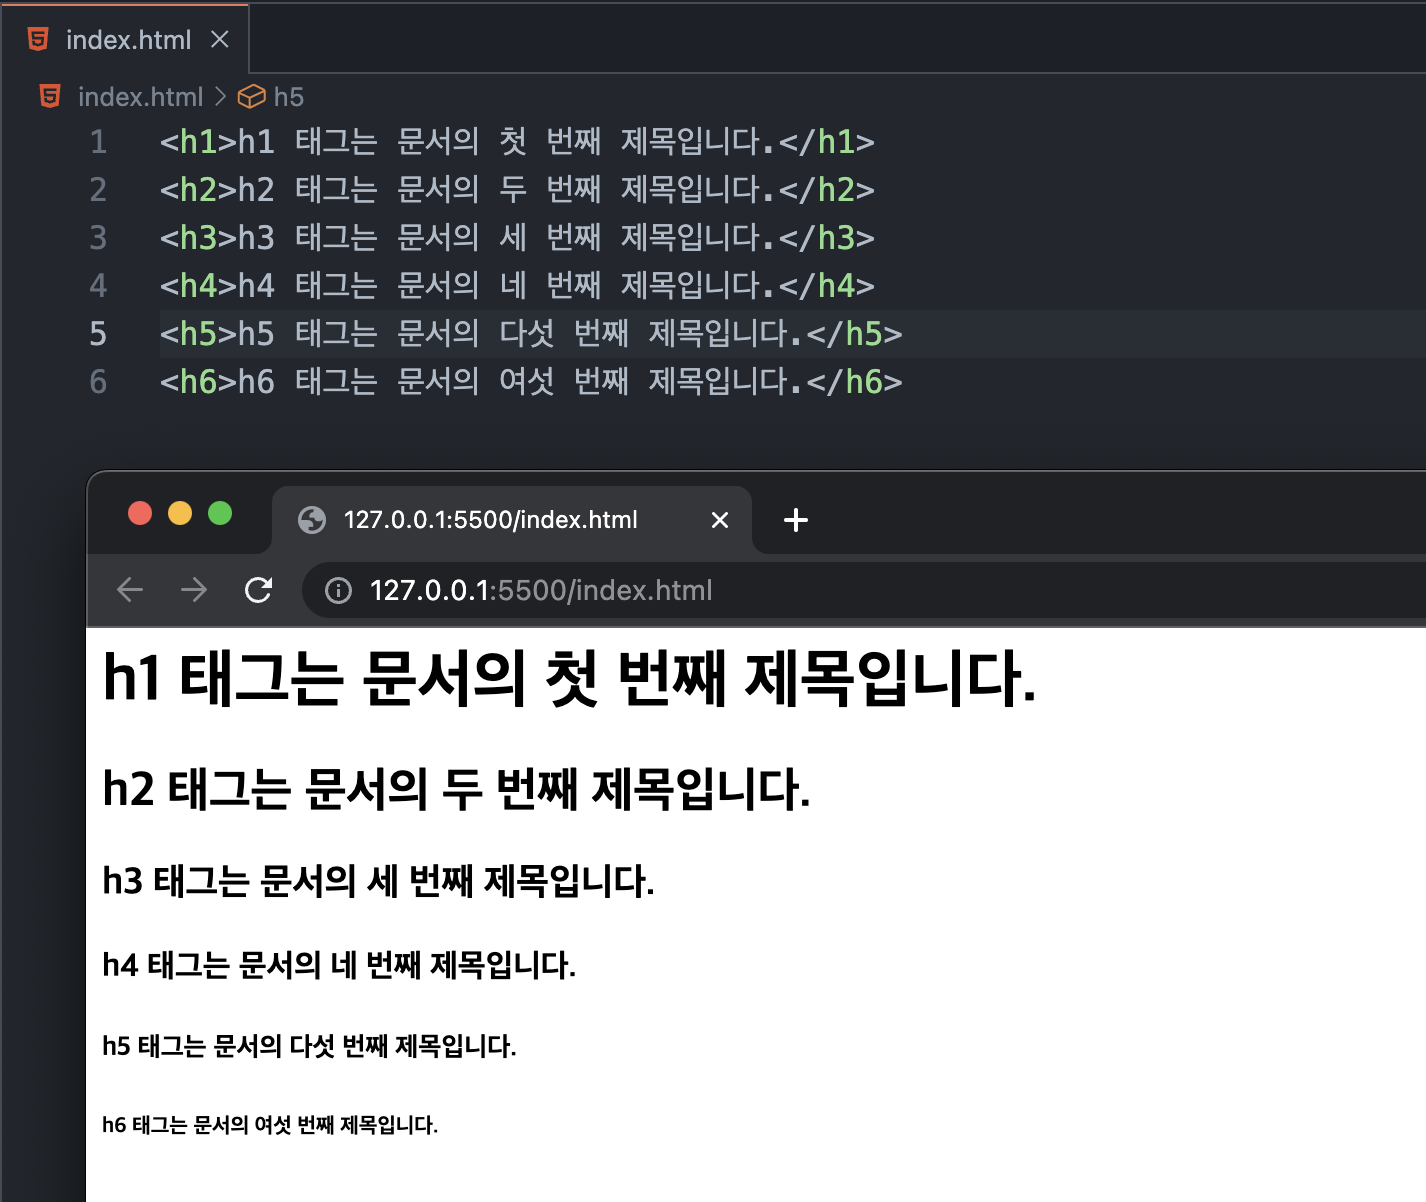
단락
<p>, <pre>, <div>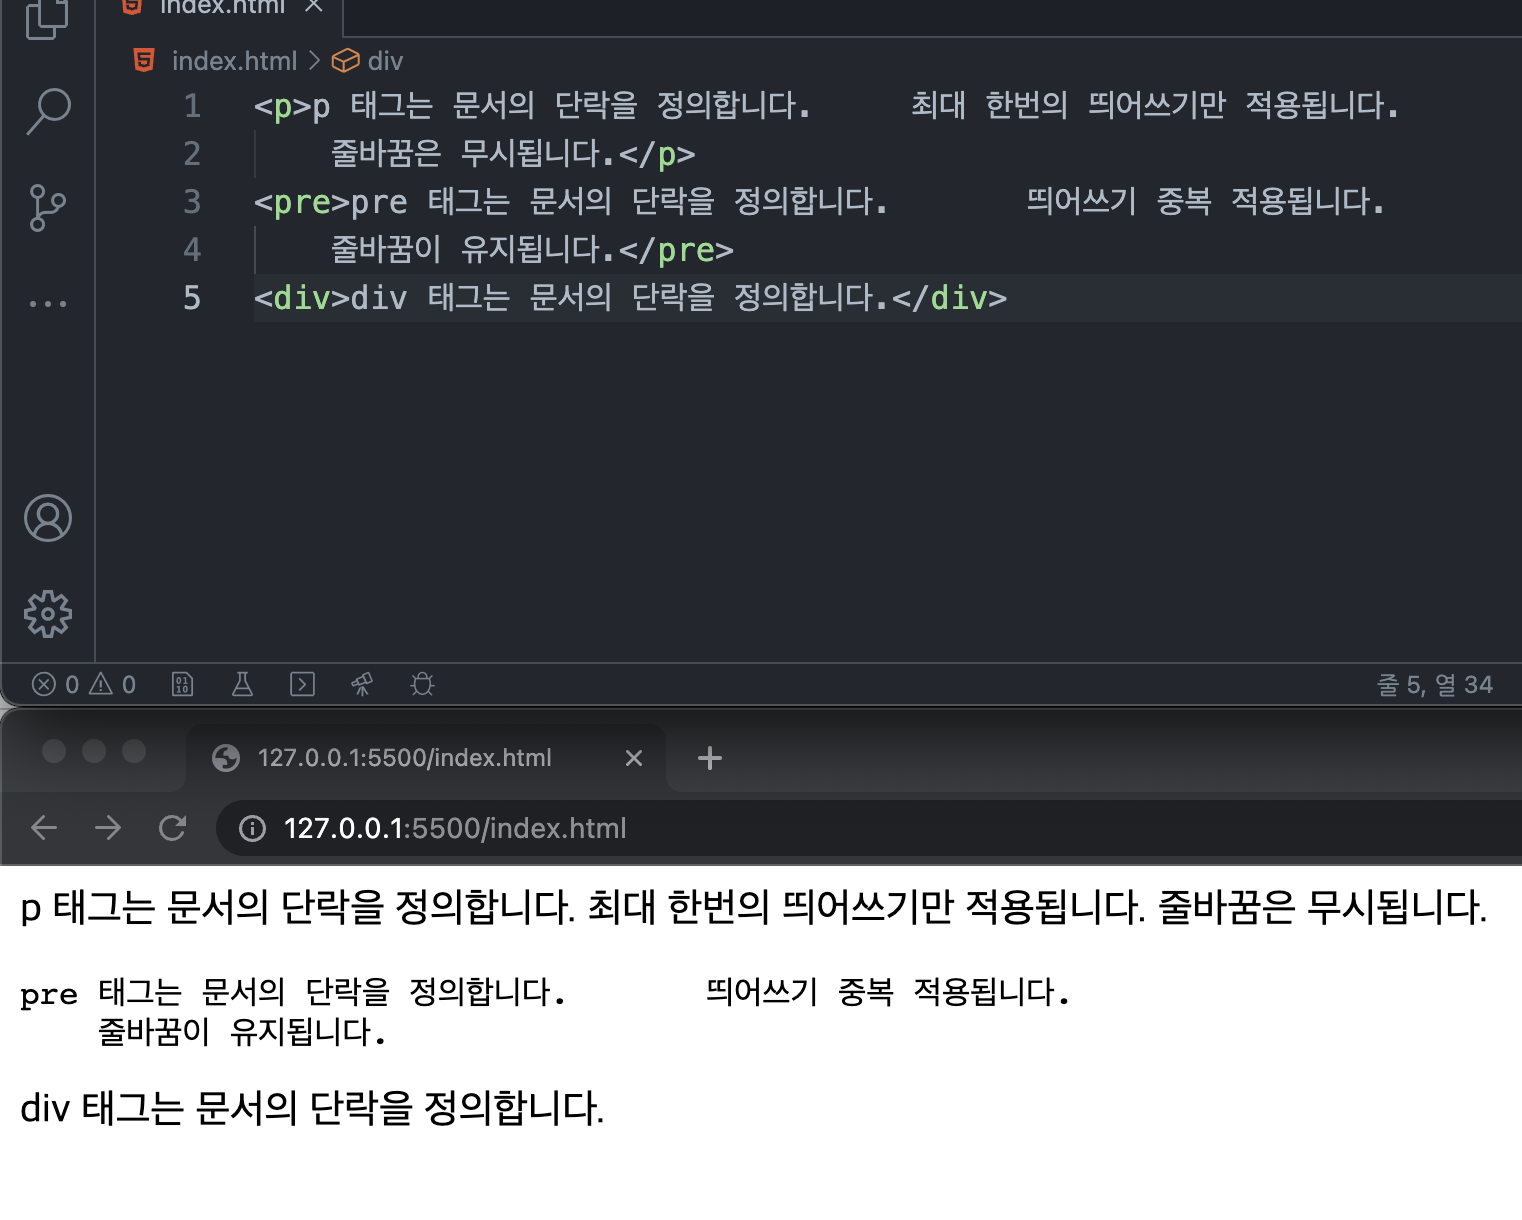
목차
<li>, <ol>, <ul>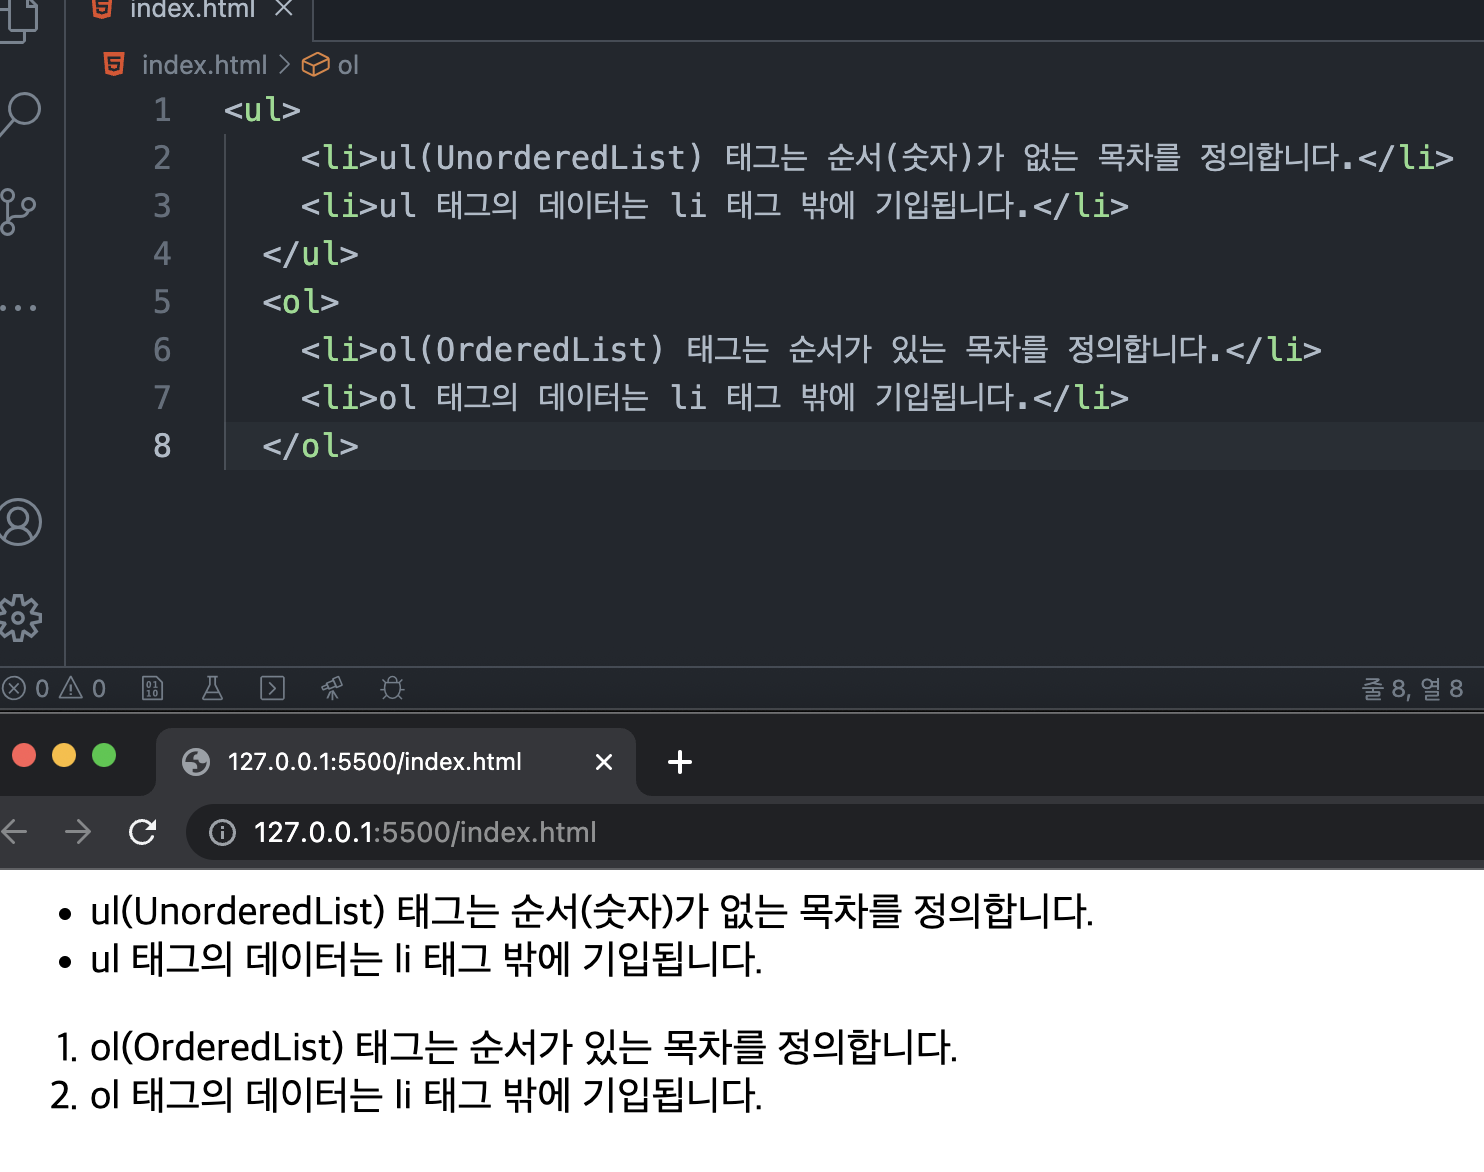
줄바꿈
<br>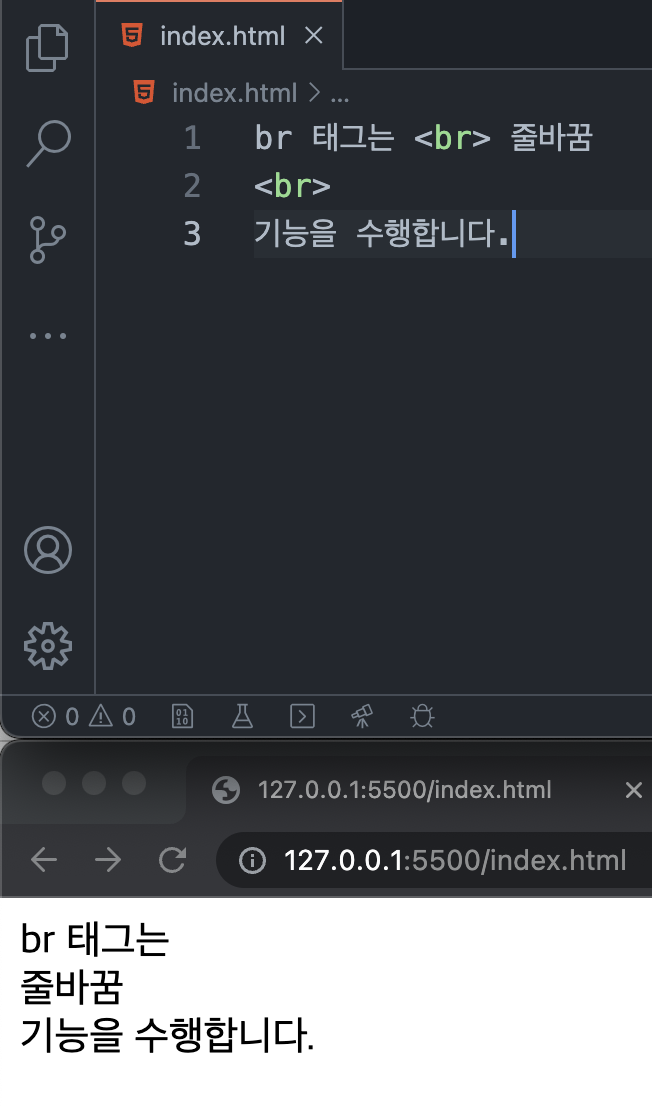
글자 서식
<strong>, <em>, <u>, <b>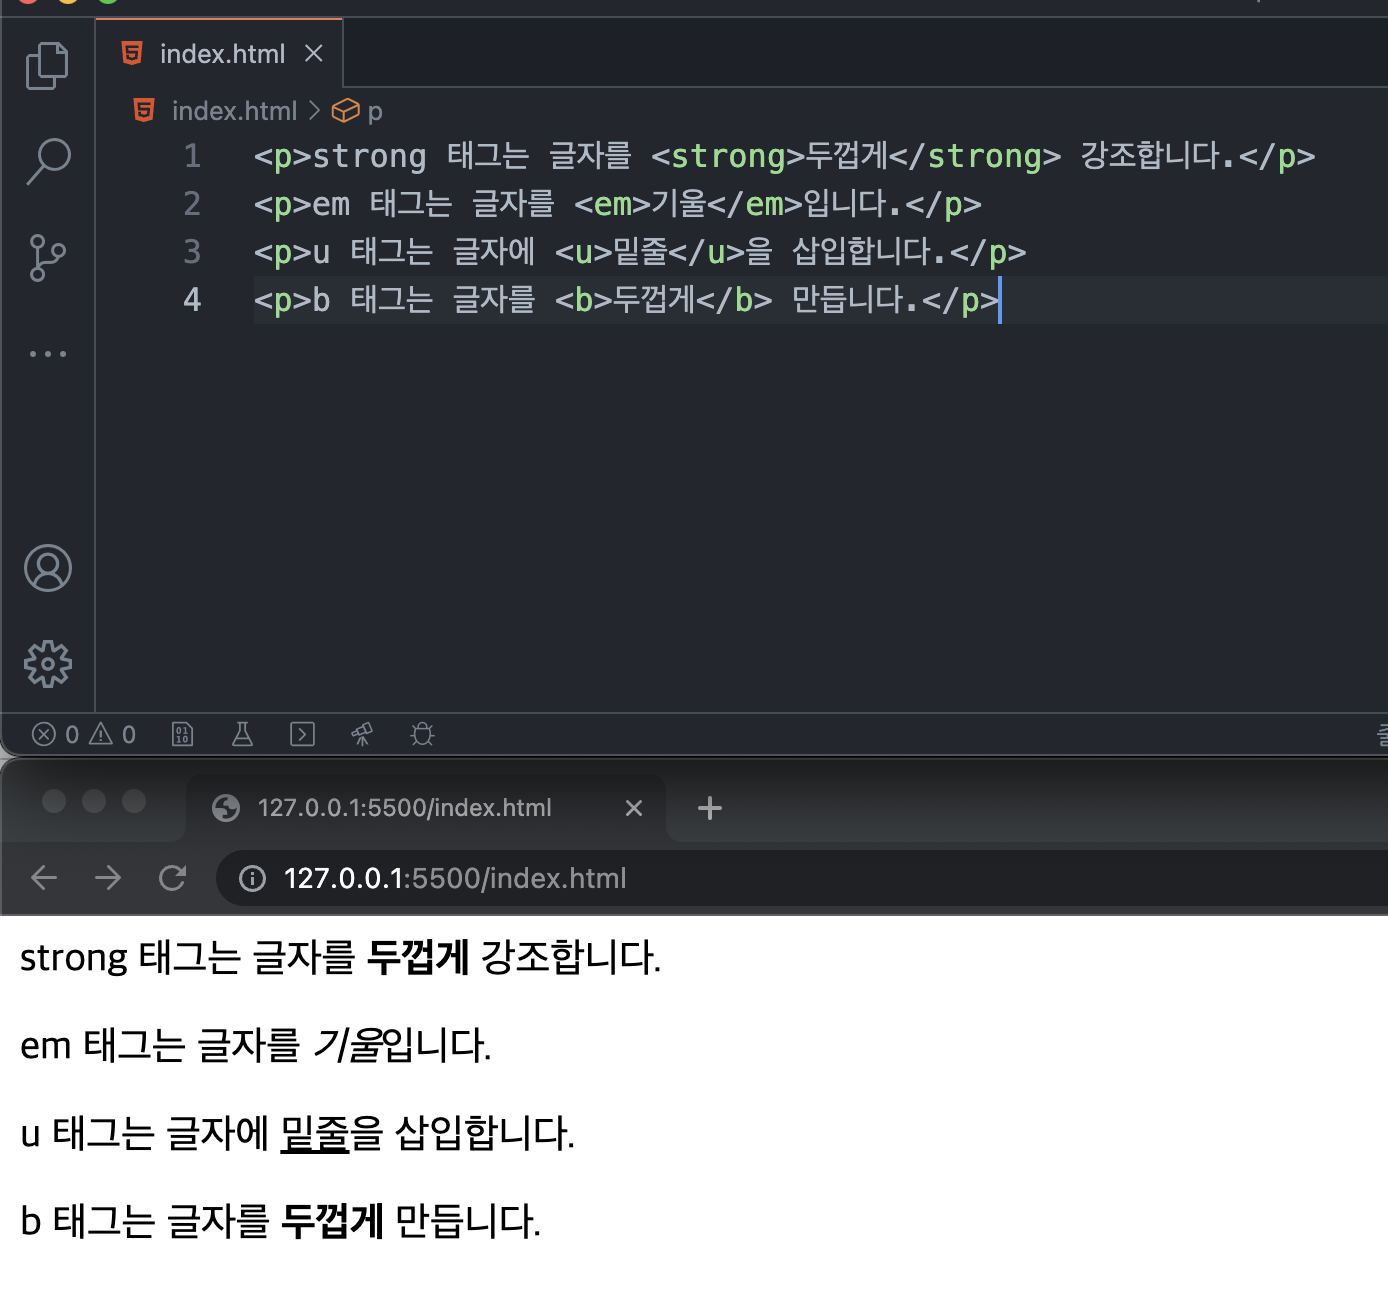
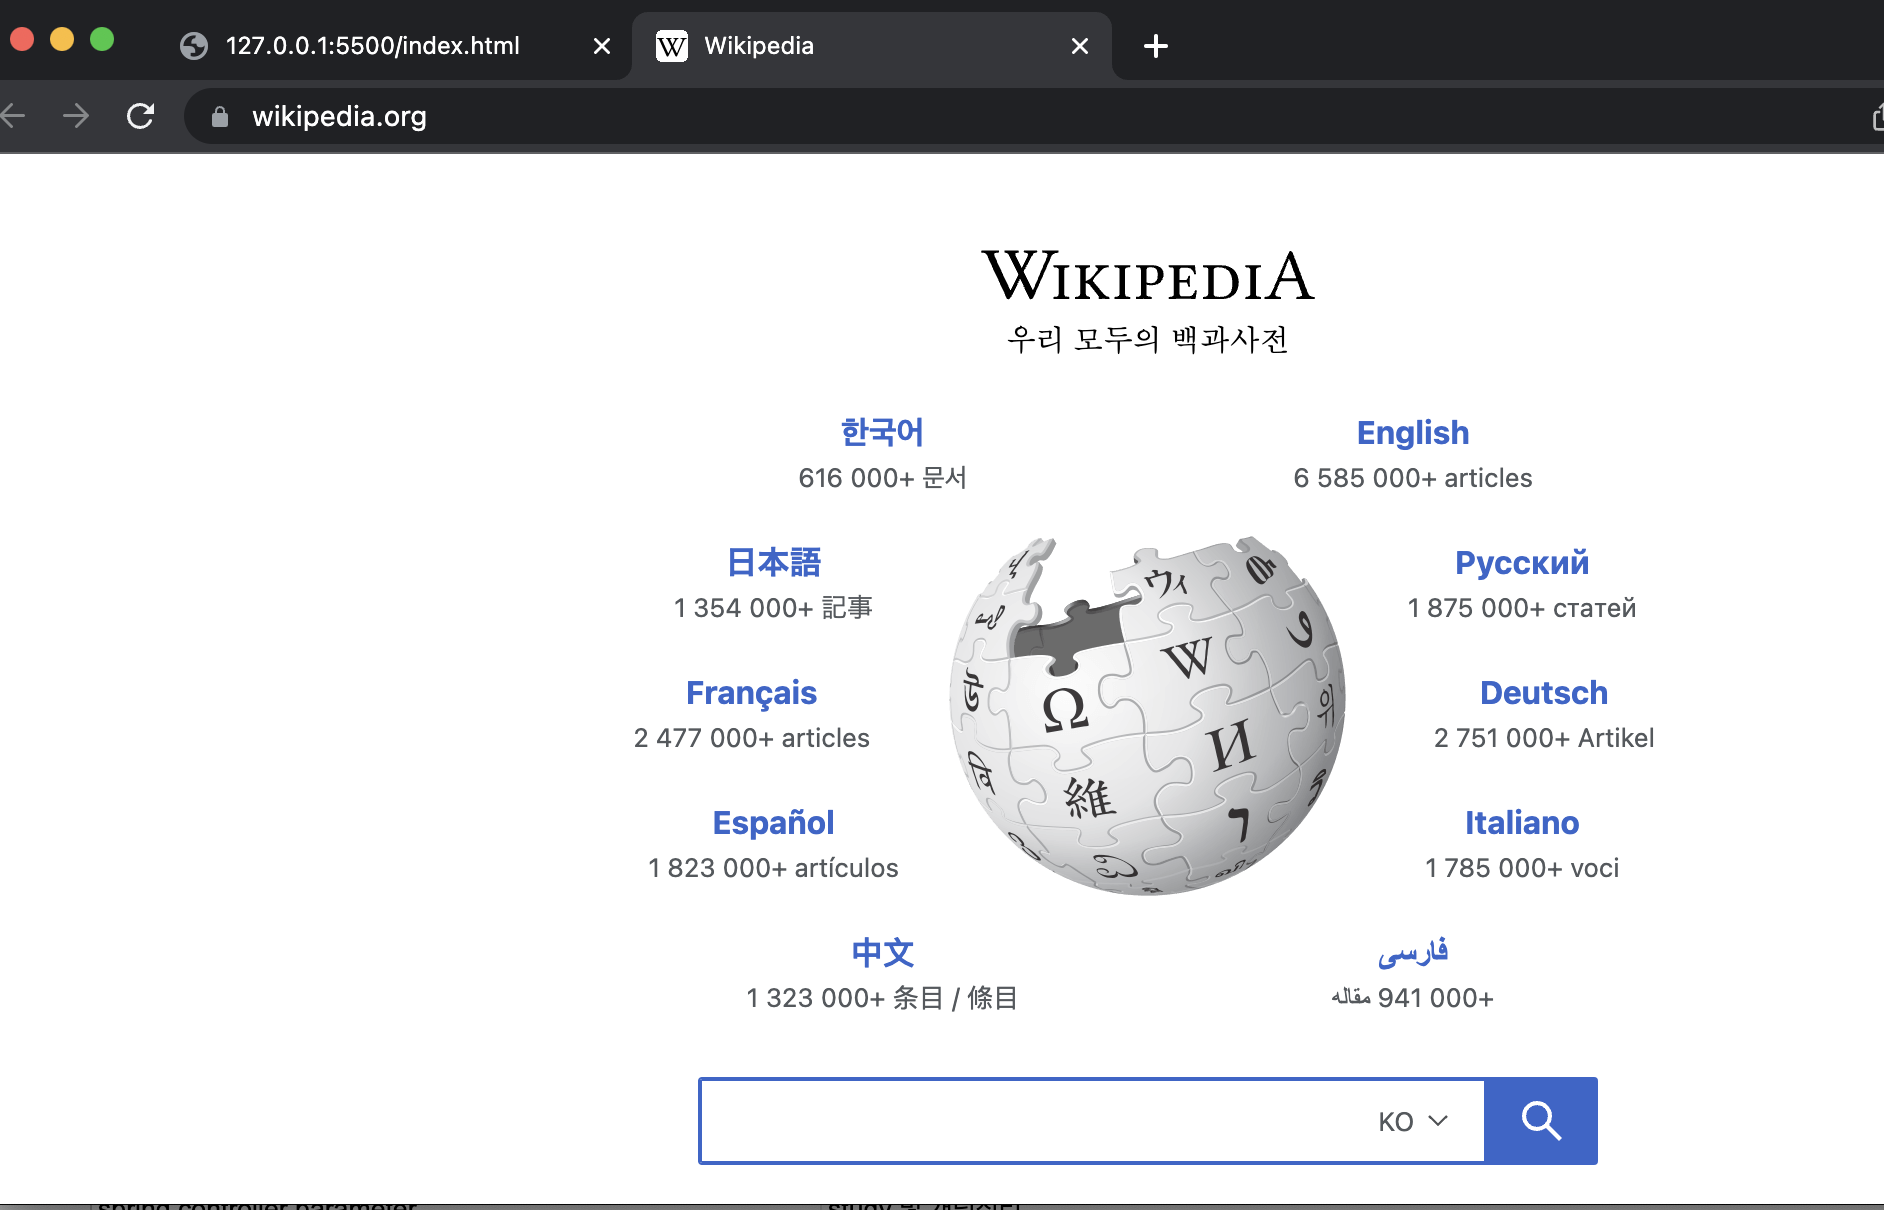
링크
<a>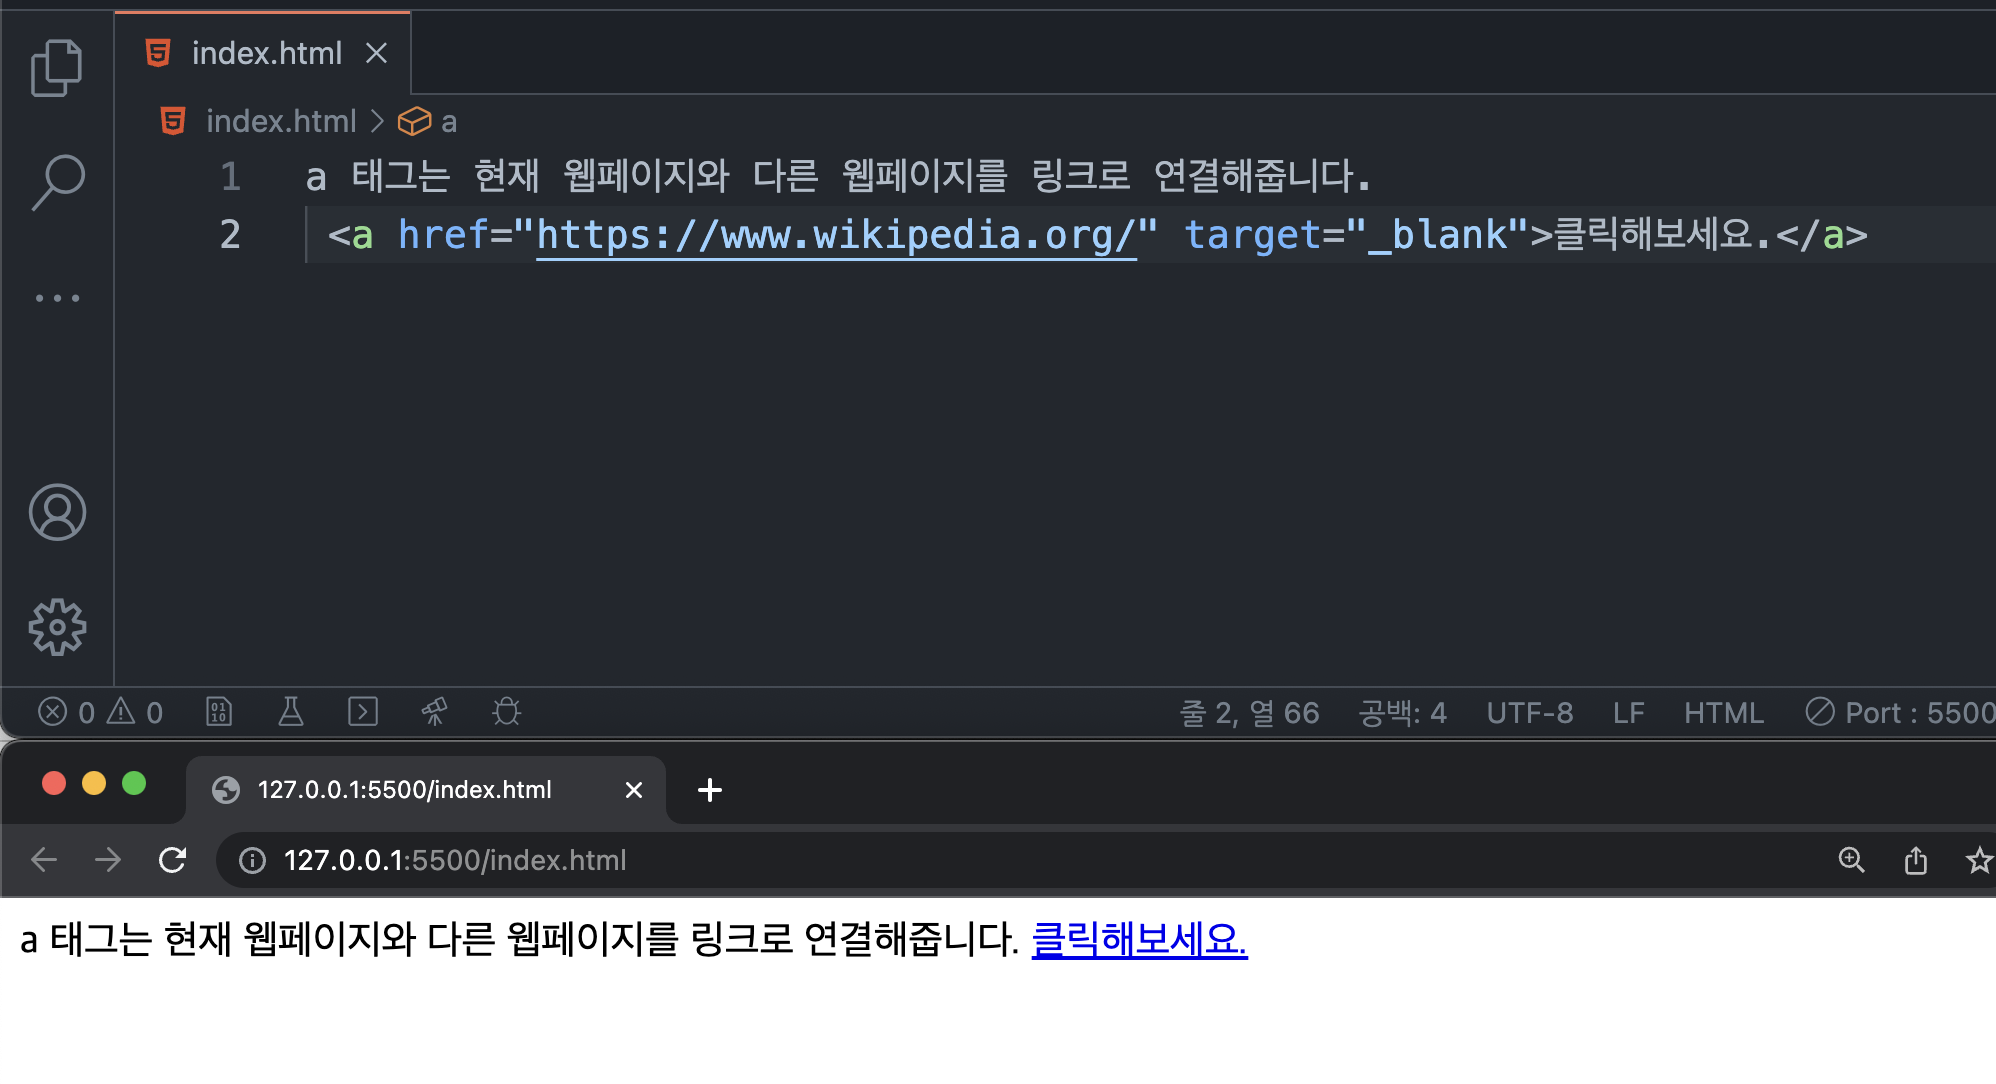
클릭 후
이미지
<img>
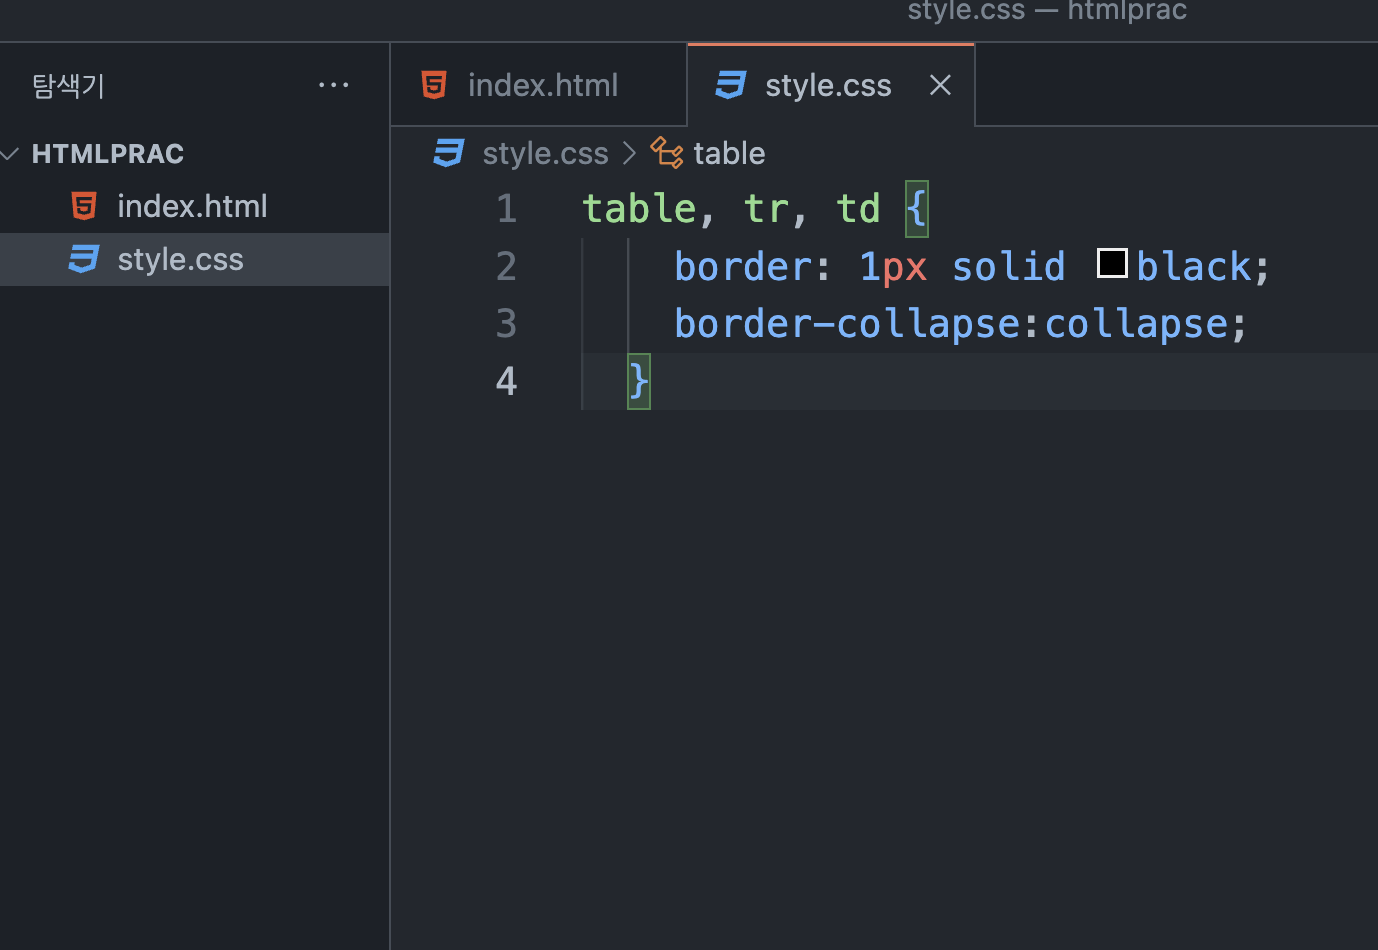
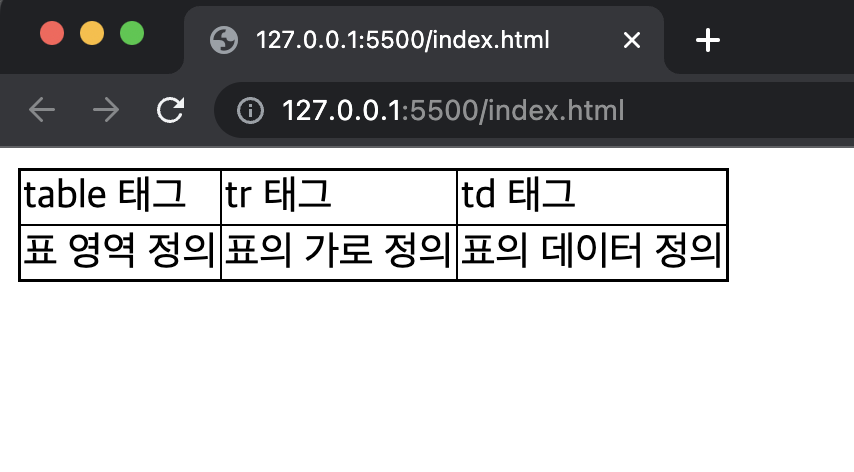
표
<table>, <tr>, <td>
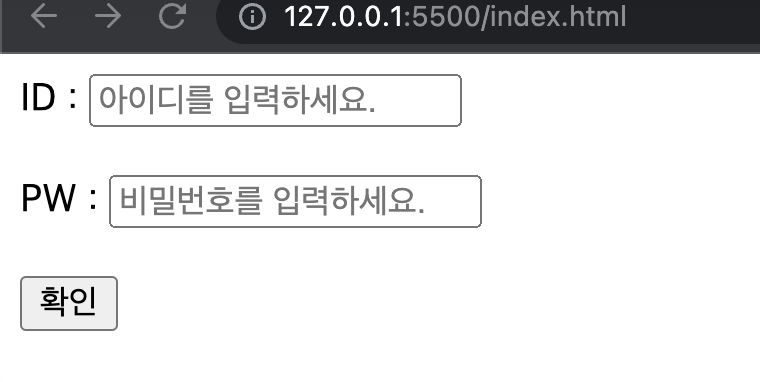
입력 폼
<form>, <input>, <label>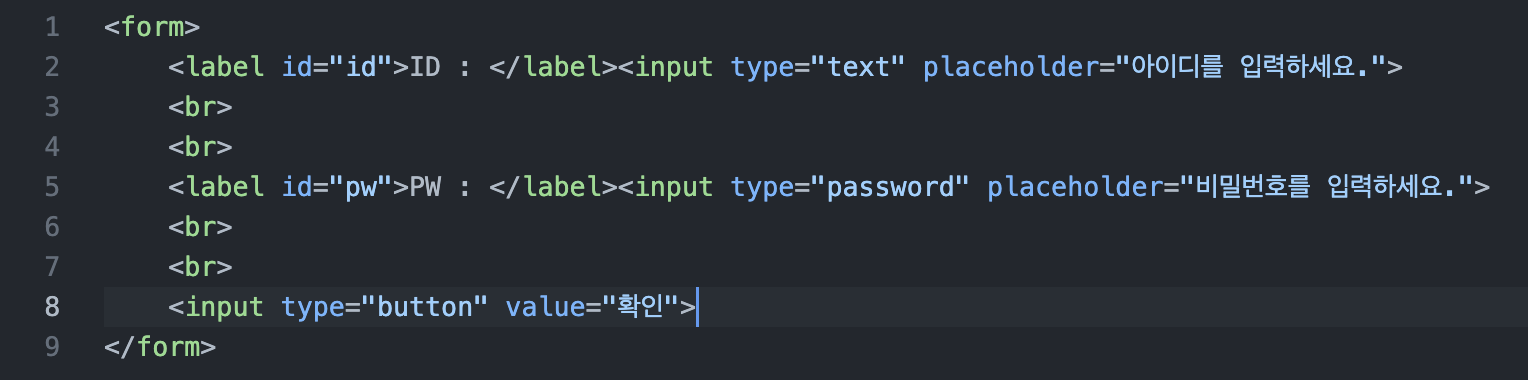
블록 태그 & 인라인 태그
- HTML 태그를 브라우저에서 구현되는 범위로 구분을 하면 블록 태그와 인라인 태그로 나눌 수 있다. 블록 태그는 태그가 시작될 때 새로운 줄에서 영역을 차지한다. 반면에 인라인 태그는 태그가 시작되어도 줄바꿈없이 이어서 기록된다.
블록 태그: <h1>~ <h6>, <p>, <li>,<ul>, <ol>, <table>, <pre>, <div> 등인라인 태그: <a>, <em>, <strong>, <b>, <span>, <u>, <img> 등
💥 열고 닫는 태그 & 빈 태그
- HTML 태그를
<p>태그와</p>태그와 같이 한 쌍으로 쓰이는가 아니면**<br>태그와 같이 단독**으로 쓰이는가에 따라 분류할 수 있다. - 대부분 태그는 여는 태그와 닫는 태그로 구성된다. 하지만
<img>,<br>등의 빈 태그는 단독으로 사용된다.
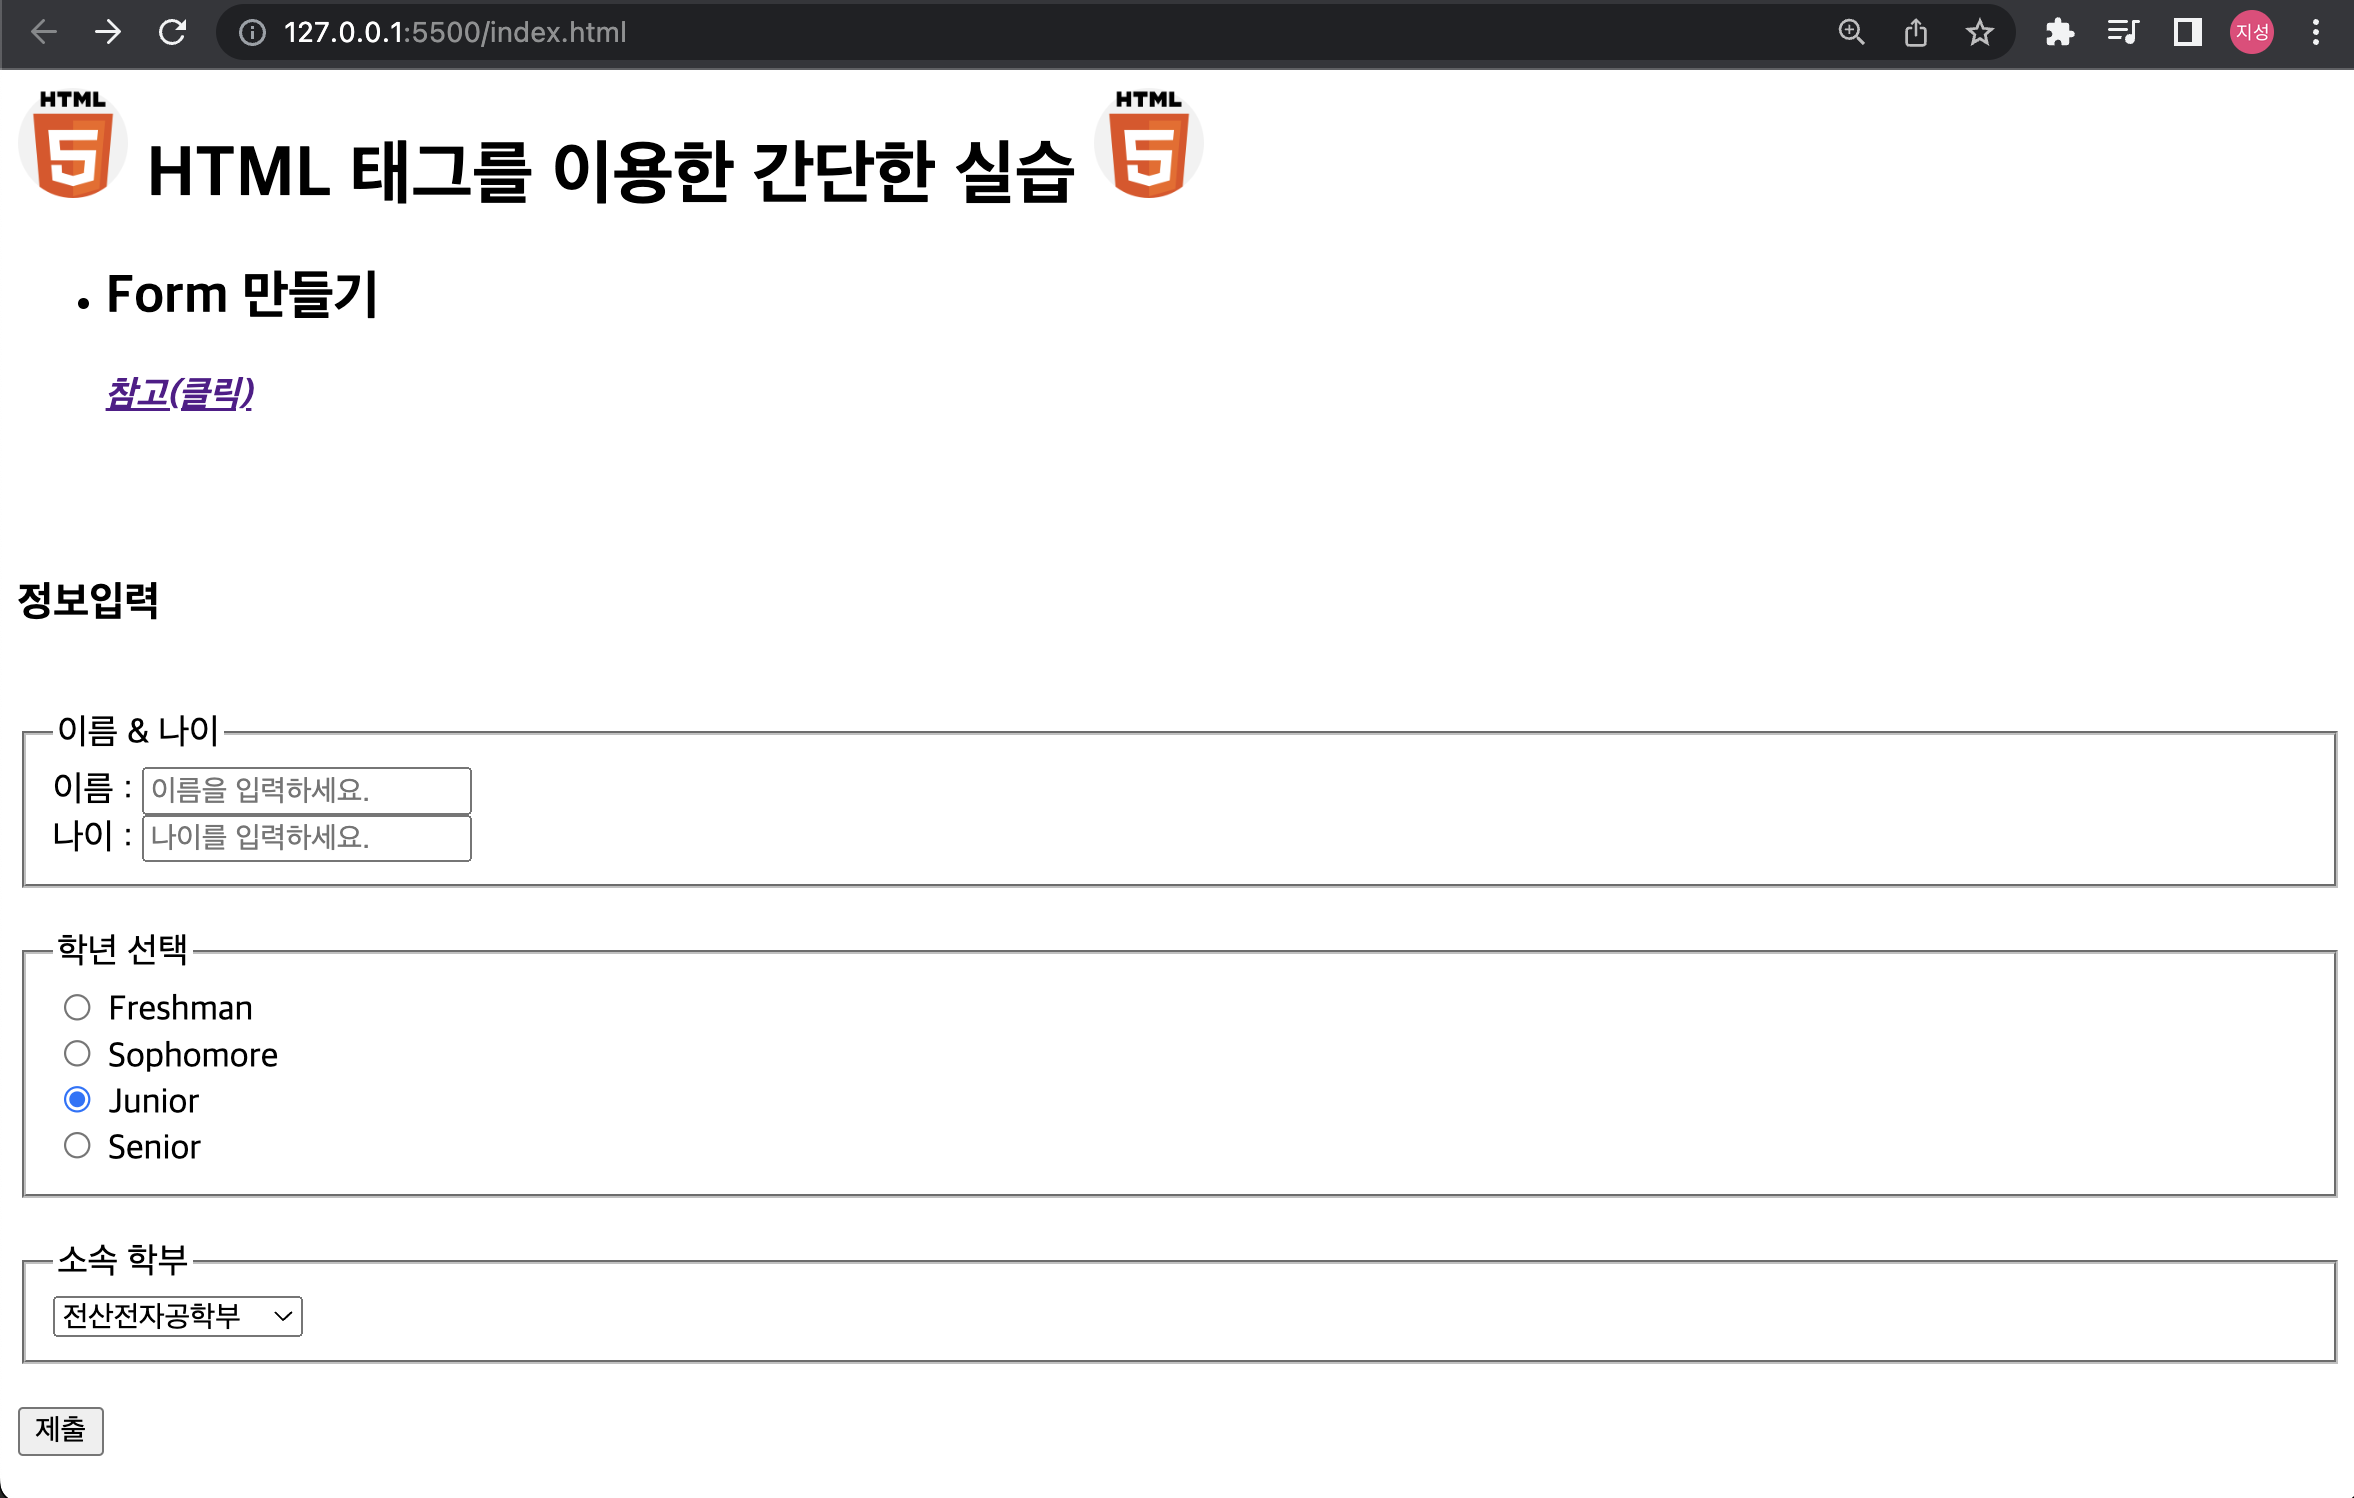
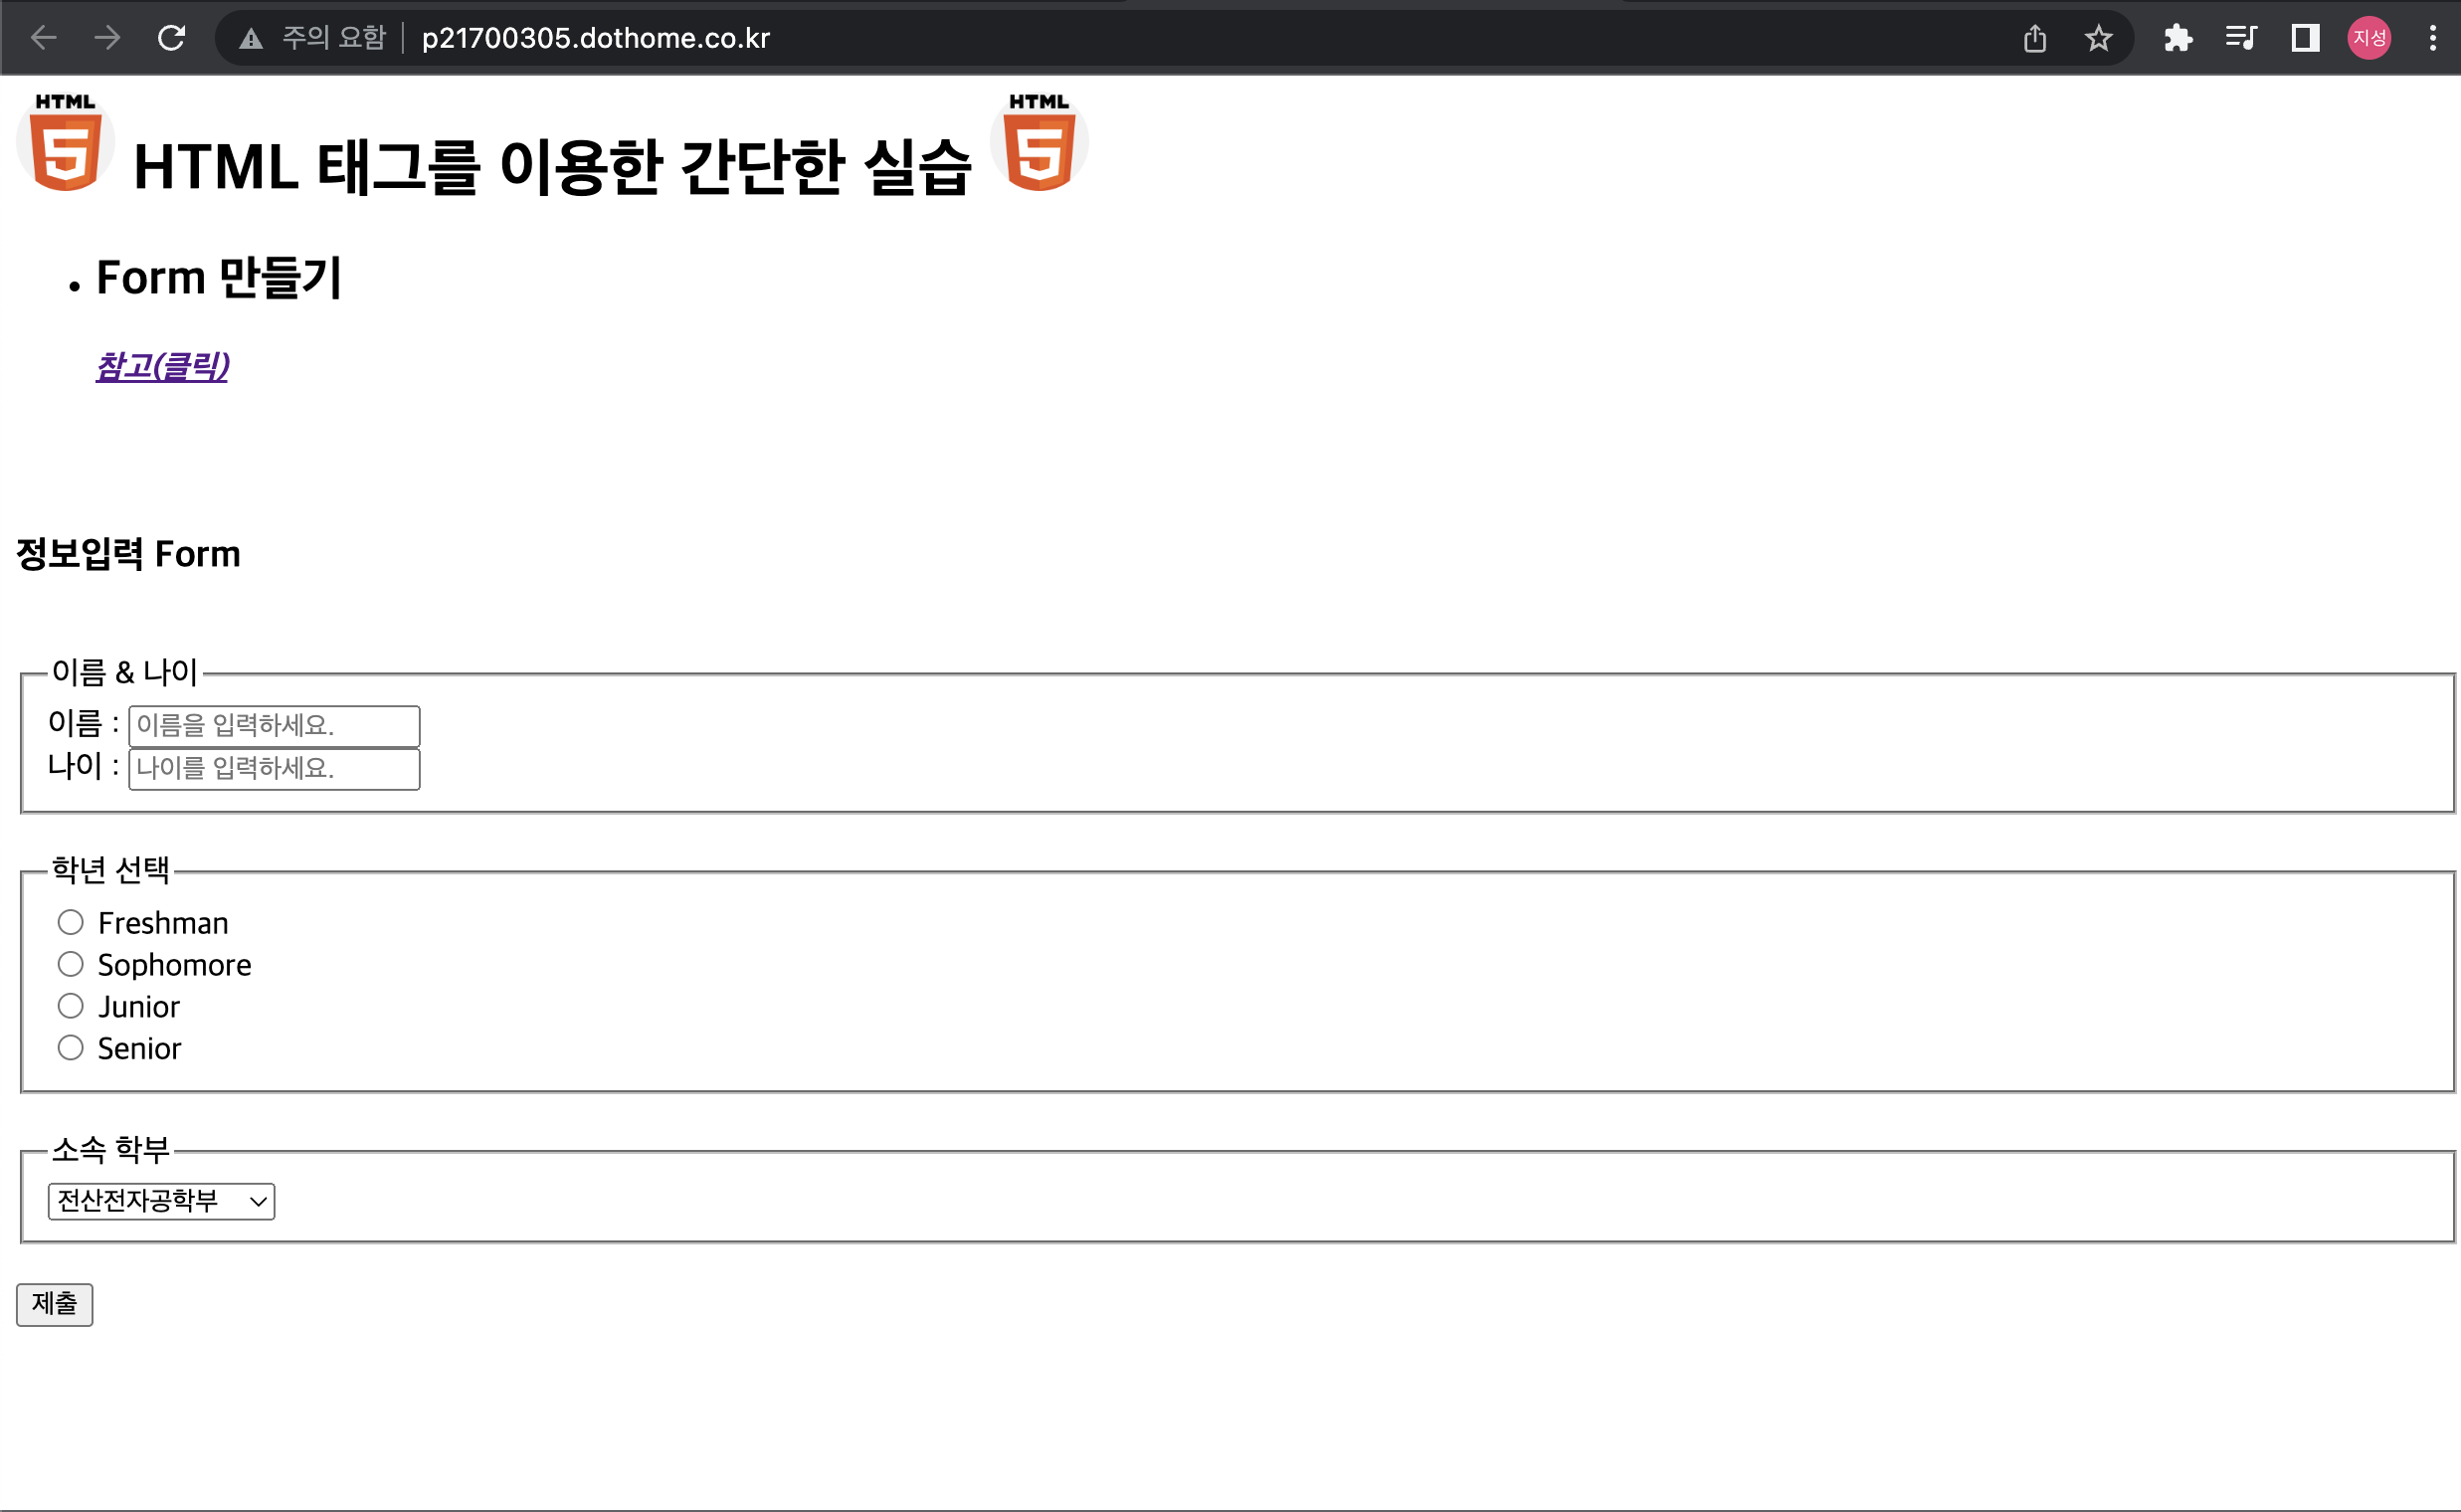
👊 HTML 태그를 이용한 간단한 실습
Form 만들기
-
실습 코드
<h1> <img src="https://cdn-icons-png.flaticon.com/512/919/919827.png" width="50"> HTML 태그를 이용한 간단한 실습 <img src="https://cdn-icons-png.flaticon.com/512/919/919827.png" width="50"> </h1> <ul> <li> <h2>Form 만들기</h2> <a href="https://www.notion.so/HTML-efebfcb89a5f412d872d21b815ca28db"><em><b>참고(클릭)</b></em></a> </li> </ul> <br> <br> <form> <h3>정보입력 Form</h3> <br> <fieldset> <legend>이름 & 나이</legend> <label id="name">이름 : </label><input type="text" placeholder="이름을 입력하세요."> <br> <label id="age">나이 : </label><input type="text" placeholder="나이를 입력하세요."> </fieldset> <br> <fieldset> <legend>학년 선택</legend> <input type="radio" id = "Freshman" name="grade"/> <label for="Freshman">Freshman</label> <br> <input type="radio" id = "Sophomore" name="grade"/> <label for="Sophomore">Sophomore</label> <br> <input type="radio" id = "Junior" name="grade"/> <label for="Junior">Junior</label> <br> <input type="radio" id = "Senior" name="grade"/> <label for="Senior">Senior</label> </fieldset> <br> <fieldset> <legend>소속 학부</legend> <select name="major"> <option value="1">전산전자공학부</option> <option value="2">기계제어공학부</option> <option value="3">상담심리학부</option> <option value="4">경영경제학부</option> <option value="5">콘텐츠디자인학부</option> <option value="6">생명공학부</option> </select> </fieldset> <br> <input type="button" value="제출"> </form> -
결과물
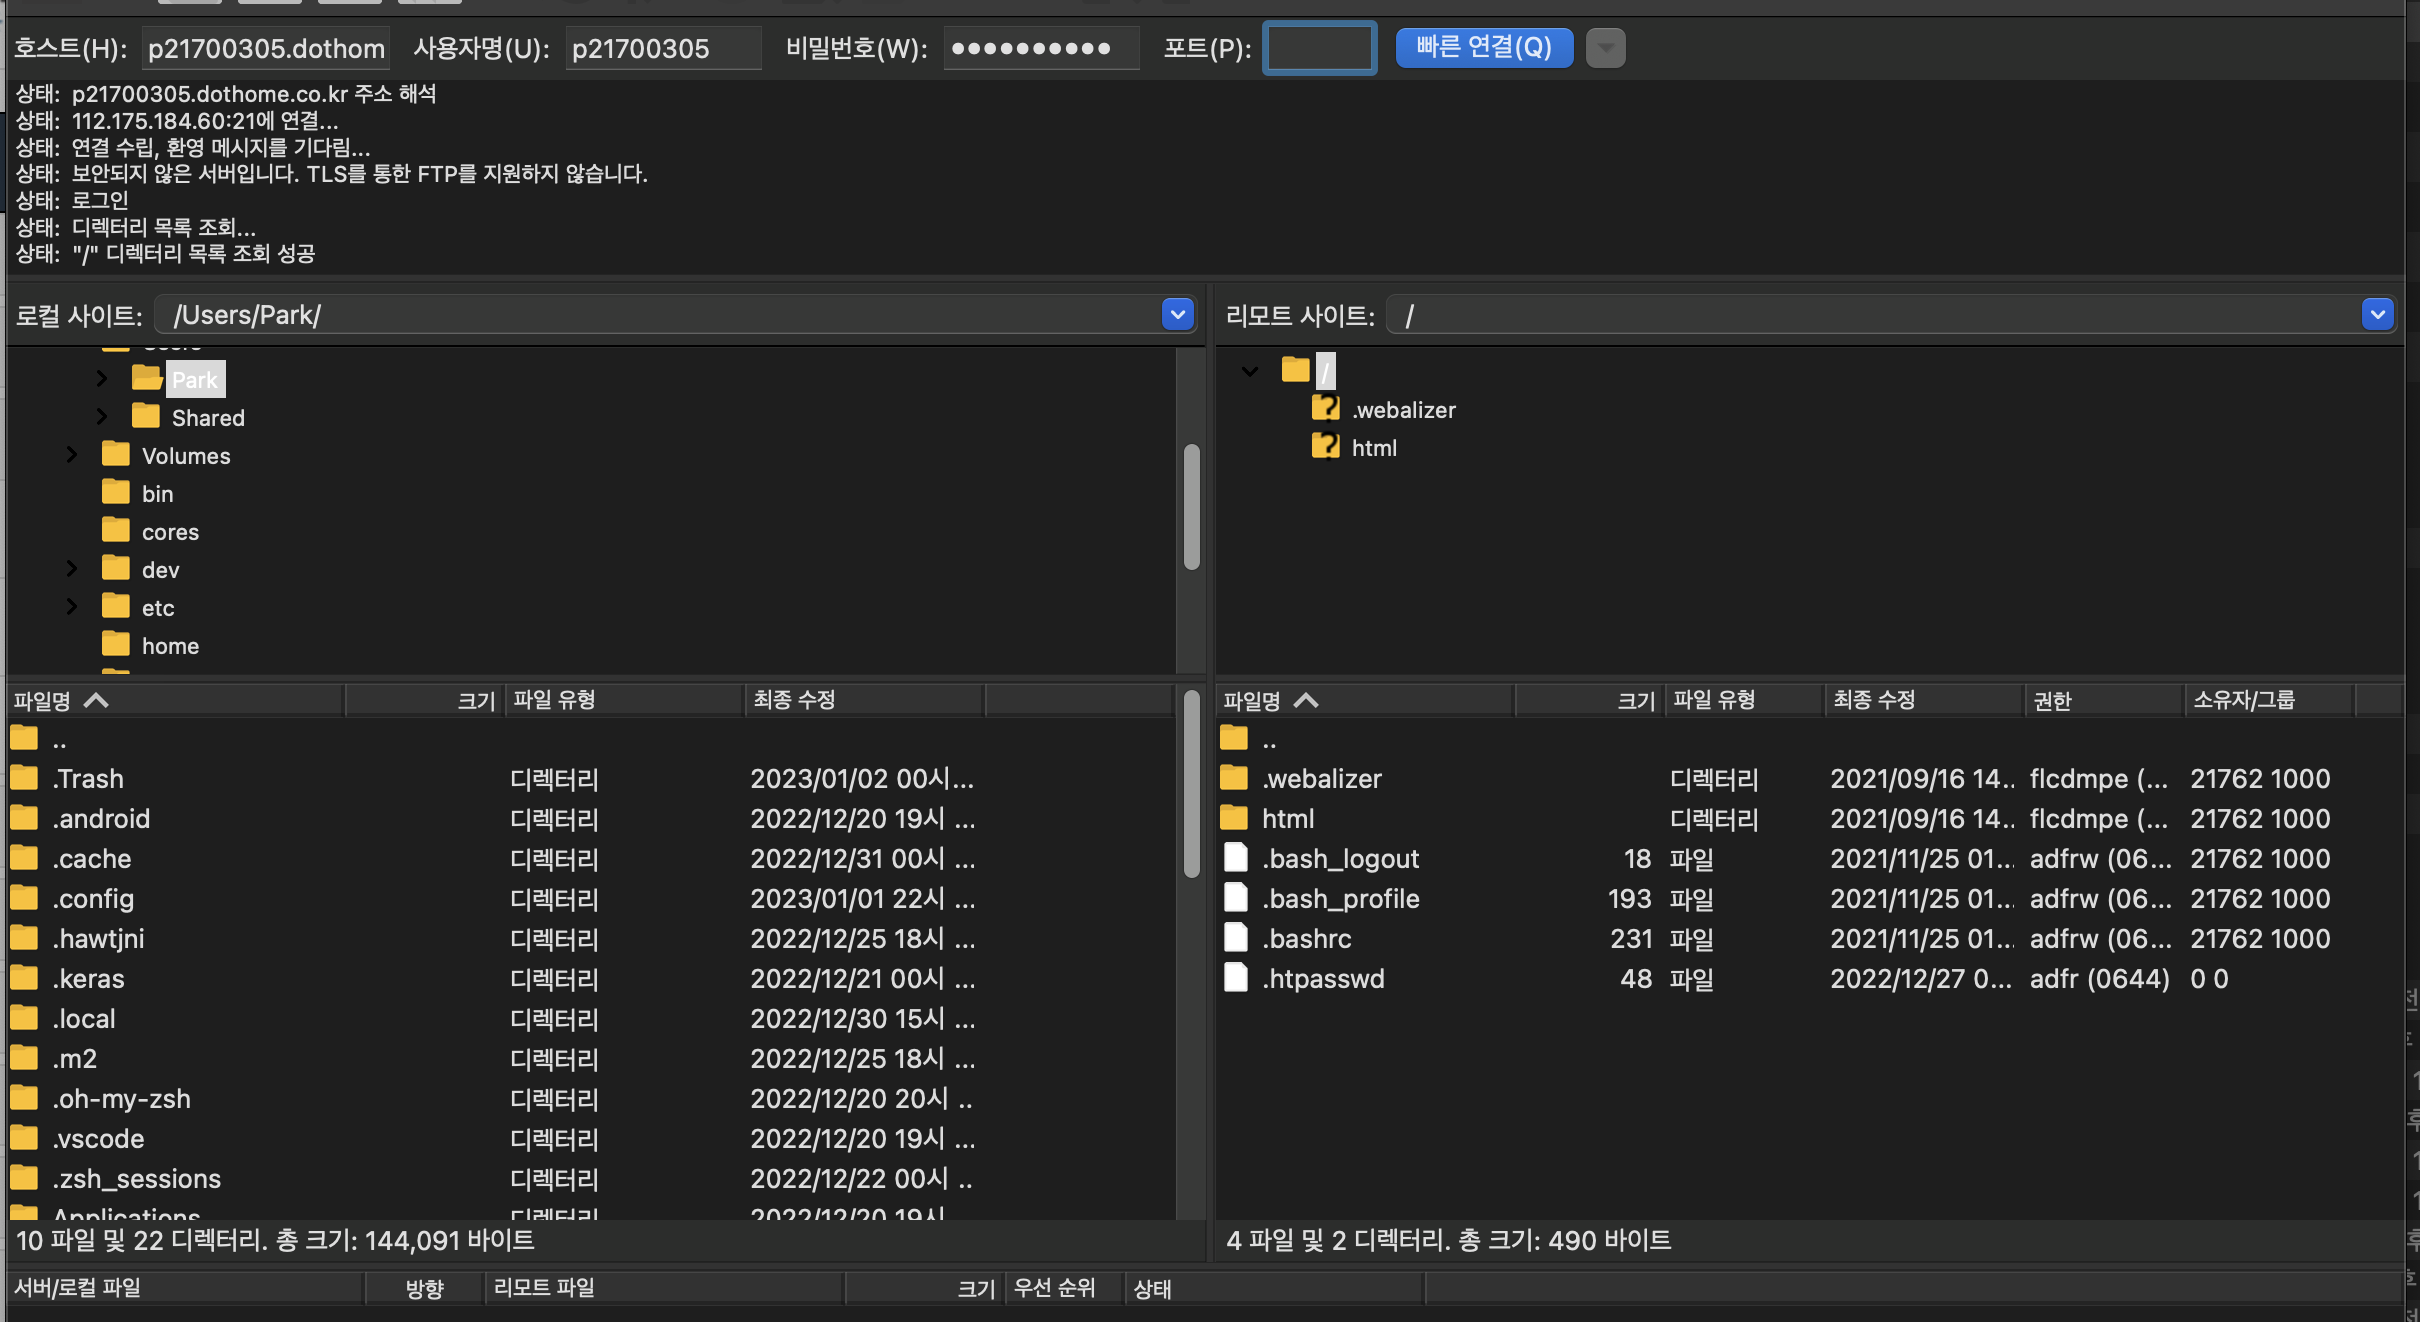
✨ FileZilla를 이용하여 dothome에 올려보기
- filezilla를 통해 나의 dothome과 연결한다.
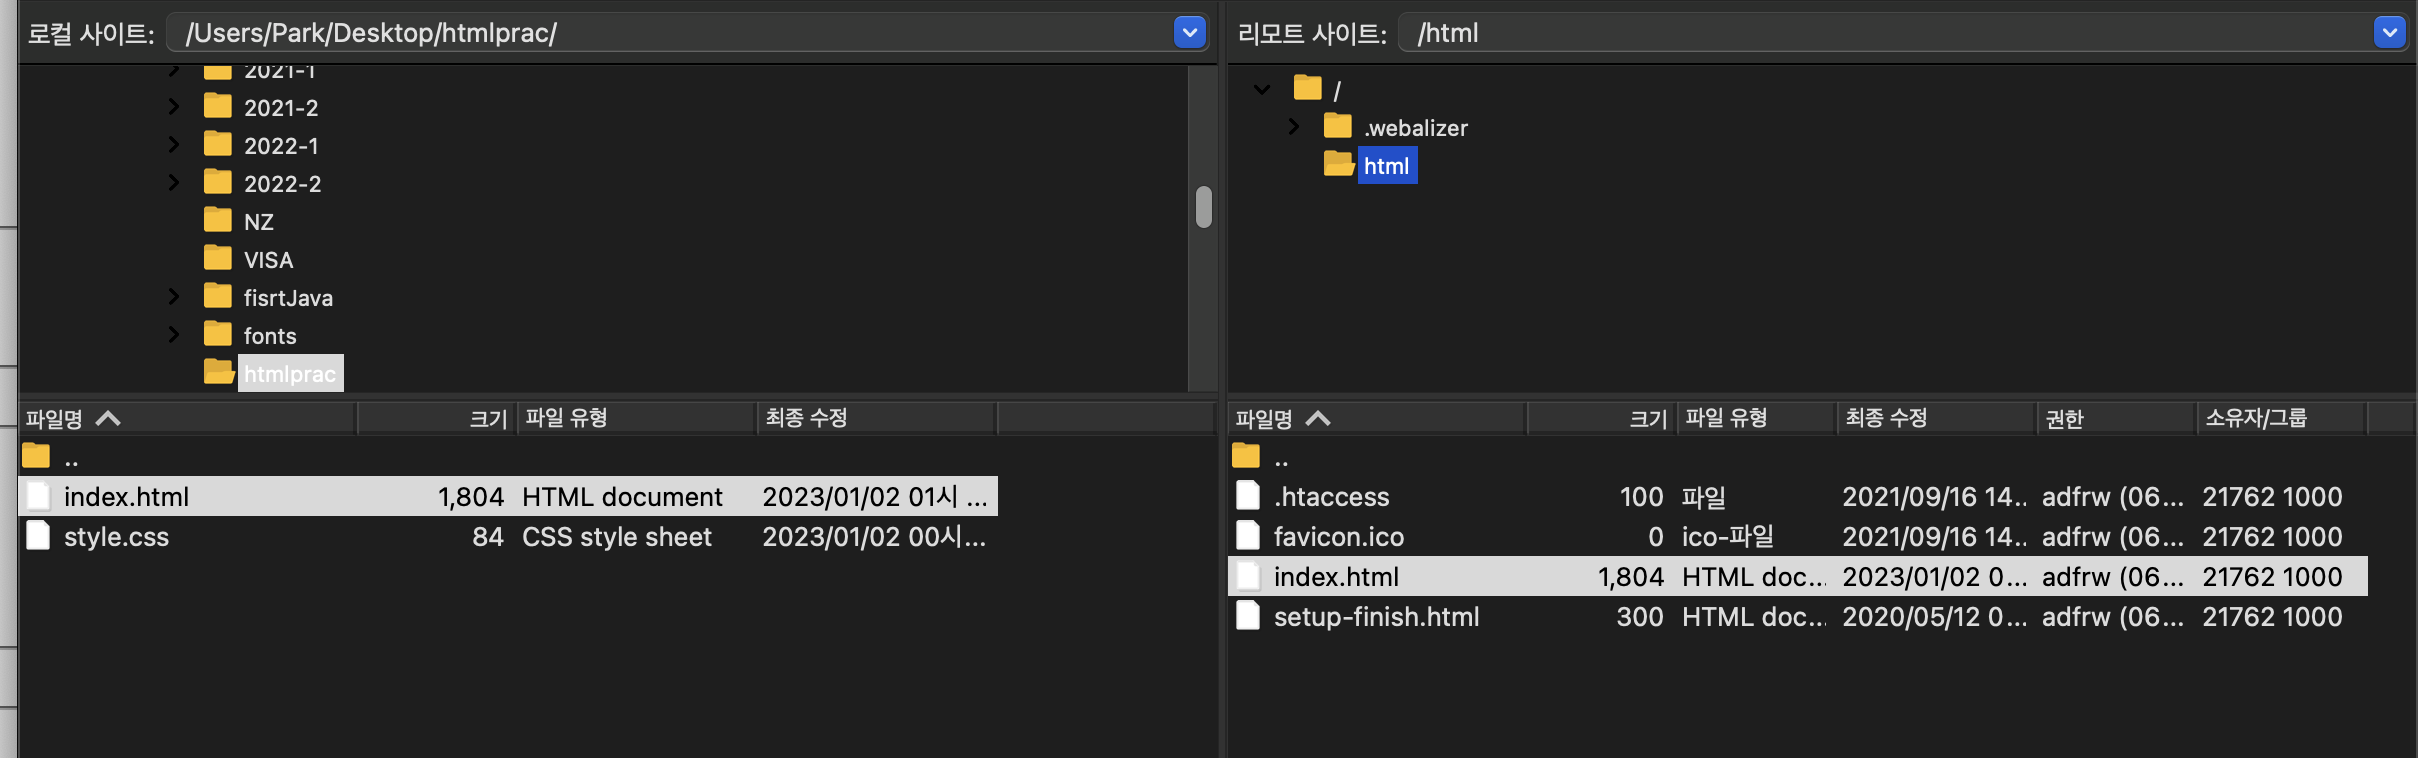
- 로컬에서 작성한 html파일 (여기서는 index.html)을 리모트 사이트 루트 바로 아래있는 html폴더에 드래그하여 넣는다. 이때 파일 이름을 index.html로 하여야 도메인 주소를 입력하였을 때 바로 보여진다.
- 옮긴 후 주소창에 dothome 도메인 주소를 입력하였을 때 결과

참 되게 살자