tableviewcell의 생명주기와 troubleshooting
👨🎤 cell의 인생에 대하여 알아보는 시간을 가져보도록 합니다.-
우선 재사용되는 셀은 UITableViewCell, UICollectionViewCell 등이 있습니다.
-
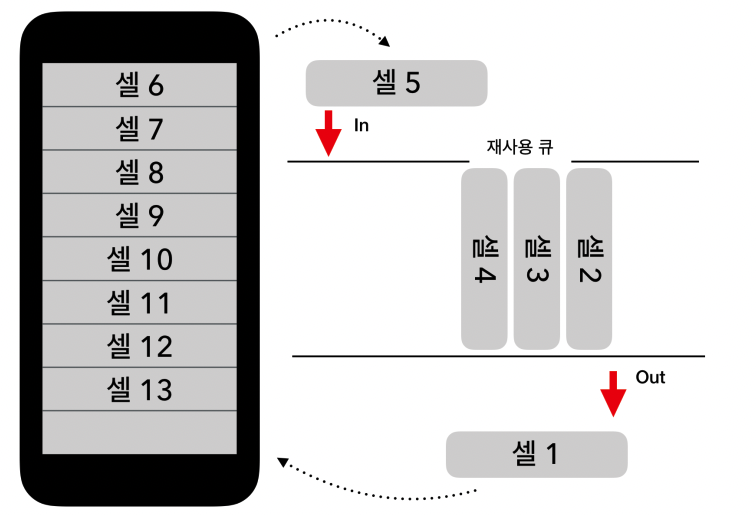
재사용 LifeCycle
- 테이블뷰 혹은 컬렉션 뷰에서 데이터 소스에 셀 인스턴스를 요청
- 데이터 소스는 요청마다 재사용 큐에 재사용을 위해 대기하는 셀이 있는지 확인 하고 있으면 그 셀에 새로운 데이터를 설정하고, 없으면 새로운 셀 생성
- 테이블뷰 및 컬렉션뷰는 데이터 소스로부터 받은 셀을 화면으로 표시
- 사용자의 스크롤 등으로 인해 셀이 화면 밖으로 사라지면 해당 셀을 다시 재사용 큐에 집어 넣음
-
이런 재사용 원리를 사용하여 메모리를 절약하고 성능을 향상하게 됩니다.
-
이 재사용 LifeCycle에는 LifeCycle Method가 있습니다.
- awakeFromNib → UITableViewCell Method (...이 메서드는 storyboard 기반으로 테이블뷰와 셀을 만들어야 호출된다고 합니다. 저처럼 코드기반으로 짜면 호출을 안해요, 이 경우에는 대신 init을 씁시다.)
- prepareForReuse → UITableViewCell Method
- init → (당연하게도) 클래스 생성자
- deinit → (당연하게도) 클래스 소멸자
- cellForRowAt → DataSource Method
- willDisplay → Delegate Method
- didEndDisplaying → Delegate Method
- prefetchRowsAt → DataSource Prefetching Method
- cancelPrefetchingForRowsAt → DataSource Prefetching Method
어떤 순서로 호출되는지 확인해봅시다.
ViewController.swift
import UIKit

class ViewController: UIViewController {

    var tableView: UITableView = UITableView()

    let data = Array(1...20)

    override func viewDidLoad() {
        super.viewDidLoad()
        // Do any additional setup after loading the view.
        setTableView()
    }

    func setTableView() {
        tableView.dataSource = self
        tableView.prefetchDataSource = self
        tableView.delegate = self
        tableView.register(MyCell.self, forCellReuseIdentifier: MyCell.identifier)

        view.addSubview(tableView)
        tableView.translatesAutoresizingMaskIntoConstraints = false
        NSLayoutConstraint.activate([
            tableView.topAnchor.constraint(equalTo: self.view.topAnchor),
            tableView.bottomAnchor.constraint(equalTo: self.view.bottomAnchor),
            tableView.leadingAnchor.constraint(equalTo: self.view.leadingAnchor),
            tableView.trailingAnchor.constraint(equalTo: self.view.trailingAnchor)
        ])
    }
}

extension ViewController: UITableViewDataSource {
    func tableView(_ tableView: UITableView, numberOfRowsInSection section: Int) -> Int {
        return data.count
    }

    func tableView(_ tableView: UITableView, cellForRowAt indexPath: IndexPath) -> UITableViewCell {
        guard let cell: MyCell = tableView.dequeueReusableCell(withIdentifier: MyCell.identifier, for: indexPath) as? MyCell else { return UITableViewCell() }
        cell.row = indexPath.row
        cell.textLabel?.text = "Cell \(indexPath.row)"
        print("cellForRowAt: \(indexPath.row)")

        return cell
    }
}

extension ViewController: UITableViewDelegate {
    func tableView(_ tableView: UITableView, willDisplay cell: UITableViewCell, forRowAt indexPath: IndexPath) {
        print("willDisplay: \(indexPath.row)")
    }

    func tableView(_ tableView: UITableView, didEndDisplaying cell: UITableViewCell, forRowAt indexPath: IndexPath) {
        print("didEndDisplaying: \(indexPath.row)")
    }
}

extension ViewController: UITableViewDataSourcePrefetching {
    func tableView(_ tableView: UITableView, prefetchRowsAt indexPaths: [IndexPath]) {
        print("prefetchRowsAt: \(indexPaths)")
    }

    func tableView(_ tableView: UITableView, cancelPrefetchingForRowsAt indexPaths: [IndexPath]) {
        print("cancelPrefetchingForRowsAt: \(indexPaths)")
    }
}
MyCell.swift
import UIKit

class MyCell: UITableViewCell {

    static let identifier: String = "MyCell"

    var row: Int?

    override func awakeFromNib() { // 스토리보드 기반, xib등 으로 셀을 다룰 경우에만 호출
        super.awakeFromNib()
        print("awakeFromNib, row:\(row ?? 0)")
    }

    override func prepareForReuse() {
        print("prepareForReuse, row:\(row ?? 0)")
    }

    override init(style: UITableViewCell.CellStyle, reuseIdentifier: String?) {
        super.init(style: style, reuseIdentifier: reuseIdentifier)
        print("init, row:\(row ?? 0)")
    }

    required init?(coder: NSCoder) {
        fatalError("init(coder:) has not been implemented")
    }

    deinit {
        print("deinit, row:\(row ?? 0)")
    }

}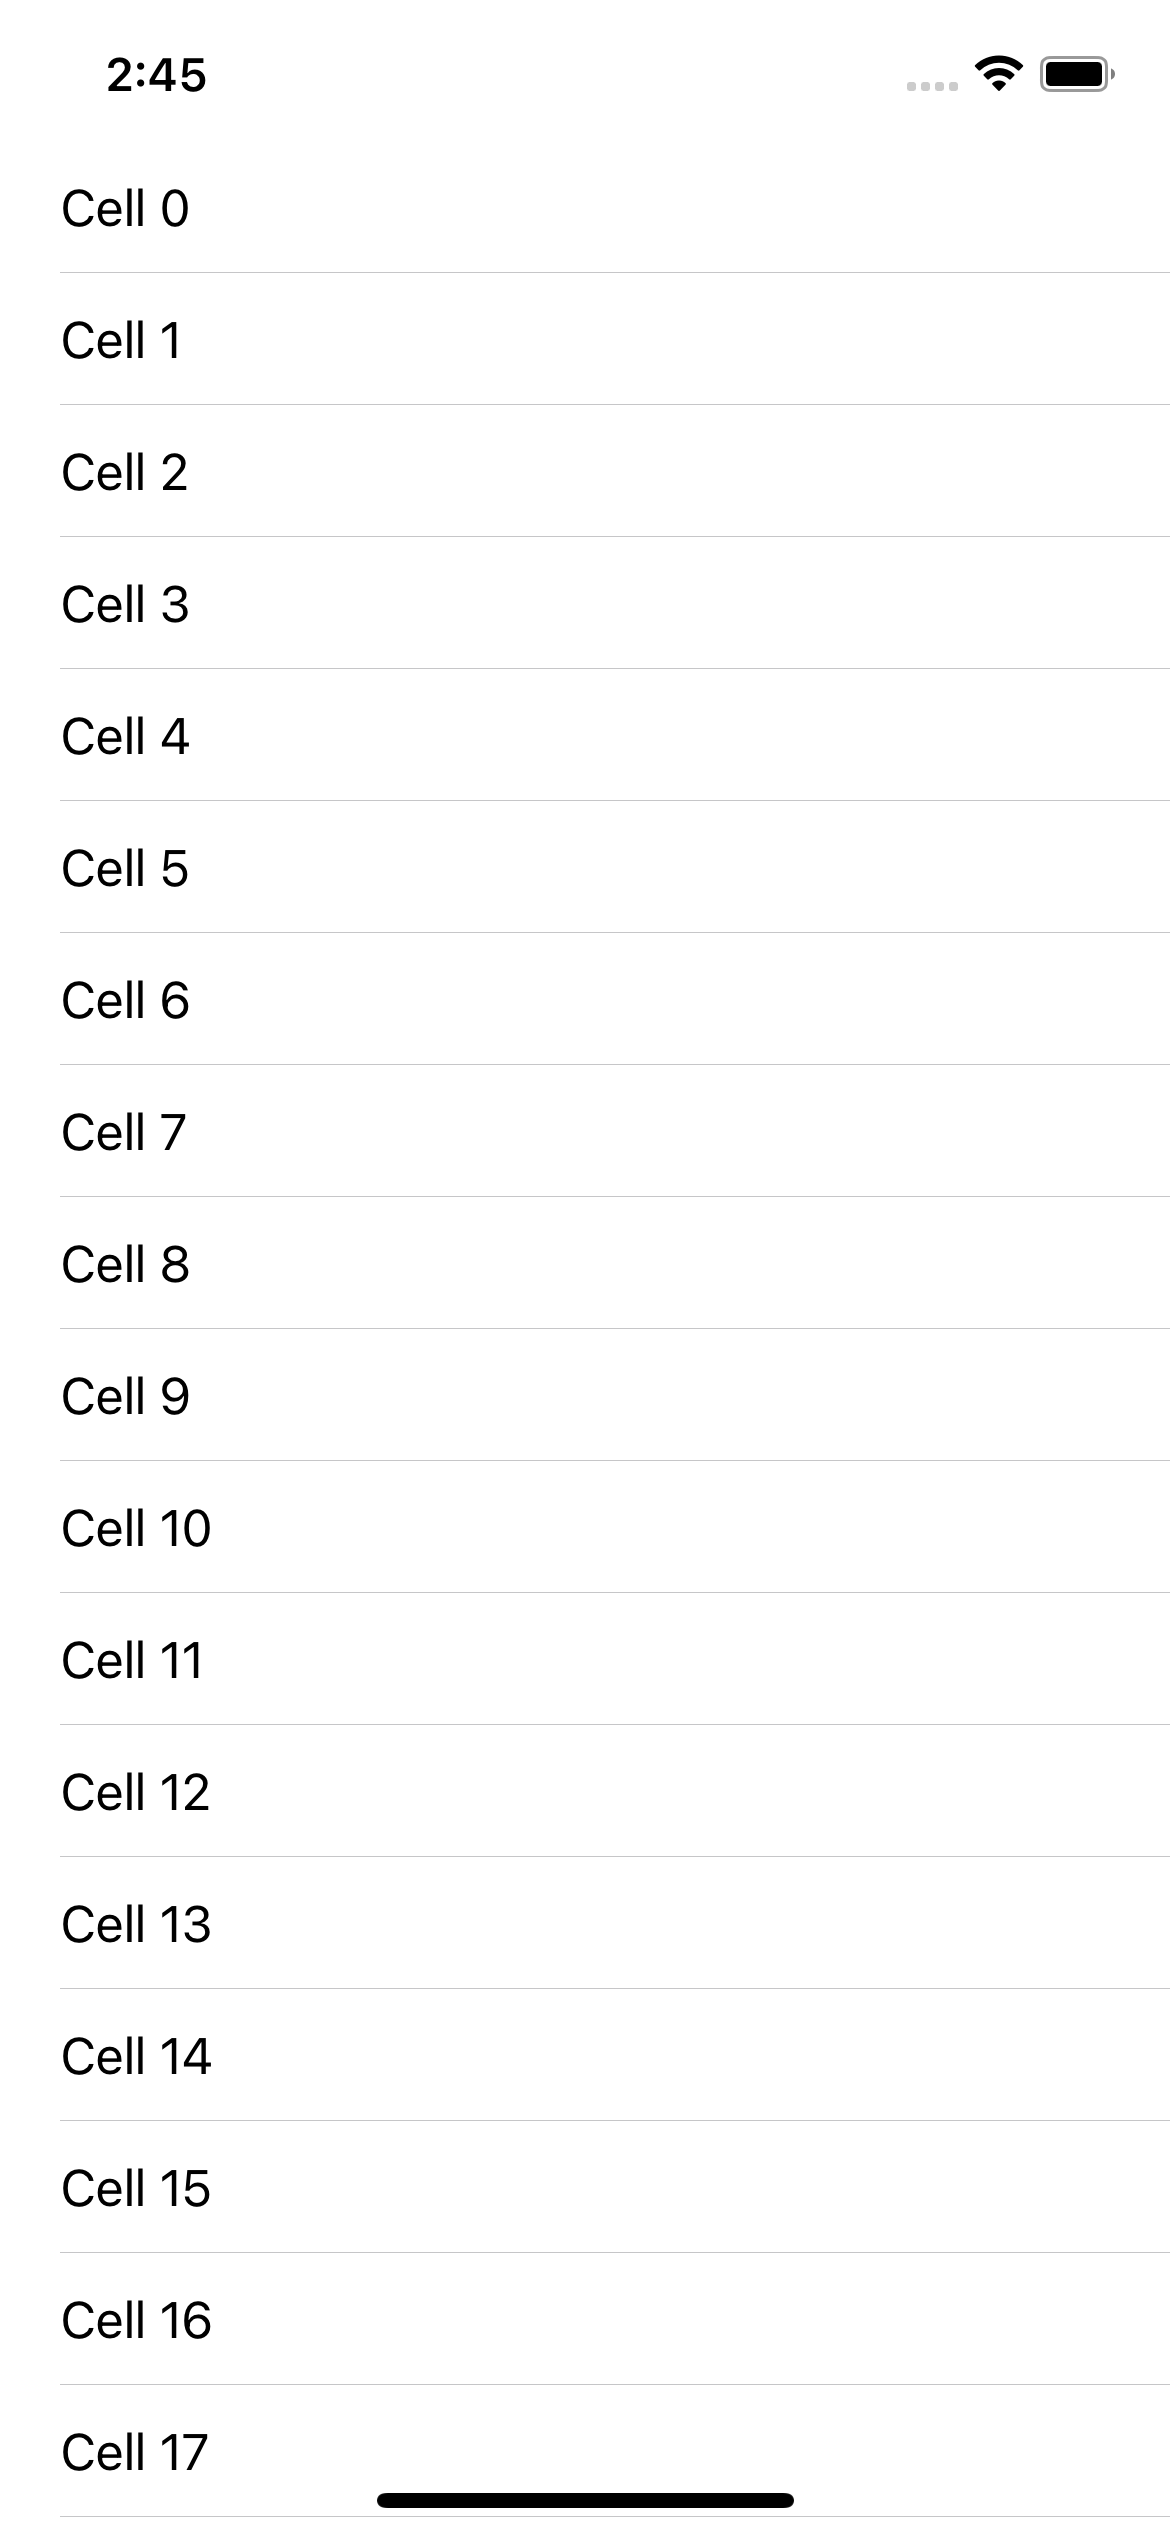
실행화면
init, row:0
cellForRowAt: 0
willDisplay: 0
init, row:0
cellForRowAt: 1
willDisplay: 1
init, row:0
cellForRowAt: 2
willDisplay: 2
init, row:0
cellForRowAt: 3
willDisplay: 3
...(중략)
init, row:0
cellForRowAt: 18
willDisplay: 18
prefetchRowsAt: [[0, 19], [0, 20], [0, 21], [0, 22], [0, 23], [0, 24], [0, 25], [0, 26], [0, 27], [0, 28]]
init, row:0
cellForRowAt: 19
init, row:0
cellForRowAt: 21
didEndDisplaying: 0
willDisplay: 21
init, row:0
cellForRowAt: 22
didEndDisplaying: 1
willDisplay: 22
prepareForReuse, row:0
cellForRowAt: 23
didEndDisplaying: 2
willDisplay: 23
prepareForReuse, row:1
cellForRowAt: 24
didEndDisplaying: 3
willDisplay: 24
prepareForReuse, row:2
cellForRowAt: 25로그에 찍힌 메서드들부터 알아보겠습니다. 애플 도큐먼트 참고했습니다.
- 먼저 init메서드가 호출됩니다. 이 메서드에서 row값이 0으로 나온 이유는 당연하게도 아직 cellForRow 메서드가 작동하지 않은 시점이기에 row값이 들어오지 않았기 때문입니다.
- 그 다음은 cellForRowAt 메서드가 호출됩니다. 이 시점에서 row값을 받습니다.
- 특정 위치에 삽입할 cell에 대해 data source를 요청하는 메서드. dequeueReusableCell 메서드를 통해 지정된 indexPath로 셀에 데이터를 지정합니다.
- willDisplay 메서드가 호출됩니다.
- 테이블뷰가 셀을 이용해 행에 그리기 직전에 delegate에게 이 메시지를 보내게 된다. 이 메서드는 delegate에게 상태 기반 프로퍼티를 테이블뷰보다 더 먼저 설정할 수 있는 기회를 제공합니다. selection이나 background color 같은 것.
이렇게 총 첫화면에서 보이는 19개 셀이 로드 되며 init을 호출, cellForRowAt에 의해 셀들이 메모리에 로드, willDisplay로 화면에 보이기 이전 호출이 반복되게 됩니다.
그리고 살짝 테이블뷰를 드래그 하기 시작하면
- prefetchRowsAt이라는 메서드가 호출되게 됩니다.
- TableView와 UICollectionView에 사용가능한 UITableViewDataSourcePrefetching 프로토콜은 iOS10이상부터 사용이 가능하고 셀이 디스플레이에 보여지는 셀 이외 셀의 정보를 미리! 호출해 데이터를 받아올 수 있습니다.

- 한번 뜯어봅시다. prefetchRowsAt은 optional 이 붙어 있지 않으므로 필수 구현입니다.
- cancelPrefetchingForRowsAt은 필요치 않은 셀들에 대해 작업을 취소하는 메서드입니다.
- TableView와 UICollectionView에 사용가능한 UITableViewDataSourcePrefetching 프로토콜은 iOS10이상부터 사용이 가능하고 셀이 디스플레이에 보여지는 셀 이외 셀의 정보를 미리! 호출해 데이터를 받아올 수 있습니다.
사용자가 테이블을 계속 드래그 해서 이제 셀이 화면 바깥으로 사라지기 시작하면?
- didEndDisplaying 메서드가 호출됩니다.
- 테이블뷰로부터 cell이 사라지면 호출되는 메서드
그리고 didEndDisplaying이 호출되는 이후 특정 시점부터는 init 메서드가 호출되지 않습니다. 대신...
- prepareForReuse 메서드가 호출됩니다.
- 테이블뷰 Delegate에 의해 재사용 가능한 셀을 준비하는 메서드. 만약 셀이 재사용된다면 dequeueReusable 메서드가 리턴되기 전 호출된다. 성능상 이유로 컨텐츠와 관련이 없는 셀의 속성만 재설정 해야 한다. alpha, editing, selection state등. cellForRowAt 메서드는 항상 셀을 재사용할 때 모든 컨텐츠를 리셋 시켜야만 한다.
- 만약 셀 객체가 reuse identifier와 관련되지 않았다면, 또는 reconfigureRows 메서드를 사용해 존재하는 셀의 컨텐츠를 업데이트 한 경우 테이블뷰는 이 메서드를 호출하지 않는다.
즉, 재사용된 셀을 사용할 때는 prepareForReuse 메서드만 호출되게 되는 것입니다.
생명 주기 메서드를 활용해 문제를 해결해봅시다.
유저 정보를 랜덤으로 보내주는 API입니다. 이걸 이용해서 동적으로 셀에 데이터를 추가해볼게요
한번 이렇게 만들어봅시다. 드래그해서 셀이 화면에 나타날때마다 해당 셀의 이미지가 로딩됩니다.
_-_2021-11-07_at_18.05.08.png)
약간만 코드를 수정해봅시다. Alamofire를 사용해 서버로부터 데이터를 가져옵니다.
ViewController.swift
import UIKit
import Alamofire

class ViewController: UIViewController {

    var tableView: UITableView = UITableView()

    let data = Array(1...20)
    var userData: [User] = []

    override func viewDidLoad() {
        super.viewDidLoad()
        // Do any additional setup after loading the view.
        setTableView()
    }

    override func viewDidAppear(_ animated: Bool) {
        requestUserData()
    }

    func setTableView() {
        tableView.dataSource = self
        tableView.prefetchDataSource = self
        tableView.delegate = self
        tableView.register(MyCell.self, forCellReuseIdentifier: MyCell.identifier)

        view.addSubview(tableView)
        tableView.rowHeight = 100
        tableView.translatesAutoresizingMaskIntoConstraints = false
        NSLayoutConstraint.activate([
            tableView.topAnchor.constraint(equalTo: self.view.topAnchor),
            tableView.bottomAnchor.constraint(equalTo: self.view.bottomAnchor),
            tableView.leadingAnchor.constraint(equalTo: self.view.leadingAnchor),
            tableView.trailingAnchor.constraint(equalTo: self.view.trailingAnchor)
        ])
    }

    func requestUserData() {
        guard let url: URL = URL(string: "https://randomuser.me/api/?results=20&inc=name,email,picture") else { return }

        AF.request(url, method: .get, parameters: nil, encoding: URLEncoding.default, headers: ["Content-Type":"application/json", "Accept":"application/json"], interceptor: nil, requestModifier: nil)
            .validate()
            .responseJSON { response in
                switch response.result {
                case .success:
                    guard let data = response.data else { return }
                    do {
                        let jsonData = try JSONDecoder().decode(APIResponse.self, from: data)
                        self.userData = jsonData.results
                        self.tableView.reloadData()
                    } catch let err {
                        print(err.localizedDescription)
                    }
                case .failure(let err):
                    print(err.localizedDescription)
                }
            }
            .resume()
    }

}

extension ViewController: UITableViewDataSource {
    func tableView(_ tableView: UITableView, numberOfRowsInSection section: Int) -> Int {
        return userData.count
    }

    func tableView(_ tableView: UITableView, cellForRowAt indexPath: IndexPath) -> UITableViewCell {
        print("cellForRowAt: \(indexPath.row)")
        guard let cell: MyCell = tableView.dequeueReusableCell(withIdentifier: MyCell.identifier, for: indexPath) as? MyCell else { return UITableViewCell() }
        DispatchQueue.global().async {
            guard let thumbnailUrl = URL(string: self.userData[indexPath.row].picture.thumbnail) else { return }
            guard let imageData = try? Data(contentsOf: thumbnailUrl) else { return }
            DispatchQueue.main.async {
                cell.profileImageView.image = UIImage(data: imageData)
                cell.setNeedsLayout()
                cell.layoutIfNeeded()
            }
        }
        cell.row = indexPath.row
        return cell
    }
}

extension ViewController: UITableViewDelegate {
    func tableView(_ tableView: UITableView, willDisplay cell: UITableViewCell, forRowAt indexPath: IndexPath) {
        print("willDisplay: \(indexPath.row)")
    }

    func tableView(_ tableView: UITableView, didEndDisplaying cell: UITableViewCell, forRowAt indexPath: IndexPath) {
        print("didEndDisplaying: \(indexPath.row)")
    }

}

extension ViewController: UITableViewDataSourcePrefetching {
    func tableView(_ tableView: UITableView, prefetchRowsAt indexPaths: [IndexPath]) {
        print("prefetchRowsAt: \(indexPaths)")
    }

    func tableView(_ tableView: UITableView, cancelPrefetchingForRowsAt indexPaths: [IndexPath]) {
        print("cancelPrefetchingForRowsAt: \(indexPaths)")
    }
}
MyCell.swift
import UIKit

class MyCell: UITableViewCell {

    static let identifier: String = "MyCell"

    var row: Int?

    var profileImageView: UIImageView = UIImageView()

    override func awakeFromNib() {
        super.awakeFromNib()
        print("awakeFromNib, row:\(row ?? 0)")
    }

    override init(style: UITableViewCell.CellStyle, reuseIdentifier: String?) {
        super.init(style: style, reuseIdentifier: reuseIdentifier)
        print("init, row:\(row ?? 0)")
        layoutCellProperties()
    }

    required init?(coder: NSCoder) {
        fatalError("init(coder:) has not been implemented")
    }

    override func prepareForReuse() {
        print("prepareForReuse, row:\(row ?? 0)")
//        아래 부분 주석은 나중에 해제해 줍시다.
//        profileImageView.image = nil
    }

    deinit {
        print("deinit, row:\(row ?? 0)")
    }


    func layoutCellProperties() {
        profileImageView.contentMode = .scaleToFill
        contentView.addSubview(profileImageView)
        profileImageView.translatesAutoresizingMaskIntoConstraints = false
        NSLayoutConstraint.activate([
            profileImageView.widthAnchor.constraint(equalTo: widthAnchor, multiplier: 0.2),
            profileImageView.heightAnchor.constraint(equalTo: heightAnchor, multiplier: 0.9),
            profileImageView.centerYAnchor.constraint(equalTo: centerYAnchor),
            profileImageView.leadingAnchor.constraint(equalTo: leadingAnchor, constant: 8)
        ])
    }

}
APIResponse.swift
import Foundation

struct APIResponse: Codable {
    let results: [User]
}

struct User: Codable {
    struct Name: Codable {
        let title: String
        let first: String
        let last: String

        var full: String {
            return self.title.capitalized + ". " + self.first.capitalized + " " + self.last.capitalized
        }
    }

    struct Picture: Codable {
        let large: String
        let medium: String
        let thumbnail: String
    }

    let name: Name
    let email: String
    let picture: Picture
}
주목할 점은 MyCell.swift에 있는 prepareForReuse 생명주기 메서드입니다.
- 만약 profileImageView.image = nil 이 없다면?
위 아래 셀들이 재사용되며 이전 이미지가 아주 잠깐이지만 나타나는 것을 볼 수 있습니다.
왜냐하면 재사용 큐에 들어간 셀의 이전 이미지뷰를 초기화 해주는 부분이 없기 때문입니다.
이러면 사용자 입장에서 보기 좋지 않을 것 같아요.
- 이때 profileImageView.image = nil 을 적용하면?
원활하게 동작합니다