이론 수업
for loop
for (let i = 0; i < 5; i++)
const items = ['a','b','c','d','e']
for(let i = 0; i < 5; i++){
  console.log(items[i]);
}
for .. in
- 아이템의 키값을 가져온다.
const items = ['a','b','c','d','e']
for(const i in items){
  console.log(items[i]);
}
for .. of
- 아이템의 밸류를 가져온다.
const items = ['a','b','c','d','e']
for(const i of items){
  console.log(items[i]);
}
while
- 와일은 조건을 검사하고 조건이 통과되면 반복
const items = ['a','b','c','d','e']
let i = 0;
while(i < items.length){
  console.log(items[i]);
  i++;
}
do..while
- 무조건 한번 실행 시킨다.
const items = ['a','b','c','d','e']
let i = 0;
do{
  console.log(items[i]);
  i++;
}while(i<items.length)
배열.forEach
//arrow function
items.forEach((item, index) => {
  console.log(item, index );
});// forEach는 인덱스 번호도 가져올 수 있다.
›
//function
items.forEach(function(item){
  console.log(item);
});

/*
----forEach의 실행 과정----
	const items = [1,2,3,4,5];
    items.forEach(function(item){
      console.log(item);
    })
    //items.forEach(function(item){...})
    	//.forEach(function(1)..)
        //.forEach(function(2)..)
        //.forEach(function(3)..)
        //.forEach(function(4)..)
        //.forEach(function(5)..)
        //이런 식으로 하나씩 매개변수로 넣어줘서 함수를 실행한다.
*/
배열 메소드 구분하기
- 배열을 변경하지 않고, 정보만 추출하는 메소드
// 1. 배열을 변경하지 않고 정보만 가져오는 메소드

let a = ['hello', 'world', 'foo', 'bar'];

// find
console.log(
    a.find(value => value.includes('f'))
);

// index로 아이템 조회
console.log(a[2]);

// index 찾기
console.log(a.indexOf('world'));
- 배열 자체를 변경하는 메소드 -push, pop, sort 등
// 2. 원래 배열을 변경하는 메소드

a = ['hello', 'world', 'foo', 'bar'];

console.log(
    a.push('elice')
); // returns a.length

console.log(
    a.pop()
); // return popped item

const reversed = a.reverse();
console.log(reversed); // returns same array
console.log(a);
a.push('elice');

console.log(reversed);

a.sort();
console.log(a);- 기존 배열을 변경하지 않고, 새로운 배열을 생성하는 메소드
// 3. 새 배열을 반환하는 메소드

a = [1, 2, 3, 4, 5];

const b = a.map(v => v * 2);
console.log(a, b);
//[1,2,3,4,5] [2,4,6,8,10]
//원래 배열(a)은 유지하고 새로운 배열(b)을 만듬

const c = b.filter(v => v < 8);
console.log(a, b, c);

const items = [1,2,3, [4,5,6], [7,8], 9];
console.log('items', items);
console.log('flatted', items.flat());
위의 3번 코드들은 reduce로 모두 구현할 수 있다.
- reduce?
const a = [1, 2, 3, 4, 5];
// 1. map
const b = a.map(v => v * 2);
console.log(b);
// [ 2, 4, 6, 8, 10 ]
// 2. reduce
const c = b.reduce((prev, curr) => prev + curr);
// 두개를 짝지어서 값을 보내줌 - 1과 2를 보내줌
// 배열의 요소가 [1,2,3,4,5]일때
// prev + curr
// 1 + 2 = 3
// 3, [3,4,5] => 3 + 3 = 6
// 6, [4,5] => 6 + 4 = 10
// 10, [5] => 10 + 5 = 15
console.log(c);
// 30
const d = b.reduce((sum, v) => sum + v, 0);
console.log(d);
// 30
const e = b.reduce(function(sum, v) {
return sum + v;
}, 0);
console.log(e);
// 30
/// =======================
const values = [...Array(11).keys()].slice(1);
// [1,2,3,4,5,6,7,8,9,10]
// 3. filter
console.log(
values.filter(value => value % 5 === 0)
);
// [ 5, 10 ]
console.log(
values.reduce((arr, v) => {
if (v % 5 === 0) {
arr.push(v);
}
return arr;
}, [])
);
// [ 5, 10 ]
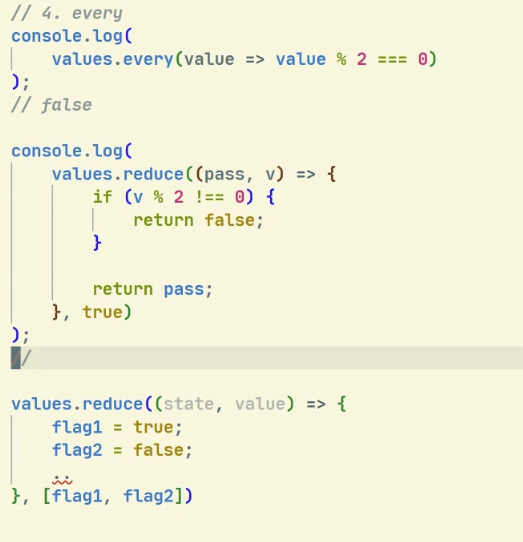
// 4. every
console.log(
values.every(value => value % 2 === 0)
);
// false
console.log(
values.reduce((pass, v) => {
if (v % 2 !== 0) {
return false;
}
return pass;
}, true)
);
배열.map()
배열.filter()
배열.every()
배열.reduce()//reduce로 모두 구현할 수 있다.- every
this
this 개념잡기
- 자바스크립트에서 this는 변경할 수 없는 특별한 무언가가 아니다!
- 함수마다 하나의 this를 가질 수 있다.
- this에는 어떤 값이든 들어갈 수 있다.
function sum(a, b){
  console.log('sum', a + b + this.offset);
}
sum(1,2);
sum.call({offset:30}, 1, 2);- this는 함수에 아무거나 들어간다
const rect = {
  w : 10,
  h : 20,
  calculate : function(){
    this.w * this.h;
   },
}- this안에 있는 값은 바꿀 수 있다.(하지만 재선언은 에러가 뜬다!)
const test = function(){
this.a = 10;//이건 가능
//this = {a : 10};// 이건 쌉 불가능 => 이건 this를 바꾸는 것이니까 안되는데 위에건 this안에 있는 a에 값을 넣는 것이니까 쌉가능~~
console.log(this.a);
}
test.call({});
test.call('');
test.call('hello');
test.call({a : ture});
test.call(11);
화살표 함수 안에서 this는 ??
- this 못바꿈
//화살표함수에선 this를 함부로 못바꾼다.
//화살표함수는 this를 한번 선언하면 this를 바꿀 수 없다.
const another = () =>{
  console.log(this);
};
another.call('hello'); //{}
another.call(true); //{}

- 실행결과

함수에 붙여쓰는 bind, call, apply
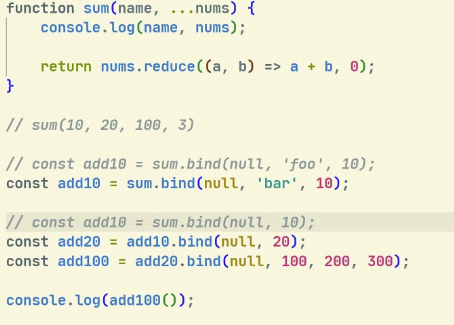
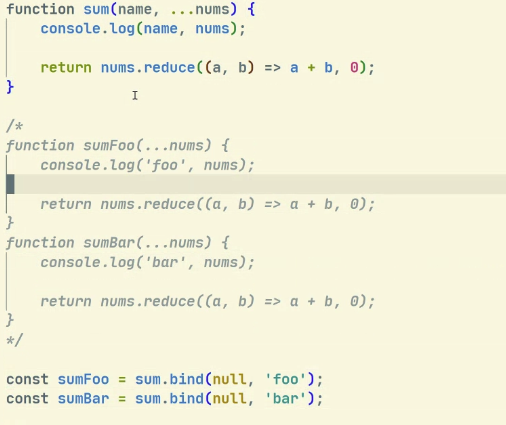
function sum(...nums) {
    console.log(nums);

    return nums.reduce((a, b) => a + b, 0);
}

const add10 = sum.bind(null, 10);
const add20 = add10.bind(null, 20);
const add100 = add20.bind(null, 100);

console.log(add100.call(null, 3));
// ?

console.log(add100.apply(null, [3, 4, 5]));
console.log(add100.call(null, ...[3, 4, 5]));
call
function sum(...num){
  console.log(nums);
  return nums.reduce((a,b) => a+ b, 0);
}
console.log(
  sum.call(null, 1,2,3,4)
);
apply
function sum(...num){
  console.log(nums);
  return nums.reduce((a,b) => a+ b, 0);
}
console.log(
  sum.apply(null, [1,2,3,4])
);
bind
- 파라미터를 하나씩 집어 넣어서 변수로 만들 수 있음.
- bind는 뜻 그대로 매개변수 값을 묶어 두는 것이라고 생각!
function sum(...nums) {
    console.log(nums);

    return nums.reduce((a, b) => a + b, 0);
}

const add10 = sum.bind(null, 10);
const add20 = add10.bind(null, 20);
const add100 = add20.bind(null, 100);
//sum(10,20,100)으로 묶어놓은 것
console.log(add100());
//console.log(add100.call(null, 3));
// ?
- 위의 사진이라고 생각하면 된다!!
- 값을 저장했다가 사용하는 것이라 유용하게 사용할 수 있다!
querySeletor
- quertSelector - 하나의 요소만 가져올 때
- quertSelectorAll- 여러개를 동시에 가져올 때
- CSS Selector를 이용해서 접근 가능!
onclick VS addEventListener
onclick
- 변수처럼 생각하면 된다!
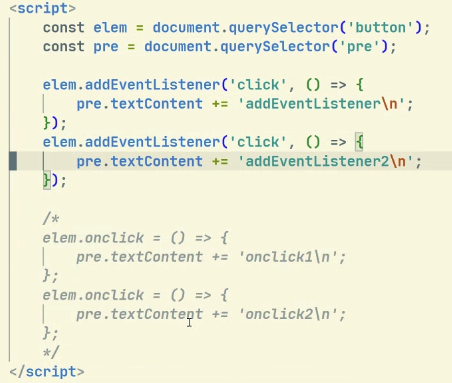
addEventListener
- event가 추가가 된다고 생각하면 된다.
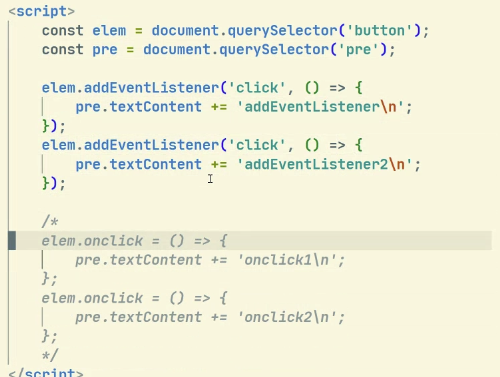
- 위의 예시를 보면 addEventListener를 출력하면 addEventListener1, addEventListener2가 동시에 출력이 되지만 onclick을 출력하면 onclick2만 출력이 된다!!
이벤트를 다룰때 꼭 알아야하는 메소드
- preventDefault() : 이벤트에 의한 기본 동작 막기
- stopPropagation() : 이벤트 요소의 전파막기
preventDefault()
- a(링크 이동), form태그 등의 기능을 멈춘 후 원하는 기능을 수행하게 함
stopPropagation()
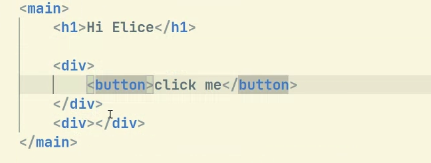
- 모든 div를 가져와서
[...divs]로 작성했다.
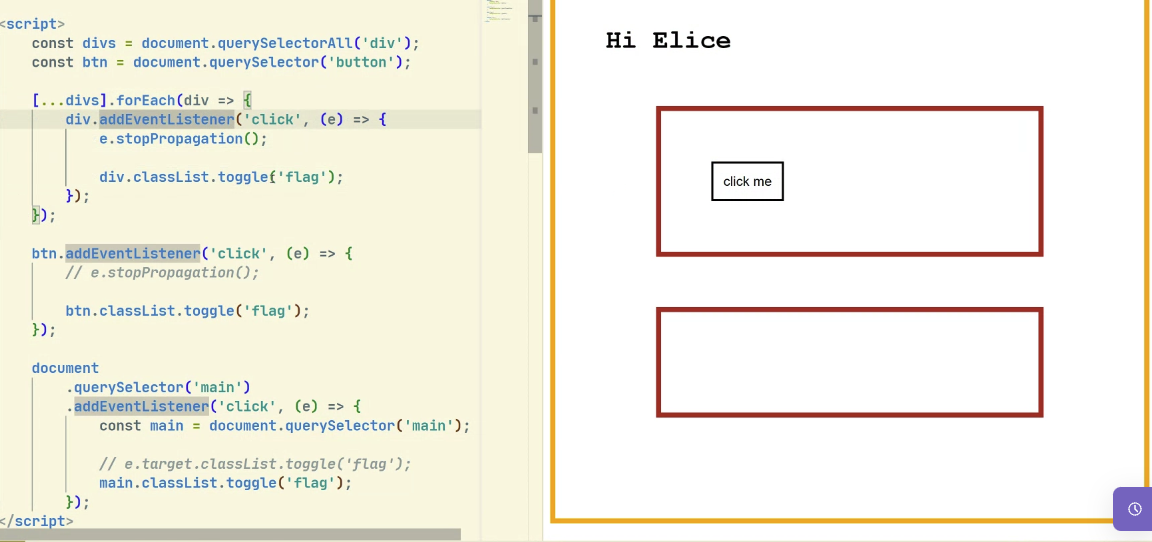
- btn에 있는 stopPropagation()을 주석처리를 하면 stopPropagation()이 선언되지 않은 부모관계의 태그들까지 영향을 준다!(형제 요소들에겐 영향ㄴㄴ)
https://ko.javascript.info/bubbling-and-capturing
웹 브라우저에서 사용가능한 스토리지 리스트
- 같은 도메인(주소) 내에서만 접근 가능한 데이터 공간을 제공
WebStorage
- 단순히 임의의 key에 값을 저장하고, 조회하는 기능을 제공
- key와 value 모두 문자열만 지원
- getItem, setItem, removeItem, clear, key, length
- sessionStorage는 모든 세션이 닫히면 데이터 초기화
- localStorage
- 직접 지워야만 로컬스토리지에 저장된 데이터가 날아간다!
- sessionStorage - 탭끼리 동기화가 되지 않는다.
- 창을 닫으면 데이터가 날아간다!
IndexedDB
- 웹 브라우저에서 사용할 수 있는 좀 더 본격적인 데이터베이스
- ObjectStore라는 개념으로 여러 테이블을 생성할 수 있고,
- 데이터를 조회, 갱신, 삭제를 할 수 있으며,
- 트랜잭션도 지원하는
- 웹 브라우저에 기본 탑재된 NoSQL 데이터 베이스
- 외부DB를 사용하지 않고 브라우저 DB에 저장한다.
- 저수준, 노후화된 인터페이스를 제공
https://pks2974.medium.com/indexeddb-%EA%B0%84%EB%8B%A8-%EC%A0%95%EB%A6%AC%ED%95%98%EA%B8%B0-ca9be4add614
번외 - https?
- https는 통신과정에서 암호화를 통해 보안을 제공하는 프로토콜
실습
this
Event
- 마우스 이벤트
- 키 이벤트
- 폼 이벤트
- 로드 및 기타 이벤트
EventListener()
DOM객체.addEventListener(이벤트명, 실행할 함수명, 옵션)- 이벤트명 : JavaScript에서 발생할 수 있는 이벤트 명을 입력
- 함수명 : 해당 변수는 생략 가능, 해당 이벤트가 발생할 때 실행할 함수명을 입력한다.
- 옵션 : 옵션은 생략 가능, 자식과 부모 요소에서 발생하는 버블링을 제어하기 위한 옵션이다.
이벤트 리스너 사용해보기
- 우리가 충분히 만들 수 있는 코드로 간단한 기능 만들기!
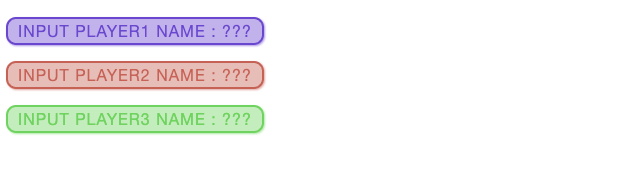
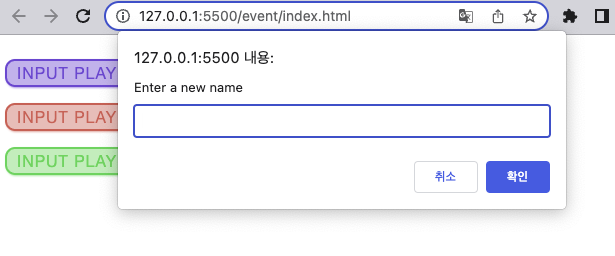
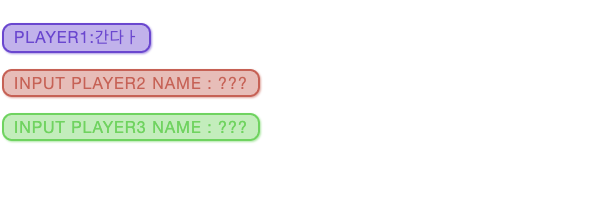
- ???이라고 적힌 부분을 클릭하면 prompt창이 뜨며 이름을 입력할 수 있다.
- 입력하면 결과가 바뀐다.
//DOM객체 불러오기
// 1번 방법
const player1 = document.getElementById("player1");
const player2 = document.getElementById("player2");
const player3 = document.getElementById("player3");

// 2번 방법
// const players = [];
// for(let i = 0; i < 3; i++){
//   const player[i] = document.getElementById("player" + i+1);
//}
player1.addEventListener("click", updatePlayer1Name);
player2.addEventListener("click", updatePlayer2Name);
player3.addEventListener("click", updatePlayer3Name);

function updatePlayer1Name(){
  const name = prompt("Enter a new name");
  //prompt = 이름을 적는 창
  player1.textContent = player1.id + ":" + name;
}
function updatePlayer2Name(){
  const name = prompt("Enter a new name");
  //prompt = 이름을 적는 창
  player2.textContent = player2.id + ":" + name;
}
function updatePlayer3Name(){
  const name = prompt("Enter a new name");
  //prompt = 이름을 적는 창
  player3.textContent = player3.id + ":" + name;
}- 코드 리팩토링
// 2번 방법
const players = [];
for(let i = 0; i < 3; i++){
  players[i] = document.getElementById("player" + i+1);
  players[i].addEventListener("click", function() {
    const name = prompt("Enter a new name");
    //prompt = 이름을 적는 창
    players[i].textContent = playes[i]1.id + ":" + name;
  });
}- 이렇게 간단히 코드를 작성할 수 있다...!(ㅜㅜ 바로 이렇게 생각하면 좋을텐데 ㅜㅜ)
// 3번 방법
const players = [];
for(let i = 0; i < 3; i++){
  players[i] = document.getElementById("player" + (i+1));
  players[i].addEventListener("click", updateName);
}
function updateName(event){
  const name = prompt("Enter a new name");
    //prompt = 이름을 적는 창
    event.target.textContent = event.target.id + ":" + name;
}
// 4번 방법
for (let i = 0; i < 3; i++){
const players = document.getElementById("player" + (i+1));
players.addEventListener("click", updateName);
}
function updateName(event){
const name = prompt("Enter a new name");
//prompt = 이름을 적는 창
event.target.textContent = event.target.id + ":" + name;
}- 최종으로 이렇게 만들어졌다.
- 코드가 거의 절반이 줄어든 것 같다.
엘리스 문제 풀이
1. 배경색 바꾸기
- 오 이건 쉽다 ㅋㅎㅋㅎ
2. 화면 최상단으로 이동하기
- 아 이거 function(){window.scrollTo()} 으로 선언해야되는데 멍청하게 function 안쓰고 그냥 window.scrollTo()이러고 있었네 ;;;
3. 출석부
-
DOM객체들을 불러올때 Elements를 사용하는 것들은 복수이기 때문에 첫번째 요소를 불러와야해서
document.getElementsByClassName[0]를 붙여준다...(이거 떄문에 실행 안됐네 ㅂㄷㅂㄷ) -
innerTEXT - text, 사용자가 볼 수 있는 문자열
-
textContent - text, 해당 객체에 있는 모든 문자열
-
innerHTML - element,
<a>blahblah</a>를 다 가져옴
4. form 다루기
- 오 이건 좀 쉽다!!
5. n번째 요소 만들기
- 지시사항대로 안풀면 할 수 있는데 지시사항대로 하니까 어려웠다...
6. 태그의 속성에 따라 하이라이트 하기
- 3가지 문제 중에 2, 3번째는 쉽게 풀었는데 1번째를 모르겠다... ㅠ
2, 3 = 글자 색상 변경
1 = 8글자 이상 단어는 하이라이트 하기
7. 클릭 시 토글!
- 음..! 시간 있으면 풀만 한데 시간 내에는 못풀겠다 ㅋㅎㅋㅎ

안녕하세요! 만나서 반갑습니다.