
나중에 까먹지 않기 위해 기록으로 남겨보는 React Native 초기세팅! 내가 설치하고 싶은 것은 아래와 같다.
프로젝트 초기세팅하기
- typescript용 React Native App
- npx react-native run-ios 정상 실행 확인
- npx react-native run-android 정상 실행 확인
- react navigation 설치
- styled-components 설치
- 개발 시작할 수 있도록 라우터 및 폴더 구조 잡기
- Navigator와 index.js 정리해주기
1. TS용 RN 만들기
https://reactnative.dev/docs/typescript를 보고 install 했다.
npx react-native init Puzzleai --template react-native-template-typescript타입스크립트 용으로 만들었기 때문에, tsconfig.json이라는 파일이 있는 것을 볼 수 있다.
그리고 만들어 두었던 깃헙과 연결한다. 깃헙과 연결하는 걸 먼저 해서 폴더가 하나 더 생성되어 처음부터 다시 하는 중이다 ㅠ_ㅠ
2. npx react-native run-ios 정상 실행 확인
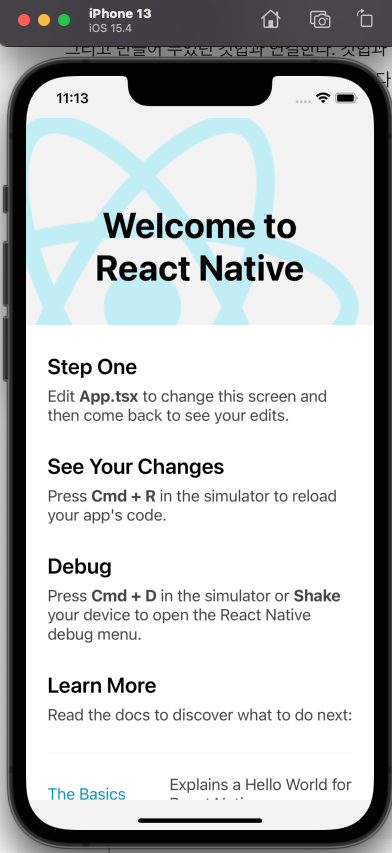
code .을 눌러 VSC를 켜주고, 터미널 창에 npx react-native run-ios실행! Simulator가 정상적으로 열리며 여기까지 정상 작동 확인 완료. 더불에 터미널 창이 하나 더 열리며 Metro도 정상 실행되고 있음을 확인할 수 있다.
3. npx react-native run-android 정상 실행 확인

4. react navigation 설치
react router처럼 분명 router를 깔아줘야 하는데 찾아보니 react navigation을 가장 많이 설치하는 것 같아 여쭤보았고, 맞다고 하셨다.
https://reactnavigation.org/docs/getting-started
npm install @react-navigation/native
npm install react-native-screens react-native-safe-area-context
npx pod-install ios
안드로이드 환경에서 정상 실행해 주기 위해 추가로 해줘야 하는게 있는데 MainActivity.java 파일을 찾아 다음과 같이 넣어준다.
// MainActivity class 본문 안에

@Override
protected void onCreate(Bundle savedInstanceState) {
  super.onCreate(null);
}

// 맨 위에 import 아래 사항 import 해주기
import android.os.Bundle;
5. styled-components 설치
- styled-component 설치
https://styled-components.com/docs/basics#installation
npm install --save styled-components --legacy-peer-deps- babel plugin 설치 - 필수는 아니지만 React Debuging Tool 등에서 Debuging 시 class명을 확인하기 쉽게 만들어 줌
https://styled-components.com/docs/tooling#babel-plugin
npm install --save-dev babel-plugin-styled-components --legac
y-peer-deps
그 후 babel.config.js에 아래와 같이 plugins 추가하기.
- TypeScript plugin 설치
https://styled-components.com/docs/api#typescript
npm install --save @types/styled-components @types/styled-components-react-native6. 폴더 구조 잡기
src라는 폴더 하나를 생성해 주고, 그 하위로 페이지들을 정리해 주려고 한다.
src를 만들고 바로 그 하위로, asset / components / screens / styles 폴더를 만들어주었다. 그리고 폴더 하나씩 초기세팅 정리하기 시작!
1. asset
하위로 images폴더를 만들어주었다. 추후 이미지는 이 폴더에 넣어주기로 한다. 깃에 정상적으로 추가되도록 임의의 README.md 파일을 생성하였다.
2. components
공통 컴포넌트를 넣을 파일로, 임의로 README.md 파일을 하나 넣어주었다.
3. screens
개발할 화면 하나하나를 만들어주었는데, zeplin을 보고 Entry, Login, Main, Signup, Video 총 5개 파일을 만들어 주었다. 물론 tsx로!
그 후, typescript code snippet을 깔아 아주 간단하게 기본 화면들을 만들어주었다!
4. styles
여기는 생성해 줘야할 게 조금 있다.
4-1. styled.d.ts 파일 생성하기
typescript용 styled components를 설치하면서 이미 해당 파일이 다운받아져 있으나, theme을 커스텀해서 쓸 수 있도록 커스텀해서 쓸 아이들을 이 파일에 override하여 작성해 준다. 그러면 추후에 theme을 만들고 사용할 때, 기존 js에서는 에러메세지가 안 떴었는데, 이젠 에러메세지가 뜬다!
import 'styled-components';

declare module 'styled-components' {
  export interface DefaultTheme {
    mainBlue: string;
    mainDarkGrey: string;
    mainLightGrey: string;
    mainRed: string;

    fontLarge: number;
    fontMedium: number;
    fontRegular: number;
    fontSmall: number;

    weightBold: number;
    weightMedium: number;
    weightRegular: number;

    lineHeightRegular: number;
    lineHeightMicro: number;
  }
}
4-2. theme.ts 파일 생성하기 - 공통 theme으로 사용할 애들을 정의해주었다.
import {DefaultTheme} from 'styled-components/native';

const theme: DefaultTheme = {
  mainBlue: '#065e85',
  mainDarkGrey: '#3e3e3e',
  mainLightGrey: '#c4c4c4',
  mainRed: '#e01e1e',

  fontLarge: 26,
  fontMedium: 22,
  fontRegular: 18,
  fontSmall: 12,

  weightBold: 700,
  weightMedium: 500,
  weightRegular: 400,

  lineHeightRegular: 27,
  lineHeightMicro: 18,
};
7. Navigator와 index.js 정리해주기
https://github.com/dev-yakuza/react-navigation-v5-exercise/commit/3125a86ffd1bb77a87a59375106bfbb413547310 이 깃헙 레포를 보고 따라해보았다.
Navigator.jsx
먼저 npm install @react-navigation/native-stack를 설치해줘야 한다.
import React from 'react';
import {NavigationContainer} from '@react-navigation/native';
import {createNativeStackNavigator} from '@react-navigation/native-stack';
import Splash from 'screens/Splash';
import Entry from 'screens/Entry';
import Login from 'screens/Login';
import Main from 'screens/Main';
import Signup from 'screens/Signup';
import Video from 'screens/VideoScreen';

const RootStack = createNativeStackNavigator();

const Navigator = () => {
  return (
    <NavigationContainer>
      <RootStack.Navigator initialRouteName="Entry">
        <RootStack.Screen
          name="Splash"
          component={Splash}
          options={{headerShown: false}}
        />
        <RootStack.Screen
          name="Entry"
          component={Entry}
          options={{headerShown: false}}
        />
        <RootStack.Screen
          name="Login"
          component={Login}
          options={{headerShown: false}}
        />
        <RootStack.Screen
          name="Main"
          component={Main}
          options={{headerShown: false}}
        />
        <RootStack.Screen
          name="Signup"
          component={Signup}
          options={{title: '회원가입', headerTitleAlign: 'center'}}
        />
        <RootStack.Screen
          name="Video"
          component={Video}
          options={{headerShown: false}}
        />
      </RootStack.Navigator>
    </NavigationContainer>
  );
};

export default Navigator;
그리고 index.js에 연결해줘야 한다.
import React from 'react';
import {AppRegistry} from 'react-native';
import {name as appName} from './app.json';
import {ThemeProvider} from 'styled-components';
import theme from 'styles/theme';
import Navigator from './Navigator';

const ProvidedNavigator = () => {
  return (
    <ThemeProvider theme={{...theme}}>
      <Navigator />
    </ThemeProvider>
  );
};

AppRegistry.registerComponent(appName, () => ProvidedNavigator);
참고한 링크
https://velog.io/@ikaret/React-Native-%EC%97%90%EC%84%9C-Styled-Component-%EC%82%AC%EC%9A%A9%ED%95%98%EA%B8%B0
https://dev-yakuza.posstree.com/ko/react-native/styled-components/
https://www.zehye.kr/ios/2020/09/16/iOS_add_font_xcode/
https://developer.apple.com/videos/play/wwdc2017/815/
https://codewithchris.com/common-mistakes-with-adding-custom-fonts-to-your-ios-app/#includefonts
https://velog.io/@ziyoonee/React-Native-custom-font-%EC%A0%81%EC%9A%A9
https://dev-yakuza.posstree.com/ko/react-native/react-native-custom-font/
https://velog.io/@ant-now/React-Native-with-TS-%ED%83%80%EC%9E%85%EC%8A%A4%ED%81%AC%EB%A6%BD%ED%8A%B8%EB%A1%9C-%EB%A6%AC%EC%95%A1%ED%8A%B8%EB%84%A4%EC%9D%B4%ED%8B%B0%EB%B8%8C-boilder-plate-%EB%A7%8C%EB%93%A4%EA%B8%B0-2%EC%8A%A4%ED%83%9D%EB%84%A4%EB%B9%84%EA%B2%8C%EC%9D%B4%EC%85%98-%EB%A7%8C%EB%93%A4%EA%B8%B0-React-Navigation-5.0

프론트엔드 신입 관련 내용 잘 보고 가요! 공유 감사합니다!