(Jetson Project#9)Setting Up Motor Control via ESP32
Developing Self Driving with Jetson Nano
Setting Up Motor Control via ESP32
This post, I configure the ESP32 microcontroller to control robot's motors based on commands received from ROS. We'll establish serial communication between the Jetson Nano and the ESP32, upload the necessary firmware to the ESP32, and create a ROS node to handle motor commands.
4.1. Hardware Connections
4.1.1. Components Needed
-
ESP32 Development Board
-
Motor Driver (e.g., L298N, TB6612FNG)
-
DC Motors
-
Jumper Wires
-
Power Supply (appropriate for motors and ESP32)
=> connect ESP32 to Jetson nano via USB.
=> Connect Motors to the Motor Driver.
4.2. ESP32 Firmware for Motor Control
Program the ESP32 to listen for serial commands from the Jetson Nano and control the motors accordingly.
4.2.1. Motor Control Code on ESP32, Arduino IDE
- below code example.
// Motor Control Pins
const int motorAForward = 5;   // IN1
const int motorABackward = 18; // IN2
const int motorBForward = 19;  // IN3
const int motorBBackward = 21; // IN4
const int motorASpeed = 22;    // ENA (PWM)
const int motorBSpeed = 23;    // ENB (PWM)

void setup() {
  // Initialize serial communication
  Serial.begin(115200);

  // Initialize motor control pins
  pinMode(motorAForward, OUTPUT);
  pinMode(motorABackward, OUTPUT);
  pinMode(motorBForward, OUTPUT);
  pinMode(motorBBackward, OUTPUT);
  pinMode(motorASpeed, OUTPUT);
  pinMode(motorBSpeed, OUTPUT);

  // Stop motors initially
  stopMotors();
}

void loop() {
  if (Serial.available() > 0) {
    char command = Serial.read();
    switch (command) {
      case 'F':
        moveForward();
        break;
      case 'B':
        moveBackward();
        break;
      case 'L':
        turnLeft();
        break;
      case 'R':
        turnRight();
        break;
      case 'S':
        stopMotors();
        break;
      default:
        stopMotors();
        break;
    }
  }
}

void moveForward() {
  digitalWrite(motorAForward, HIGH);
  digitalWrite(motorABackward, LOW);
  digitalWrite(motorBForward, HIGH);
  digitalWrite(motorBBackward, LOW);

  analogWrite(motorASpeed, 255); // Full speed
  analogWrite(motorBSpeed, 255); // Full speed
}

void moveBackward() {
  digitalWrite(motorAForward, LOW);
  digitalWrite(motorABackward, HIGH);
  digitalWrite(motorBForward, LOW);
  digitalWrite(motorBBackward, HIGH);

  analogWrite(motorASpeed, 255); // Full speed
  analogWrite(motorBSpeed, 255); // Full speed
}

void turnLeft() {
  digitalWrite(motorAForward, LOW);
  digitalWrite(motorABackward, HIGH);
  digitalWrite(motorBForward, HIGH);
  digitalWrite(motorBBackward, LOW);

  analogWrite(motorASpeed, 255); // Full speed
  analogWrite(motorBSpeed, 255); // Full speed
}

void turnRight() {
  digitalWrite(motorAForward, HIGH);
  digitalWrite(motorABackward, LOW);
  digitalWrite(motorBForward, LOW);
  digitalWrite(motorBBackward, HIGH);

  analogWrite(motorASpeed, 255); // Full speed
  analogWrite(motorBSpeed, 255); // Full speed
}

void stopMotors() {
  digitalWrite(motorAForward, LOW);
  digitalWrite(motorABackward, LOW);
  digitalWrite(motorBForward, LOW);
  digitalWrite(motorBBackward, LOW);

  analogWrite(motorASpeed, 0); // Stop
  analogWrite(motorBSpeed, 0); // Stop
}
4.3. Identifying the Serial Port on Jetson Nano
After connecting the ESP32, identify the serial port assigned to it.
1. List Serial Devices:
ls /dev/ttyUSB* /dev/ttyACM*- Possible Outputs:
/dev/ttyUSB0
/dev/ttyACM0
My port is
/dev/ttyACM0
4.4. Setting Serial Port Permissions
Ensure your user has the necessary permissions to access the serial port.
- Add User to dialout Group:
sudo usermod -a -G dialout $USER

4.5. Creating the ROS Package for Motor Control
We'll create a ROS package that sends serial commands to the ESP32 based on ROS topics or node logic (e.g., obstacle avoidance).
4.5.1. Create the motor_control ROS Package
1. Navigate to Your Catkin Workspace's Source Directory:
cd ~/catkin_ws/src
2. Create the Package:
catkin_create_pkg motor_control rospy std_msgs4.5.2. Develop the Motor Control Node
1. Navigate to the Package's Scripts Directory:
mkdir -p ~/catkin_ws/src/motor_control/scripts
cd ~/catkin_ws/src/motor_control/scripts
2. Create the motor_control_node.py Script:
nano motor_control_node.py*code
#!/usr/bin/env python3
import rospy
import serial
from std_msgs.msg import String

class MotorControlNode:
    def __init__(self):
        rospy.init_node('motor_control_node', anonymous=True)

        # Serial port parameters
        serial_port = rospy.get_param('~serial_port', '/dev/ttyACM0')  # Update as needed
        baud_rate = rospy.get_param('~baud_rate', 115200)

        try:
            self.ser = serial.Serial(serial_port, baud_rate, timeout=1)
            rospy.loginfo(f"Connected to ESP32 on {serial_port} at {baud_rate} baud.")
        except serial.SerialException as e:
            rospy.logerr(f"Failed to connect to ESP32 on {serial_port}: {e}")
            rospy.signal_shutdown("Serial connection failed.")

        # Subscriber to 'motor_command' topic
        rospy.Subscriber('motor_command', String, self.command_callback)

    def command_callback(self, msg):
        command = msg.data.upper()
        if command in ['F', 'B', 'L', 'R', 'S']:
            rospy.loginfo(f"Sending command to ESP32: {command}")
            try:
                self.ser.write(command.encode())
            except serial.SerialException as e:
                rospy.logerr(f"Failed to send command: {e}")
        else:
            rospy.logwarn(f"Received unknown command: {command}")

    def run(self):
        rospy.spin()

if __name__ == '__main__':
    node = MotorControlNode()
    node.run()
4. Make the Script Executable:
chmod +x motor_control_node.py
4.5.3. Update package.xml and CMakeLists.txt
- Edit package.xml:
nano ~/catkin_ws/src/motor_control/package.xml- Ensure the Following Dependencies Are Listed:
<build_depend>rospy</build_depend>
<build_depend>std_msgs</build_depend>
<exec_depend>rospy</exec_depend>
<exec_depend>std_msgs</exec_depend>
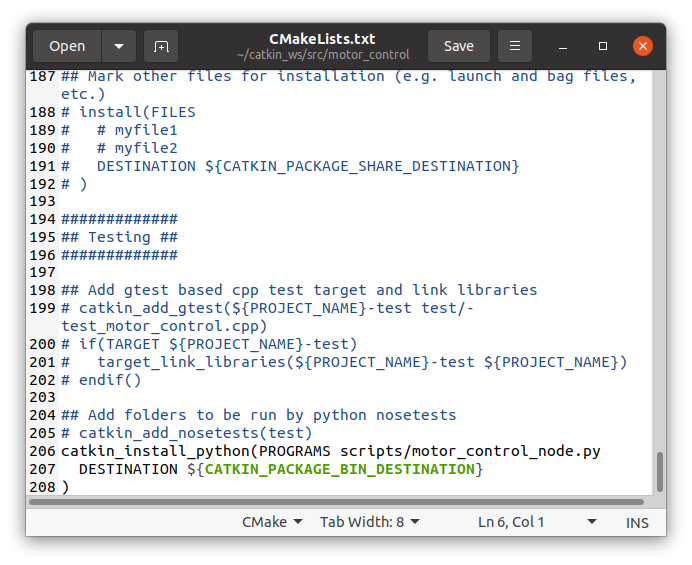
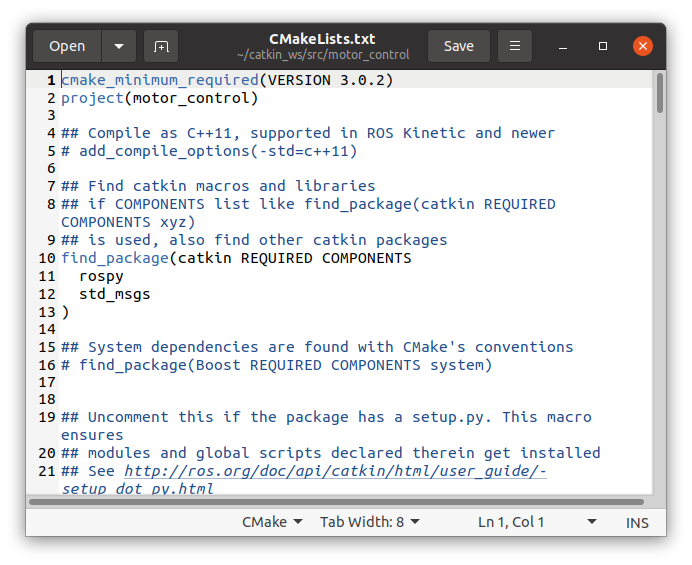
- Edit CMakeLists.txt:
nano ~/catkin_ws/src/motor_control/CMakeLists.txt- Add the Following Lines at the End:
catkin_install_python(PROGRAMS scripts/motor_control_node.py
  DESTINATION ${CATKIN_PACKAGE_BIN_DESTINATION}
)
- Ensure You Have the Following Lines for Dependencies:
find_package(catkin REQUIRED COMPONENTS
  rospy
  std_msgs
)
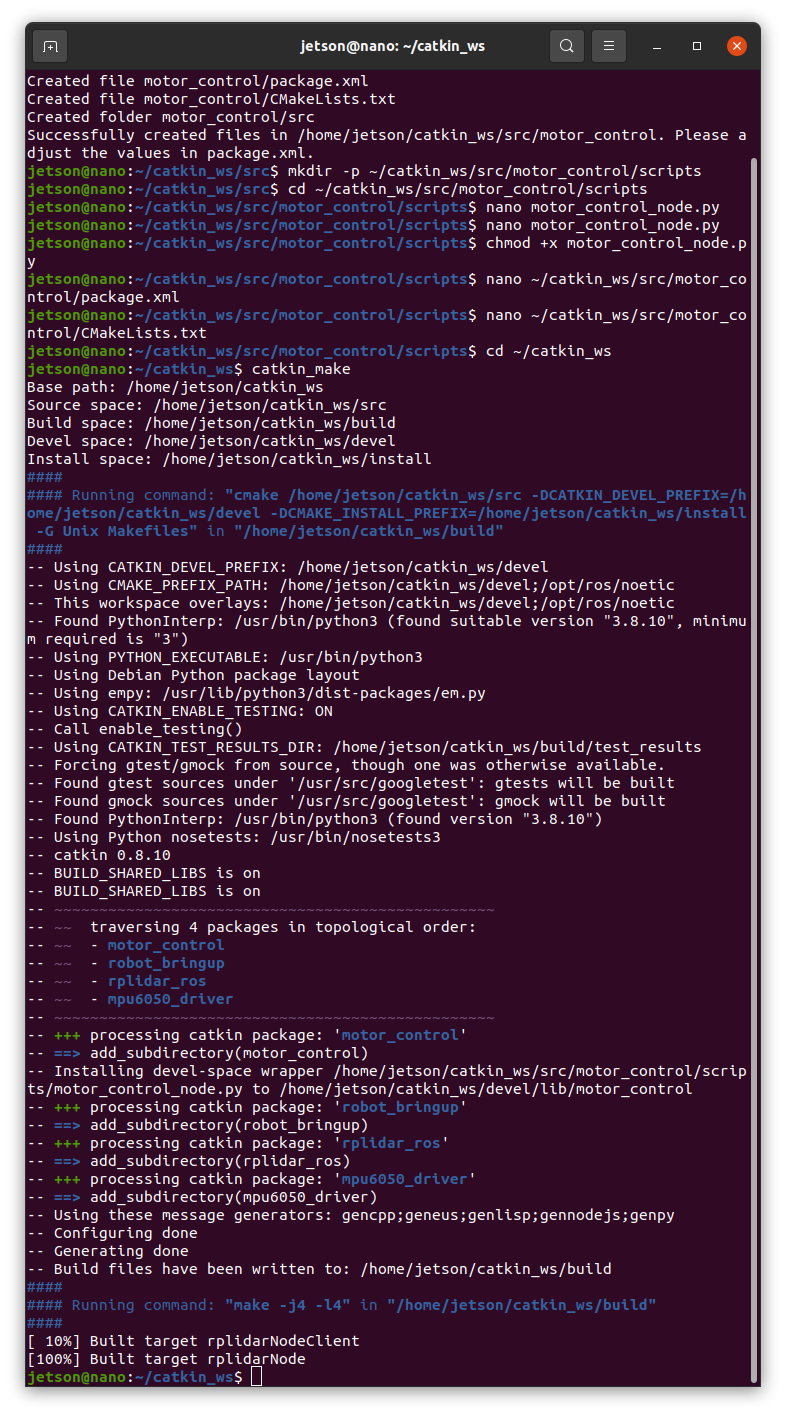
4.5.4. Build the ROS Package
- Navigate to Your Catkin Workspace:
cd ~/catkin_ws- Build the Workspace:
catkin_make
-
Source the Workspace:
source devel/setup.bash
4.5.5. Create a Launch File for Motor Control
- Navigate to the Package's Launch Directory:
mkdir -p ~/catkin_ws/src/motor_control/launch
cd ~/catkin_ws/src/motor_control/launch- Create the motor_control.launch File:
nano motor_control.launch- Add the Following Content:
<launch>
  <node name="motor_control_node" pkg="motor_control" type="motor_control_node.py" output="screen">
    <!-- Parameters -->
    <param name="serial_port" value="/dev/ttyACM0"/> <!-- Update as needed -->
    <param name="baud_rate" value="115200"/>
  </node>
</launch>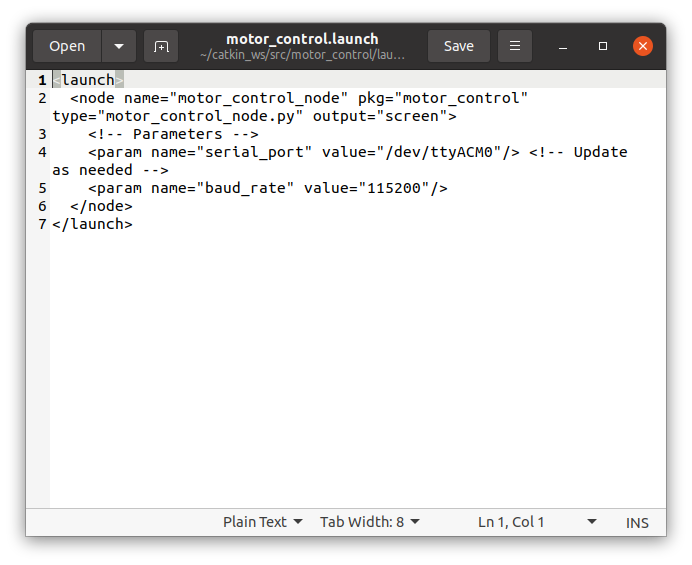
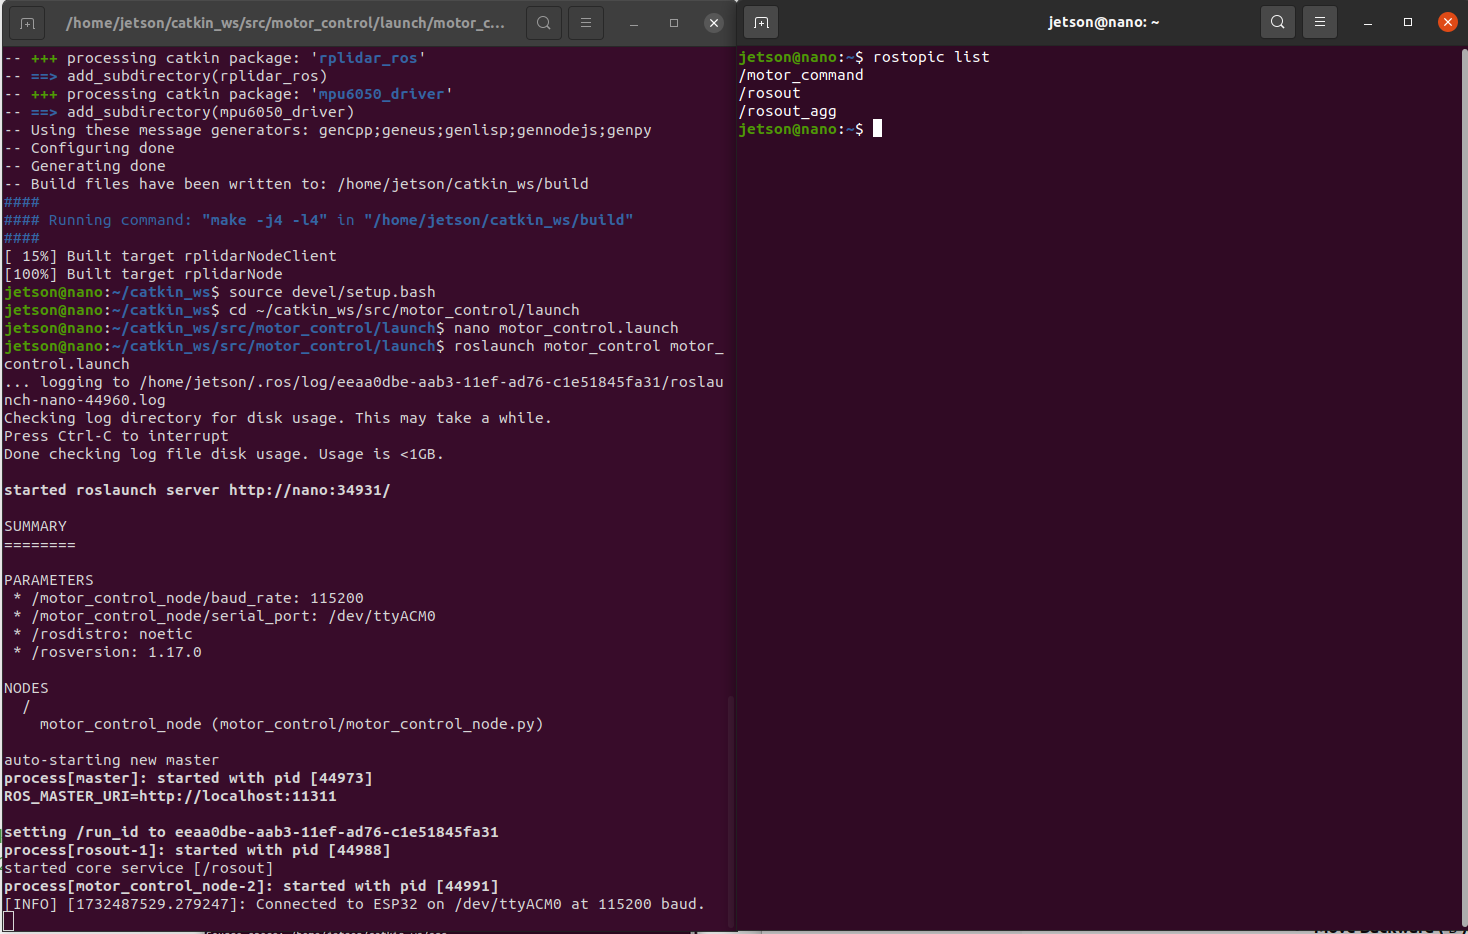
4.5.6. Launch the Motor Control Node
- Run the Launch File:
roslaunch motor_control motor_control.launchVerify Connection:
- Observe the terminal for logs indicating a successful connection.
- Ensure that sending commands to the motor_command topic results in motor actions.
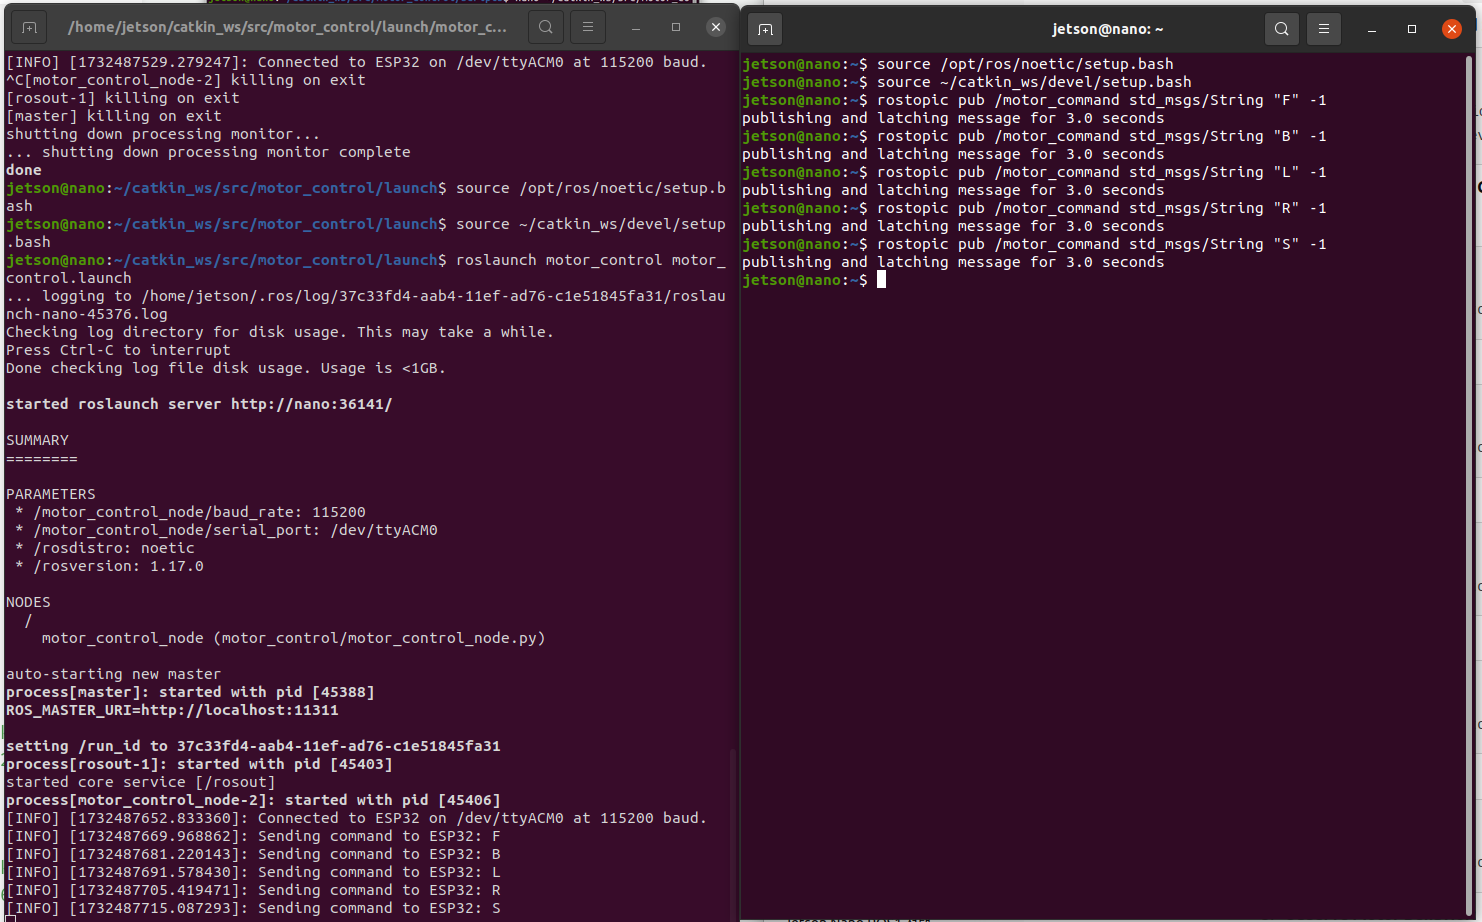
4.6. Testing the Motor Control Setup
4.6.1. Publish Commands to motor_command Topic
- Open a New Terminal and Source ROS Environment:
source /opt/ros/noetic/setup.bash
source ~/catkin_ws/devel/setup.bash-
Use rostopic to Publish Commands:
- Move Forward (F):
rostopic pub /motor_command std_msgs/String "F" -1- Move Backward (B):
rostopic pub /motor_command std_msgs/String "B" -1- Turn Left (L):
rostopic pub /motor_command std_msgs/String "L" -1- Turn Right (R):
rostopic pub /motor_command std_msgs/String "R" -1- Stop (S):
rostopic pub /motor_command std_msgs/String "S" -1