
1) 2023년 현재
ouster에서 제공하는 ros driver의 변동이 있었다.
1-1) 🛠설치
git 다운로드
https://github.com/ouster-lidar/ouster-ros
Requirements → Getting Started 순서로 따라 한다.
1-2) ❌오류
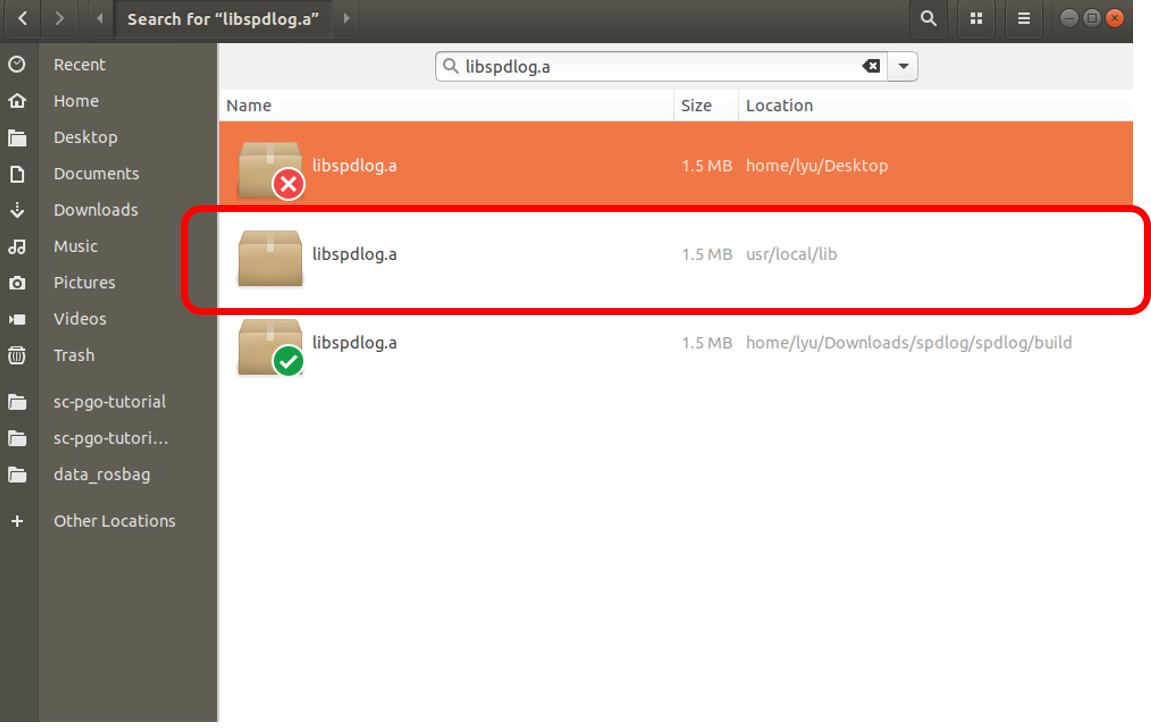
libspdlog.a의 링킹 오류가 발생
/usr/local/lib/libspdlog.a(spdlog.cpp.o): relocation R_X86_64_TPOFF32 against _ZGVZN6spdlog7details2os9thread_idEvE3tid' can not be used when making a shared object; recompile with -fPIC

1-3) ✅오류 해결
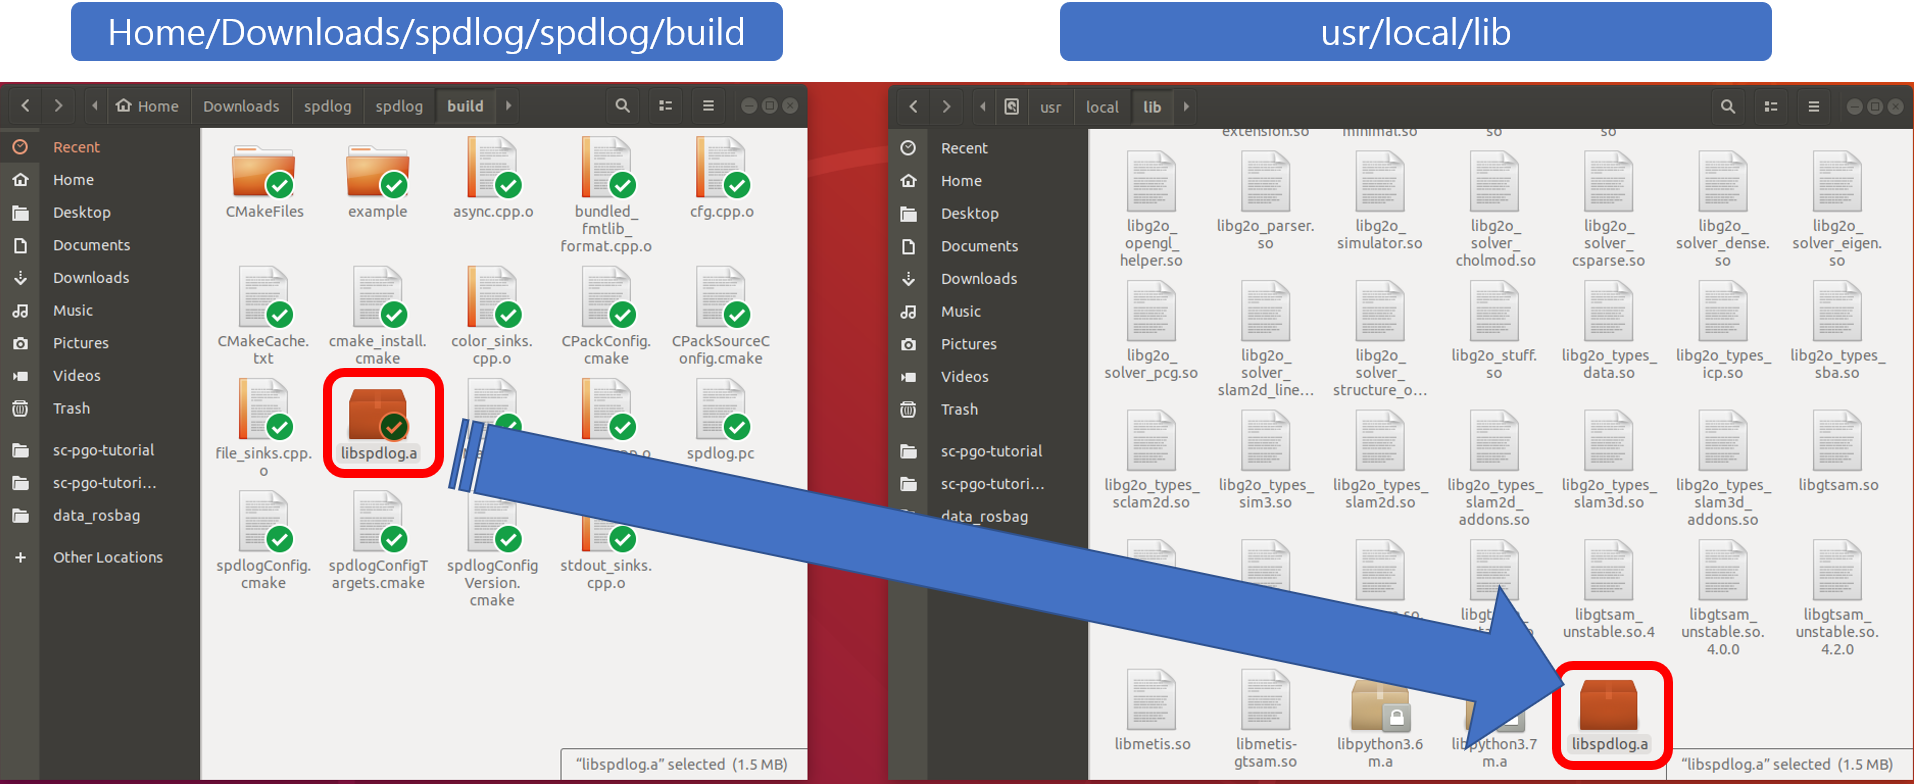
다음 명령어로 spdlog를 설치하고 spdlog 폴더의 build 안의 libspdlog.a 파일이 생성되었는지 확인
$ git clone https://github.com/gabime/spdlog.git
$ cd spdlog && mkdir build && cd build
$ cmake .. && make -j
$ make install
디스크 전체에서 libspdlog.a을 검색하고, 이 폴더에 쓰기, 읽기 권한을 부여(다음 단계에서 파일을 덮어쓰기 위함)
$ sudo chmod 777 usr/local/lib1번의 .a 파일을 2번 폴더에 덮어씀
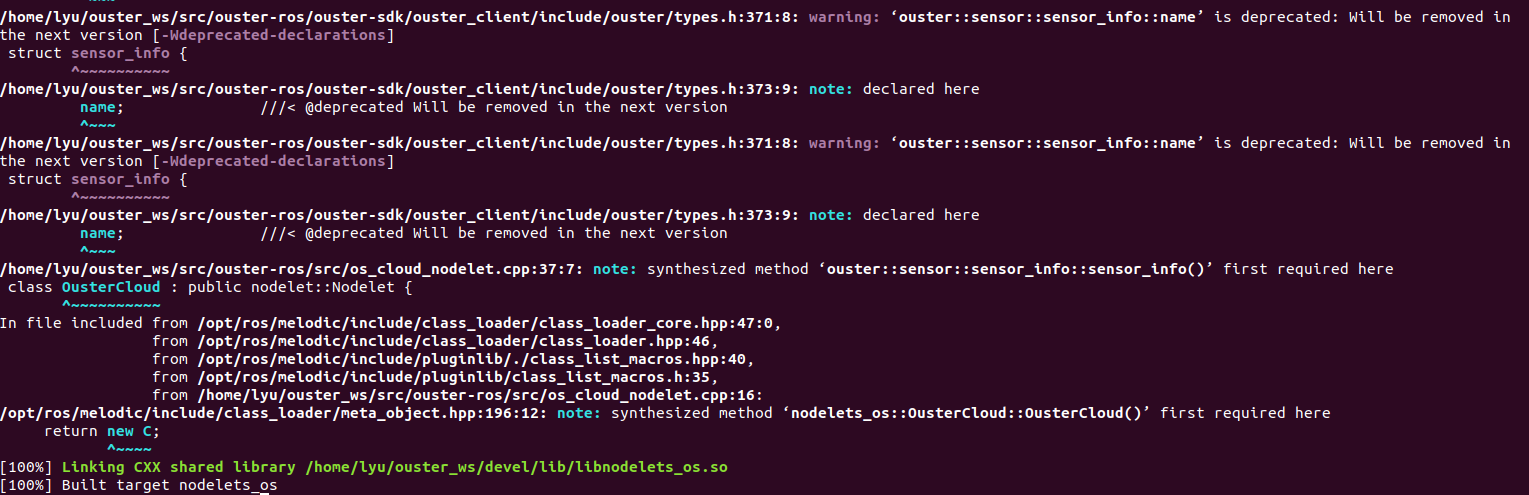
다시 make를 진행
2) 2023년 이전
pc 환경 : Ubuntu 18.04 melodic, ROS 1
OS1 초기 IP : 192.168.0.55
2-1) 🛠Build-up
2-1-1) apt-get 최신화
$ sudo apt-get update
$ sudo apt-get upgrade
2-1-2) gcc install
$ sudo add-apt-repository ppa:jonathonf/gcc-8.0
2-1-3) clang install
$ sudo apt-get install -y libc++-dev
$ sudo apt install clang-8
2-1-4) build
$ mkdir -p catkin_ws/src
$ cd catkin_ws/src
$ git clone https://github.com/ouster-lidar/ouster_example.git
$ cd ..
$ catkin_make - DCMAKE_BUILD_TYPE=Release
2-2) OS1 세팅
2-2-1) Linux
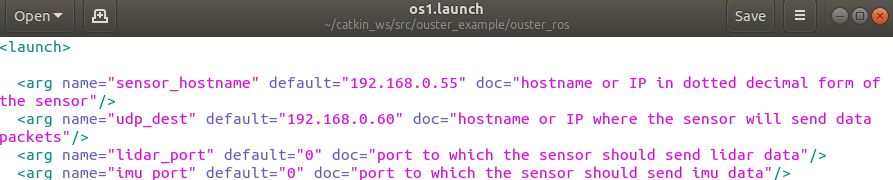
sensor_hostname : 192.168.0.55
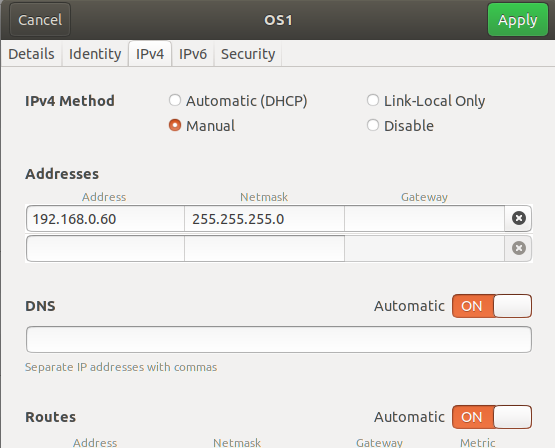
udp_dest : 192.168.0.60
PC 이더넷 ip : 192.168.0.60
UDP_dest와 PC 이더넷은 통일해야 한다.
os1.launch 파일은 /home/catkin_ws/src/ouster_example/ouster_ros 에 있다.
catkin_ws에서
source devel/setup.bash

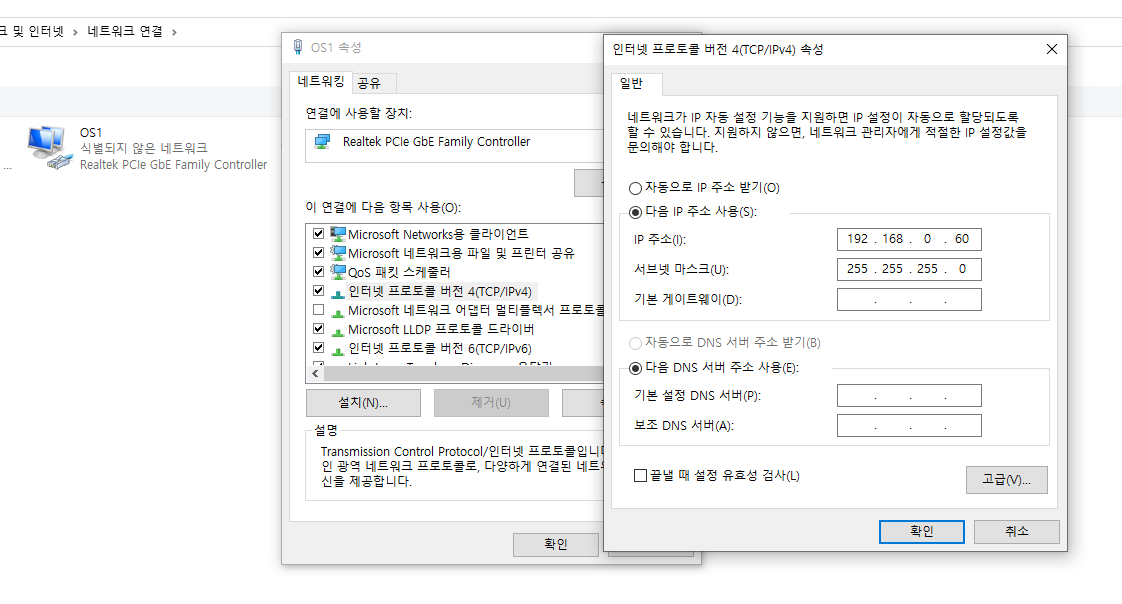
2-2-2) Window
이더넷 IP : 192.168.0.60
주소창에 192.168.0.55(본인들 OS 센서 고유 아이피) 입력
2-3). 실행
2-3-1) OS1 실행
$ roslaunch ouster_ros os1.launch metadata:=/home/lyu/meta.json
주의
$ roslaunch ouster_ros os1.launch metadata:=/home/<본인 pc 이름>/meta.json
2-3-2) rviz 실행
$ rviz
$ rostopic echo /os_cloud_node/points | grep frame
-> rviz에서 global의 os_sensor로 변경
2-3) 활용
-
토픽 확인
$ rostopic list -v -
ROS bag 녹화 :
$ rosbag record /os1_node/lidar_packets -
ROS bag 재생:
$ rosbag play 2022-01-14-18-04-51.bag -l --clock
(-l 은 무한 반복) -
ROS bag 시간 동기화
$ rosparam set use_sim_time true
파라매터 중 use_sim_time 를 활성화 시켜서 현재 시간이 아닌 bag 파일이 저장되었던 시점의 시간을 이용해야 문제가 없다. -
global frame_id 알기(rviz에 기입하기 위해)
$ rostopic echo /os1_cloud_node/points | grep frame_id
rostopic echo를 하는데 frame_id라고 출력되는 부분을 grep(잡다)하는 명령어 -
j.son 파일 받기
window 환경에서 Ouster Studio를 실행시켜 센서를 configuration 해준다.
그 후, Sensor Alerts에 들어가 Raw Alerts를 export 하여 센서 자체의 j.son 파일을 받는다.

-
Web Slam
OS사에서 제공하는 Web기반 Slam 사이트 이다. json 파일과 rosbag 데이터만 있으면 Slam을 해볼 수 있다.
2-4) Ouster Studio
ouster studio 에서 ouster studio linux 버전을 받고 풀면 bin 폴더 안에 실행 파일이 나온다.
$ ./OusterStudio로 실행한다.
2-5) ❌ 오류
만약 libpython3.7m.so.1.0: cannot open shared object file: No such file or directory 와 같은 오류가 발생하면, libpython3.7m.so.1.0이 / usr / lib에 포함되지 않아 초기화 중에 파일을 로드 할 수 없음을 뜻한다.
- 해결 방법
$ sudo apt-get install -y make build-essential libssl-dev zlib1g-dev libbz2-dev \
libreadline-dev libsqlite3-dev wget curl llvm libncurses5-dev libncursesw5-dev \
xz-utils tk-dev libffi-dev liblzma-dev
$ wget https://www.python.org/ftp/python/3.7.5/Python-3.7.5.tgz
$ tar xvf Python-3.7.5.tgz
$ cd Python-3.7.5
$ ./configure --enable-optimizations --enable-shared
$ make -j6
$ sudo make altinstall그 후
$ locate libpython3.7m으로 libpython3.7m.so.1.0 파일을 찾고,(필자의 경우 /usr/local/lib에 있었다.)
이를 /usr/lib에 복사해준다.
※경로는 각자 다르기 때문에 주의!
cp /usr/local/lib/libpython3.7m.so.1.0 /usr/lib이제 다시 ouster sudio를 실행시키면 실행이 될 것이다.
참고 : https://microeducate.tech/python3-7-error-while-loading-shared-libraries-libpython3-7m-so-1-0/
글 잘봤습니다
곧 Ouster OS1 모델을 사용 예정인데 유익한 글이네요
감사합니다 :)