개요
3D 게임에서 카메라가 고정된 상태로 입체적으로 다양한 정보를 제공하려면 쿼터뷰로 봐야합니다.
탑다운 뷰로 바라보면 옆면과 높이차를 알 수 없고, 사이드 뷰로 바라보면 바닥에 대한 정보를 알 수 없습니다.
따라서, 저는 간단한 맵을 만들고 해당 맵을 쿼터뷰로 바라보도록 카메라를 세팅해보겠습니다.
구현
대학교 1학년때 다들 기본적으로 수학을 배웁니다.
그 중 기초적으로 구면좌표계를 배우는데, 해당 내용을 활용하면 쉽게 만들 수 있습니다.
그게 아니라도, 삼각함수만 배우셨다면 쉽게 이해하실 수 있습니다.
CameraController
    [SerializeField] private float cameraArmLength;
    [SerializeField, Range(0, 90f)] private float verticalRotate;
    [SerializeField, Range(0, 90f)] private float horizontalRotate;
변수입니다. 3차원 구면좌표계에서 점을 나타내는 세 변수 입니다.
각각 반지름, 수평각, 수직각 입니다.
해당 변수들을 사용하여 특정 위치를 원점으로 하는 구면좌표에 카메라를 세팅하면 됩니다.
    // Calc Spherical to orthogonal coordinate
    private Vector3 CalcOrthoPos(Vector3 target)
    {
        float hAngle = Mathf.Deg2Rad * horizontalRotate;
        float vAngle = Mathf.Deg2Rad * verticalRotate;

        float oz = cameraArmLength * Mathf.Cos(vAngle) * Mathf.Cos(hAngle);
        float oy = cameraArmLength * Mathf.Sin(vAngle);
        float ox = cameraArmLength * Mathf.Cos(vAngle) * Mathf.Sin(hAngle);

        return new Vector3(-ox, oy, -oz);
    }
위 함수는 target을 원점으로 하는 구면좌표를 반환합니다.
이 좌표값을 바로 카메라에 세팅해주기만 하면 됩니다.
    public void SetQuaterView(Vector3 target)
    {
        camTarget = target;
        transform.position = target + CalcOrthoPos(target);
        transform.rotation = Quaternion.Euler(new Vector3(verticalRotate, horizontalRotate, 0f));
    }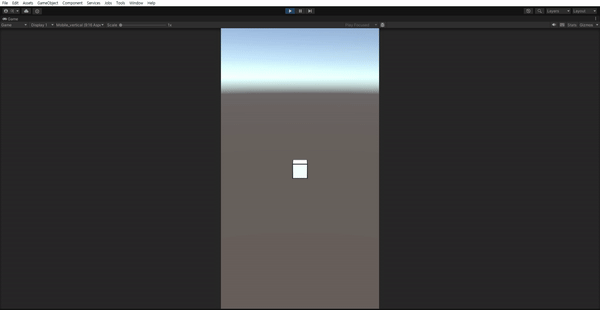
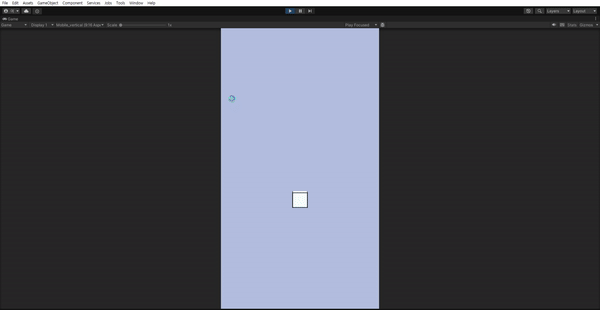
이렇게하면 위처럼 카메라를 회전시킬 수 있습니다.
이제 간단한 맵을 만들어보겠습니다.
우선, 정보를 저장하기 위한 GridInfo와 그 정보를 가지고 Monobehavior를 상속받는 MapGrid 클래스로 나누겠습니다.
GridInfo
public enum GridState { NONE = 0, START, CAMERA }

public class GridInfo {

    private Vector2Int pos;
    private int height;
    private GridState state;
    private ColorSet colorSet;

    public Vector2Int Pos { get { return pos; } }
    public int Height { get { return height; } }
    public GridState State { get { return state; } }
    public ColorSet Colorset {  get { return colorSet; } }

    public GridInfo(Vector2Int pos, int height, int colorIdx, int state = 0)
    {
        this.pos = pos;
        this.height = height;
        this.state = (GridState)state;
        colorSet = new ColorSet(ColorConstants.COLORARR[colorIdx]);
    }
}
GridInfo 맵의 각 칸에 대한 정보를 담고있습니다.
각 칸의 위치와 높이를 정확하게 계산하기 위해 전부 정수로 저장했습니다.
GridState는 시작하는 칸, 카메라 타겟 등 추가적인 정보를 전달합니다.
ColorSet 은 다음에 색상에 대해 다시 다루겠습니다.
MapGrid
public class MapGrid : MonoBehaviour
{
    private GridInfo gridinfo;
    public GridInfo Gridinfo { get { return gridinfo; } }


    // Process Grid According to GridState
    public void InitMapGrid(GridInfo info)
    {
        gridinfo = info;
        GetComponent<Renderer>().material.color = info.Colorset.GetColor();

        switch (info.State)
        {
            case GridState.NONE: break;
            case GridState.START:
                break;
            case GridState.CAMERA:
                Camera.main.GetComponent<CameraController>().SetQuaterView(transform.position - new Vector3(0, transform.position.y, 0));
                break;

        }
    }

    public void AppearGrid(float duration = 1f)
    {
        transform.DOMoveY(gridinfo.Height * Constant.GRID_SIZE - transform.localScale.y/2 - Constant.BOX_SIZE/2, duration).SetEase(Ease.InOutElastic);
    }

}
GridInfo 로 정보를 받고 각 프리팹을 관리해주는 클래스입니다.
정보를 받으면 바로 InitMapGrid 를 호출합니다. 상태, 색상에 따라 처리를 해줍니다.
아래의 AppearGrid는 DOTWEEN을 사용한 위에서 떨어지는 효과입니다.
저번에 만들었던 박스의 크기와 맵 그리드의 크기도 고려하여 아래로 낮춰줍니다.
정보를 저장했으면 저장된 정보를 가지고 맵을 만들어야 합니다.
MapGenerator
    [Header("Grid Variables")]
    [SerializeField] private GameObject gridPrefab;
    [Space(10)]

    [Header("Map Appear Effect")]
    [SerializeField] private float fallDuration;
    [SerializeField] private float timeBetweenFall;
    [SerializeField] private int camOffY;
    [Space(10)]

    private MapGrid[,] mapGrids;
맨 아래의 mapGrids 에서 현재 진행중인 퍼즐 스테이지의 맵 정보를 관리합니다.
하지만, json과 같은 파일에서는 1차원 배열로 정보가 주어집니다. 이것부터 해결하겠습니다.
    // Generate Map by List1D
    // TODO : Create 2DArray_Map to manage BoxControl
    private void GenerateMap(ref List<GridInfo> mapArr, int wh)
    {
        mapGrids = new MapGrid[wh, wh];

        GridInfo grid;

        for (int i = 0; i < mapArr.Count; i++)
        {
            grid = mapArr[i];
            mapGrids[grid.Pos.y, grid.Pos.x] = Instantiate(gridPrefab, new Vector3(grid.Pos.x, 0, grid.Pos.y) * Constant.GRID_SIZE + new Vector3(0, camOffY, 0), Quaternion.identity, transform).GetComponent<MapGrid>();
            mapGrids[grid.Pos.y, grid.Pos.x].transform.localScale = Vector3.one * Constant.GRID_SIZE;
            mapGrids[grid.Pos.y, grid.Pos.x].InitMapGrid(grid);

        }

        StartCoroutine(GridAppearEff(fallDuration));
        return;
    }
wh 변수로 맵의 크기에 대한 정보를 받고 배열을 할당합니다.
후에 GridInfo 안에 저장되어있는 Position 정보를 통해 배열에 저장합니다.
맵에 빈칸이 있을 수 있기 때문에 차례대로 저장하지 않았습니다.
여기까지 한 번 테스트 해보겠습니다.
    // Test Init
    private void TestInit()
    {
        List<GridInfo> mapArrs = new List<GridInfo>();
        mapArrs.Add(new GridInfo(new Vector2Int(0, 0), 0, 7, 1));
        mapArrs.Add(new GridInfo(new Vector2Int(0, 1), 0, 1));
        mapArrs.Add(new GridInfo(new Vector2Int(0, 2), 0, 7));
        mapArrs.Add(new GridInfo(new Vector2Int(0, 3), 0, 7));
        mapArrs.Add(new GridInfo(new Vector2Int(0, 4), 0, 2));
        mapArrs.Add(new GridInfo(new Vector2Int(1, 0), 0, 7));
        mapArrs.Add(new GridInfo(new Vector2Int(1, 1), 0, 3));
        mapArrs.Add(new GridInfo(new Vector2Int(1, 2), 0, 7));
        mapArrs.Add(new GridInfo(new Vector2Int(1, 3), 0, 7));
        mapArrs.Add(new GridInfo(new Vector2Int(1, 4), 0, 7));
        mapArrs.Add(new GridInfo(new Vector2Int(2, 1), 0, 7));
        mapArrs.Add(new GridInfo(new Vector2Int(2, 2), 0, 7, 2));
        mapArrs.Add(new GridInfo(new Vector2Int(2, 3), 0, 7));
        mapArrs.Add(new GridInfo(new Vector2Int(2, 4), 0, 7));
        mapArrs.Add(new GridInfo(new Vector2Int(3, 0), 0, 7));
        mapArrs.Add(new GridInfo(new Vector2Int(3, 1), 0, 7));
        mapArrs.Add(new GridInfo(new Vector2Int(3, 2), 0, 7));
        mapArrs.Add(new GridInfo(new Vector2Int(3, 3), 0, 0));
        mapArrs.Add(new GridInfo(new Vector2Int(3, 4), 0, 7));
        mapArrs.Add(new GridInfo(new Vector2Int(4, 0), 1, 7));
        mapArrs.Add(new GridInfo(new Vector2Int(4, 1), 1, 7));
        mapArrs.Add(new GridInfo(new Vector2Int(4, 2), 1, 7));
        mapArrs.Add(new GridInfo(new Vector2Int(4, 3), 1, 7));
        mapArrs.Add(new GridInfo(new Vector2Int(4, 4), 1, 7));

        GenerateMap(ref mapArrs, 5);
    }
마무리
이렇게 맵을 만들고 카메라를 쿼터뷰로 설정해보았습니다.
하지만 사람마다 원하는 시점이 다를 것이라고 생각합니다.
아래는 제가 생각하기에 개선이 필요한 부분들입니다.
추가할 점
- 2, 3개의 카메라 시점 프리셋을 지정하여 변경 가능하도록 수정
- 맵이 더 커질 수 있음. 맵의
wh에 따라 카메라 암 길이, 혹은Field of View값 변경하도록 수정
이번에는 글이 길어져서 ColorSet 에 대해 다루지는 못했습니다.
다음에 플레이어 박스의 색과 상호작용할 때 다루도록 하겠습니다.
참고자료
https://ko.wikipedia.org/wiki/%EA%B5%AC%EB%A9%B4%EC%A2%8C%ED%91%9C%EA%B3%84