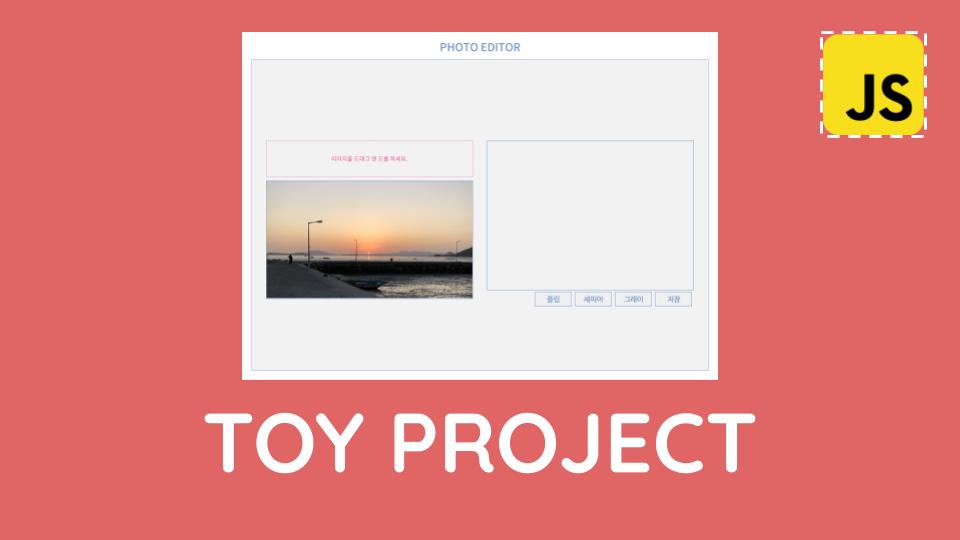
자바스크립트의 canvas를 이용해 드래그앤드롭으로 이미지파일을 끌어와 크롭할 수 있고, 간단한 효과를 줄 수 있는 포토 에디터를 구현하는 토이 프로젝트를 해보았다.
목표
-
이미지파일을 드래그해서 input영역에 놓으면 이미지 파일을 띄우는 기능 구현
-
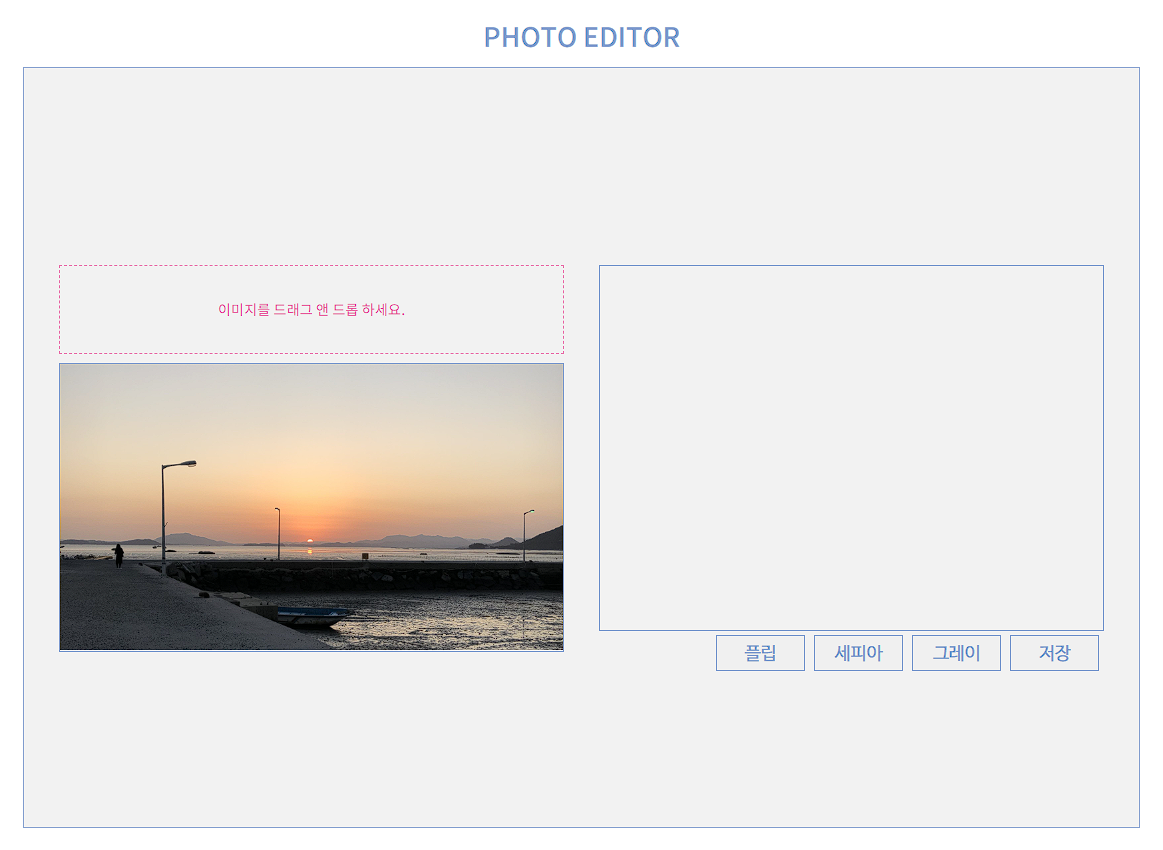
canvas를 이용해 이미지를 편집할 영역과 크롭된 이미지를 띄우고 효과를 적용하는 영역 구현
-
편집 영역에서 마우스의 움직임으로 선택할 영역 지정하는 기능 구현
-
좌우반전효과인 플립, 세피아효과, 회색조효과를 주는 기능 + 다운로드 기능 구현
1. HTML
<div class="drag_area">
	이미지를 드래그 앤 드롭 하세요.
	<input type="file" />
</div>
이런식으로 drag영역의 div태그 안에 input태그의 type을 file로 지정해 html 구조를 작성하고,
<div class="canvas_wrap">
	<canvas class="canvas"></canvas>
	<img
		src="./assets/sample.jpg"
		alt="sample"
		class="fileImage"
	/>
</div>
canvas 태그를 이용해 canvas를 생성해준다
2. 기본 선언
   'use strict'

   const get = (element) => document.querySelector(element)
use strict로 엄격모드 코드를 넣고,
<편하게 반복되는 코드를 작성하기 위해 유틸성 함수인 get함수를 선언>
querySelector를 이용해 돔을 불러올 get( )함수를 선언해준다
3. 클래스 선언
   class PhotoEditor {
     // 이곳에 기능들을 작성할 예정
   }
   new PhotoEditor()
PhotoEditor 기능들을 묶어 클래스로 만들기 위해 클래스 선언을 해준다.
4. 생성자함수로 값 설정
      constructor() {
         this.container = get('main')
         this.canvas = get('canvas')
         this.ctx = this.canvas.getContext('2d')
         this.width = 700 // 기본 이미지의 사이즈가 될 width와 height
         this.height = 411
         this.minSize = 20 // 이미지 크롭이 적용되게 할 최소 사이즈
         this.canvas.width = this.width
         this.canvas.height = this.height
         this.ctx.lineWidth = 4 // 이미지 크롭 시 영역 지정 테두리표시
         this.ctx.strokeStyle = '#ff0000' // 크롭시 영역 지정을 나타낼 테두리의 색
        // target이 붙은 것들은 모두 결과물 이미지가 보여질 영역관련
         this.targetImage = get('.image_wrap')
         this.targetCanvas = document.createElement('canvas')
         this.targetCtx = this.targetCanvas.getContext('2d')
         this.targetWidth
         this.targetHeight
        // source~ 사이즈 조절과 관련
         this.sourceX
         this.sourceY
         this.sourceWidth
         this.img = new Image()
         this.btnFlip = get('.btn_flip')
         this.btnSepia = get('.btn_sepia')
         this.btnGray = get('.btn_gray')
         this.btnSave = get('.btn_save')
         this.fileDrag = get('.drag_area')
         this.fileInput = get('.drag_area input')
         this.fileImage = get('.fileImage')
         this.clickEvent()
         this.fileEvent()
         this.drawEvent()
      }
클래스 생성 함수 내부에 생성자 함수 constructor( )을 이용해 앞으로 필요한 변수들과 값을 정의해준다.
5. Drag & Drop 기능 구현
// 파일 삽입 이벤트 함수 (드래그 앤 드롭)
  fileEvent() {
     this.fileInput.addEventListener('change', (event) => {
          // fileInput 돔에 input 값이 변화했을 시를 위한 이벤트를 등록해
        const fileName = URL.createObjectURL(event.target.files[0])
          // 이벤트 타겟 첫번째 파일의 url객체를 fileName으로 할당
        const img = new Image()
        img.addEventListener('load', (e) => {
           // 이미지 객체를 만들어 로드 이벤트를 등록해
           this.width = e.path[0].naturalWidth
           this.height = e.path[0].naturalHeight
        }) // 로드가 될때 이미지의 원래 크기값을 따로 저장하도록
        this.fileImage.setAttribute('src', fileName)
        // 그리고 fileImage돔의 src속성을 로드할 이미지 url이 담겨있는 fileName으로 설정해줌
     })
  }
'change'이벤트를 이용해 input 값의 변화에 따른 동작을 하도록 하고,
input값으로 들어온 첫번째 파일을 URL.createObjectURL( )을 이용해 url객체 생성
Image객체를 만들어 'load'이벤트를 통해 이미지가 로드가 될 때, this.width / this.height에 이미지의 원래 너비와 높이값을 할당해주고, fileImage돔 src값으로 이미지url을 넣어준다.
6. 이미지 크롭 기능 구현
// 크롭 기능 구현을 위한 이벤트 함수
  drawEvent() {
     const canvasX = this.canvas.getBoundingClientRect().left
       // 캔버스가 시작하는 x좌표를 가져오기 위해 getBoundingClientRect().left
     const canvasY = this.canvas.getBoundingClientRect().top
       // 캔버스가 시작하는 y좌표를 가져오기 위해 getBoundingClientRect().top
     let sX, sY, eX, eY // 시작 x,y 좌표값, 끝 x,y 좌표값을 변수로 선언해줌
     let drawStart = false // 크롭을 시작했다는 것을 의미하는 drawStart변수를 만들어 false로

     this.canvas.addEventListener('mousedown', (e) => {
        // 마우스를 누르기 시작하면 이벤트 발생
        sX = parseInt(e.clientX - canvasX, 10) // 캔버스 안에서의 x좌표
        sY = parseInt(e.clientY - canvasY, 10) // 캔버스 안에서의 y좌표
        drawStart = true
     })

     this.canvas.addEventListener('mousemove', (e) => {
        if (!drawStart) return // 마우스를 누른 채로 이동하지 않았을 경우 그냥 아무일도 없이
        eX = parseInt(e.clientX - canvasX, 10)
        eY = parseInt(e.clientY - canvasY, 10)
        this.ctx.clearRect(0, 0, this.canvas.width, this.canvas.height)
       	 // 캔버스 깨끗하게 지우기 (원래상태로)
        this.ctx.strokeRect(sX, sY, eX - sX, eY - sY)
         // 마우스를 이동한 좌표를 계산해 그 영역만큼 사각형 그리기
         // (시작x좌표, 시작y좌표, 넓이, 높이)
     })

     this.canvas.addEventListener('mouseup', () => {
        // 마우스 뗄 때 동작할 함수
        drawStart = false

        if ( // 미리 지정한 최솟값보다 작게 영역을 선택하면 크롭기능이 적용되지 않도록 함
           Math.abs(eX - sX) < this.minSize ||
           Math.abs(eY - sY) < this.minSize
        ) {
           return
        }
        this.drawOutput(sX, sY, eX - sX, eY - sY)
          // 결과물을 보여주는 함수에 크기 값을 넘김
     })
  }
이미지를 크롭하는 기능을 캔버스와 마우스의 좌표값을 이용해 위와 같이 구현한다.
7. 결과물 보여줄 함수 구현
  drawOutput(x, y, width, height) {
     this.targetImage.innerHTML = ''
     if (Math.abs(width) <= Math.abs(height)) {
        // 크롭한 이미지가 가로너비가 세로보다 작을 때
        this.targetHeight = this.height // 우선 세로는 원본 세로 크기로 맞춰주고
        this.targetWidth = (this.targetHeight * width) / height // 비율 맞춰주는 계산
     } else { // 아닐 경우
        this.targetWidth = this.width // 너비를 맞춰줌
        this.targetHeight = (this.targetWidth * height) / width
     }
     // 캔버스 크기 조절
     this.targetCanvas.width = this.targetWidth
     this.targetCanvas.height = this.targetHeight

     // 이미지가 로드됐을 시 작동할 함수
     this.img.addEventListener('load', () => {
        const buffer = this.img.width / this.width
        this.sourceX = x * buffer
        this.sourceY = y * buffer
        this.sourceWidth = width * buffer
        this.sourceHeight = height * buffer
        this.targetCtx.drawImage(
           this.img,
           this.sourceX,
           this.sourceY,
           this.sourceWidth,
           this.sourceHeight,
           0,
           0,
           this.targetWidth,
           this.targetHeight
        )
     })

     // 결과물을 보여주는 targetImage돔에 이미지 삽입해줌
     this.img.src = this.fileImage.getAttribute('src')
     this.targetImage.appendChild(this.targetCanvas)
  }
화면에 이미지를 적당한 비율로 보여줄 수 있도록 계산해 크기를 지정해주고, drawImage( ) 메서드를 이용해 이미지를 그린다. 그리고 그렇게 그린 이미지를 맞는 위치에 삽입해주면 끝!
12. 효과 버튼들 기능 구현하기
  clickEvent() {
     this.btnFlip.addEventListener('click', this.flipEvent.bind(this))
     this.btnSepia.addEventListener('click', this.sepiaEvent.bind(this))
     this.btnGray.addEventListener('click', this.grayEvent.bind(this))
     this.btnSave.addEventListener('click', this.download.bind(this))
  }

// 좌우반전 기능버튼
  flipEvent() {
     this.targetCtx.translate(this.targetWidth, 0)
     this.targetCtx.scale(-1, 1)
     this.targetCtx.drawImage(
        this.img,
        this.sourceX,
        this.sourceY,
        this.sourceWidth,
        this.sourceHeight,
        0,
        0,
        this.targetWidth,
        this.targetHeight
     )
  }

// 세피아 효과 버튼
  sepiaEvent() {
     this.targetCtx.clearRect(0, 0, this.targetWidth, this.targetHeight)
     this.targetCtx.filter = 'sepia(1)'
     this.targetCtx.drawImage(
        this.img,
        this.sourceX,
        this.sourceY,
        this.sourceWidth,
        this.sourceHeight,
        0,
        0,
        this.targetWidth,
        this.targetHeight
     )
  }

// 회색조 효과 버튼
  grayEvent() {
     this.targetCtx.clearRect(0, 0, this.targetWidth, this.targetHeight)
     this.targetCtx.filter = 'grayscale(1)'
     this.targetCtx.drawImage(
        this.img,
        this.sourceX,
        this.sourceY,
        this.sourceWidth,
        this.sourceHeight,
        0,
        0,
        this.targetWidth,
        this.targetHeight
     )
  }

// 다운로드 버튼
  download() {
     const url = this.targetCanvas.toDataURL()
     const downloader = document.createElement('a')
     downloader.style.display = 'none'
     downloader.setAttribute('href', url)
     downloader.setAttribute('download', 'canvas.png')
     this.container.appendChild(downloader)
     downloader.click()
     // 이렇게 생성된 다운로드 기능의 a태그를 삭제하지 않으면 계속 생성이 될 것
     // setTimeout으로 거의 바로 삭제가 되도록 아래와같이 코드 작성
     setTimeout(() => {
        this.container.removeChild(downloader)
     }, 100)
  }
각각의 기능들을 하는 함수를 작성한 다음, 그 기능들의 이벤트 함수를 clickEvent( )함수로 묶어준다.
12. 위 코드들을 즉시실행 함수로 감싸주기
코드들을 즉시실행 함수로 감싸 변수충돌을 방지해준다.