❖ API 인증을 해야 하는 이유
인증(authentication)을 요구하는 API
- 앞서 사용했던 API는 간단하고 단순한 데이터였기 때문에 누구든 무료로 접근 가능
- 기상예측처럼 더욱 복잡하고 가치있는 데이터는 유료로 제공됨
- 테스트 또는 학습 용도로만 사용하는 경우를 위해 무료 버전도 존재
- 해당 서비스에 많은 사용자가 있을 경우에는 유료 버전이 합리적
API 키(key)- 무료 버전의 남용을 방지하기 위해 사용
- 개인 계정번호, 비밀번호와 비슷
- 사용자가 API를 얼마나 사용하는 지 추적하여 한도를 초과하면 액세스를 거부함
- 사용자가 API 제공자에게 스스로를 인증하는 방법 중 가장 일반적으로 사용됨
🗂️ Day35 프로젝트 : 비 알리미 앱
비가 올 예정이라면 아침에 외출하기 직전에 SMS를 보내는 애플리케이션
1. API 키로 인증하고 날씨 데이터 가져오기
🔍 유의 사항
- OpenWeather
- 자신만의 API 키를 받으려면 OpenWeather에 계정을 만들어야 한다
- 인증되지 않은 키를 입력하면 데이터를 받을 수 없음
- My API Keys → 키 이름 작성 후 키 생성 → 복사
강의와 달리 매 시간대별 기상예측은 현재 유료이기 때문에 가능한 API로 대체- Call 5 day / 3 hour forecast data
- 앞으로 5일동안의 기상예측 데이터(3시간 간격 측정)를 제공받는 API
- 엔드포인트 :
https://api.openweathermap.org/data/2.5/forecast- 매개변수 : lat=위도, lon=경도, appid=API 키, cnt=타임스탬프 개수
⌨️ main.py
import requests
endpoints = "https://api.openweathermap.org/data/2.5/forecast"
api_key = "고유 API 키"
weather_params = {
"lat": 13.756331,
"lon": 100.501762,
"appid": api_key,
"cnt": 8
}
response = requests.get(endpoints, params=weather_params)
response.raise_for_status()
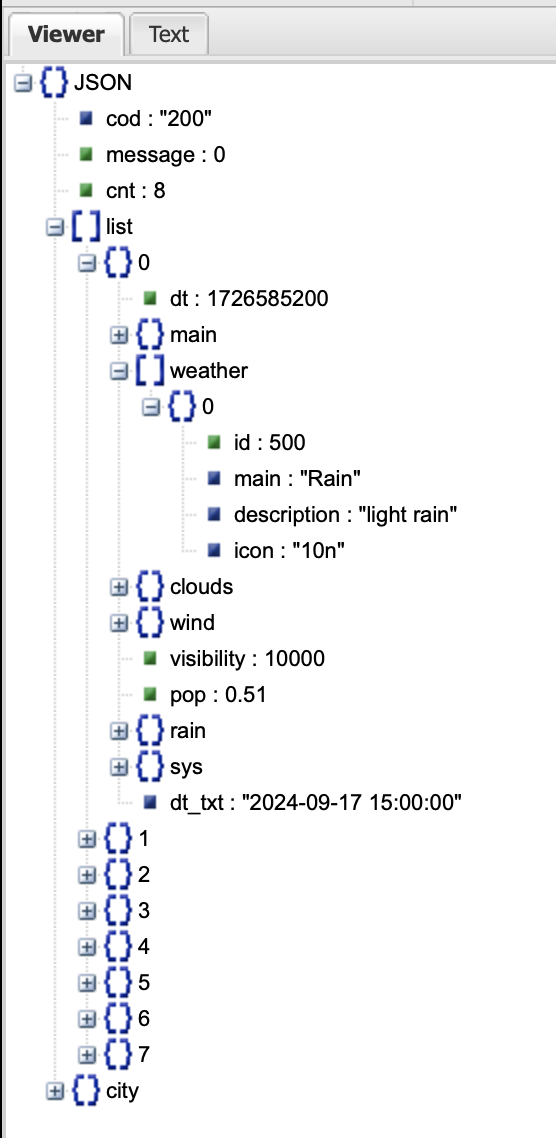
print(response.json())출력 결과를 Online JSON Viewer and Formatter 에서 정리
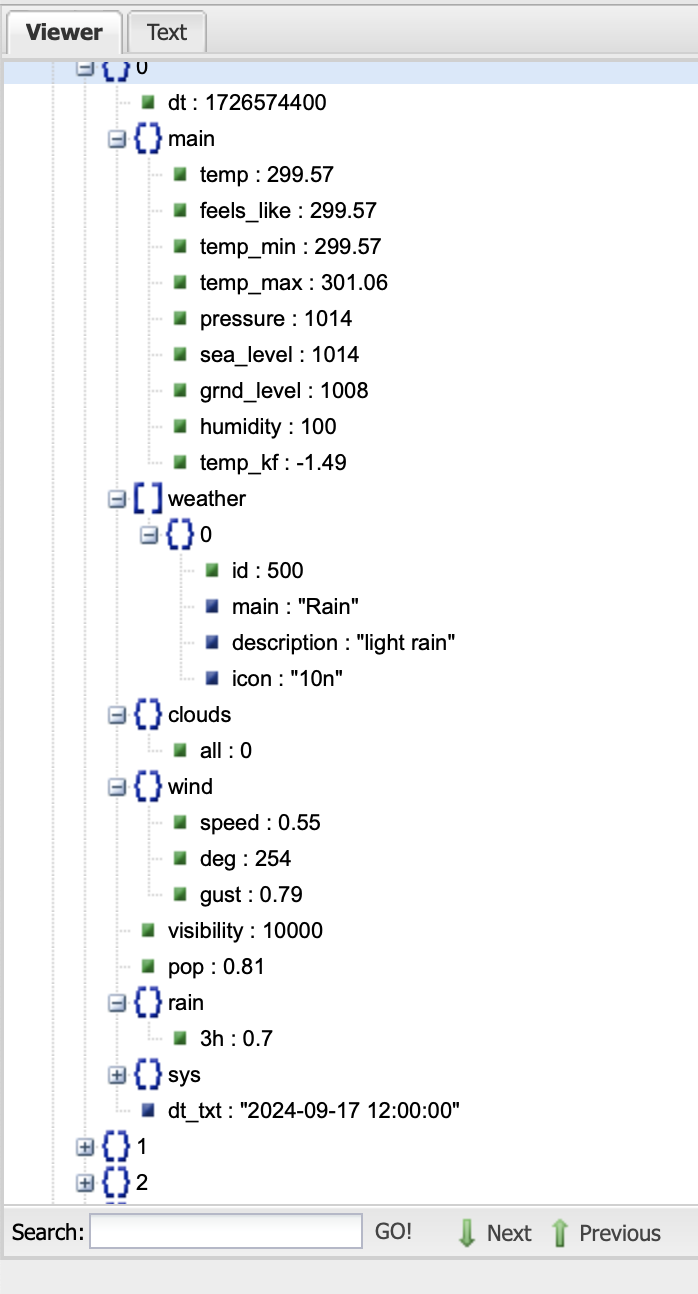
- 0시, 3시, 6시, 9시, 12시, 15시, 18시, 21시마다 예측
- 현재 시간에서 2단계 전(지금 21시에서 0시 사이일 경우 15시부터)부터 시작
2. 앞으로 12시간 안에 비가 올지 확인하기
🔍 유의 사항
- 스크립트는 매일 아침 7시에 실행
- 다음 12시간 동안(저녁 7시까지)의 날씨를 확인
- 필요한 만큼의 데이터만 받아서 전송 속도를 올리기
- 매개변수 cnt=8 을 추가해야 저녁 9시까지의 데이터를 구할 수 있음
- 12시간 내(실제로는 14시간)에 비가 올 경우, 우산을 챙기라는 메세지를 출력하기
- weather 키 안의
id는 날씨 코드
- Weather condition codes
- 700번 이하의 코드는 모두 우산이 필요한 날씨(눈 포함)
- 코드를 바로 테스트하기 위해 현재 비가오는 곳의 위도와 경도로 변경하기
- Ventusky 라이브 날씨 예보
- 현재 강수량이 많은 지역의 이름으로 위도와 경도 조사하기
- : 슬라이스 연산자
⌨️ main.py
import requests

endpoints = "https://api.openweathermap.org/data/2.5/forecast"
api_key = "고유 API 키"
weather_params = {
    "lat": 13.756331,
    "lon": 100.501762,
    "appid": api_key,
    # 매개변수 추가
    "cnt": 8
}
response = requests.get(endpoints, params=weather_params)
response.raise_for_status()

weather_data = response.json()

# 7AM부터 3시간마다 예측(6시, 9시, 12시, 15시, 18시, 21시만 고르기)
every_3hours = weather_data["list"][2:]

will_rain = False

for weather in every_3hours:
    condition_code = weather["weather"][0]["id"]
    if condition_code < 700:
        will_rain = True

if will_rain:
    print("Bring the umbrella!")
Bring the umbrella!
❖ Twilio API
- 모든 나라에서 SMS를 전송하거나 가상 전화번호를 사용하게 해주는 서비스
- $15.50을 테스트용으로 지급
- 가상 전화번호
- 기본 무료 버전은 미국 번호로, 원하는 국가의 번호도 유료로 생성 가능
twilio.com/console에서 확인 가능- 해당 번호를 이용해서 원하는 전화번호로 SMS 전송 가능
- 인증된 전화번호만 문자 메시지를 받을 수 있음
- 처음 가입 시 인증했던 핸드폰 번호가 자동으로 인증됨
- 번호 추가 :
Phone Numbers→Verified Caller IDs→Add a new Caller ID
- 미국/캐나다에 거주할 경우
- 무료 전화번호(TFN)로 발신하는 SMS 메시지는 검증에 시간이 오래 소요됨
- 대신 WhatsApp 이용 가능
3. Twilio API로 SMS 보내기
🔍 유의 사항
⌨️ main.py
import requests
# 모듈 설치
from twilio.rest import Client

# twilio 서비스
account_sid = '개인 Account SID'
auth_token = '개인 Account SID'

endpoints = "https://api.openweathermap.org/data/2.5/forecast"
api_key = "고유 API 키"
weather_params = { … }

response = requests.get(endpoints, params=weather_params)
response.raise_for_status()

weather_data = response.json()
every_3hours = weather_data["list"][2:]

will_rain = False
for weather in every_3hours:
    condition_code = weather["weather"][0]["id"]
    if condition_code < 700:
        will_rain = True

# SMS 전송
if will_rain:
    client = Client(account_sid, auth_token)

    message = client.messages.create(
        body="It's going to rain today. Remember to bring an umbrella ☔️",
        from_="twilio 가상 번호",
        to="twilio에 인증된 번호",
    )
    # 성공적으로 전송됐는지 확인
    print(message.status)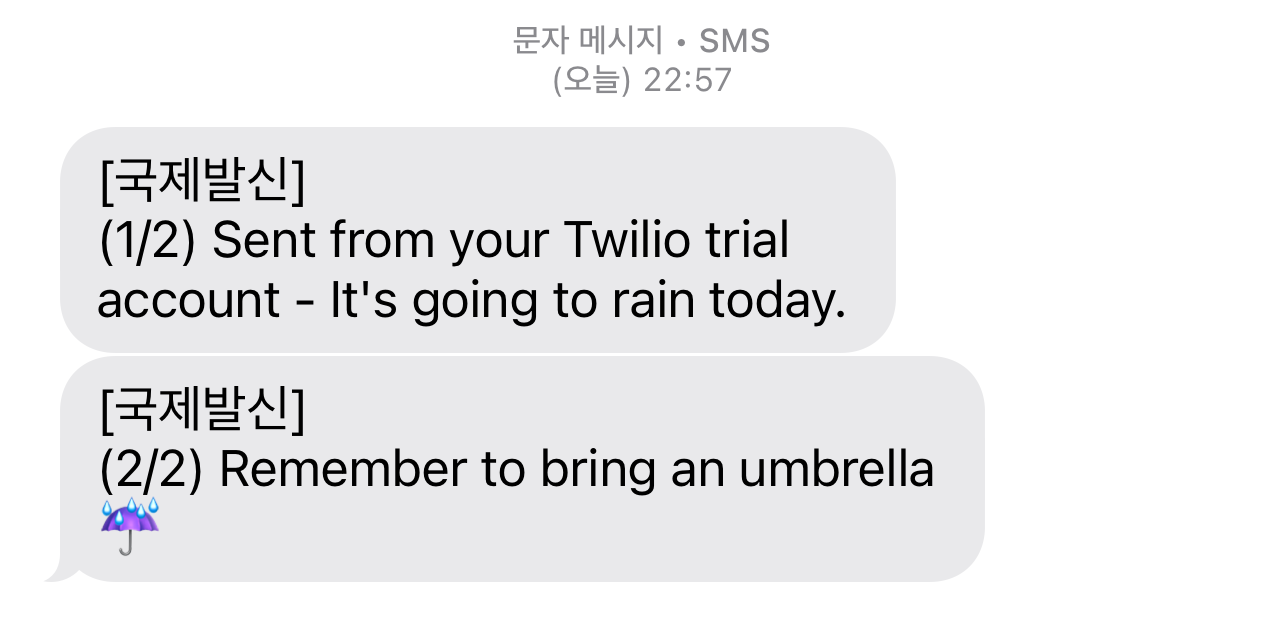
4. PythonAnywhere로 파이썬 스크립트 자동화하기
- Day32 ❖ 클라우드에서 파이썬 코드 실행 참고
- 에러 발생 시 참조 : 링크
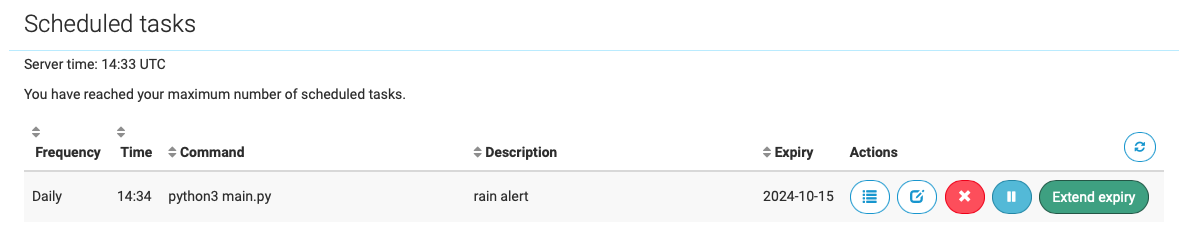
매일 정해진 시간에 조건에 따라 SMS 문자 수신 가능
❖ 환경변수와 API 키 감추기
🪬 Environment Variables
- 파이참 등의
Terminal→ $ 뒤에env입력- 키
VIRTUAL_ENV다음에 나오는 것들이 환경변수 - 문자열 형태로, 애플리케이션이나 코드에서 사용 가능
- 키
- 편의성
코드 베이스에 사용되는 특정한 변수들을 환경변수로 선언할 경우(예: 이메일 주소),
코드를 만지지 않아도 환경변수만 수정 가능 - 보안성
- 코드 베이스에 인증 키와 API 키를 함께 저장하는 것은 위험
- GitHub, Bitbucket 등의 코드 저장소 이용 시 코드가 모두에게 공개됨
- 코드를 공개적으로 업로드할 때는 중요 정보 꼭 지우기
- 환경변수를 통해 비밀 정보를 코드 베이스가 있는 곳과 다른 곳에 저장 가능
- 코드 베이스에 인증 키와 API 키를 함께 저장하는 것은 위험
🪬 환경변수 생성하기 (프로그램을 껐다 키면 설정한 환경변수가 사라짐)
- 파이참 등의
Terminal→ $ 뒤에export 환경변수이름=값입력
a.환경변수이름=값을 입력할 때 사이에 공백 없이 붙여쓰기
b. 값이 문자열일 경우 따옴표를 빼고 작성
c. 다시env입력하여 추가된 것을 확인 가능 - os 모듈 임포트
- 방법1: 코드에서
변수 = os.environ.get("환경변수이름")입력
방법2: 코드에서변수 = os.getenv("환경변수이름")입력 - 변수에 값을 직접 넣는 것과 똑같이 작동하며, 코드 베이스에 값을 직접 올리지 않아도 됨
🪬 파이참에서 환경변수 설정하는 방법 (프로그램을 껐다 켜도 환경변수 설정이 유지됨)
main.py우클릭 →Modify Run Configuration→Environment variables+→ Name에 환경변수이름, Value에 값 추가 →OK- os 모듈을 임포트하는 부분부터 위와 똑같이 진행
🪬 사용자의 환경변수를 파일에 저장하기
- 프로젝트 디렉토리에 .env 파일 생성
- python-dotenv 패키지 설치
📄.env
# 사이에 공백 없도록 주의
API_KEY="고유 API 키"
⌨️ main.py
# 임포트
from dotenv import load_dotenv
import os

# .env 파일의 환경변수들을 호출
load_dotenv()

# 환경변수 사용
API_KEY = os.getenv('API_KEY')
5. 환경변수 설정하기
🔍 유의 사항
- 변수
api_key를 환경변수로 설정- PythonAnywhere 설정
- 콘솔창에서 환경변수 설정 후,
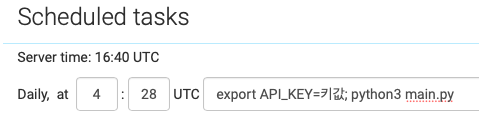
python3 main.py를 입력하면 다시 실행- Task에서
python3 main.py앞에 환경변수를 모두 입력
- ; 으로 구분
- 돈을 쓰지 않기 위해 비가 올 경우 이메일을 보내는 코드로 변경하여 테스트
⌨️ main.py
import requests
import smtplib
# os 모듈 임포트
import os

endpoints = "https://api.openweathermap.org/data/2.5/forecast"
# api_key에 환경변수 넣기
api_key = os.getenv("API_KEY")

weather_params = {
    "lat": 13.756331,
    "lon": 100.501762,
    "appid": api_key,
    "cnt": 8
}
response = requests.get(endpoints, params=weather_params)
response.raise_for_status()
weather_data = response.json()
every_3hours = weather_data["list"][2:]

will_rain = False
for weather in every_3hours:
    condition_code = weather["weather"][0]["id"]
    if condition_code < 700:
        will_rain = True

if will_rain:
    with smtplib.SMTP("smtp.gmail.com") as connection:
        connection.starttls()
        connection.login("보내는이메일", "16자리 앱 비밀번호")
        connection.sendmail(
            from_addr="보내는이메일",
            to_addrs="받는이메일",
            msg="Subject:It's going to rain today.\n\nRemember to bring an umbrella")