WeCode 1차 프로젝트로 진행했던 Dr.Martens 사이트의 리팩토링을 진행하고 있다!
리팩토링 우선 사항은
- Main - scroll event 리팩토링
- (내가 작업한 페이지는 아니지만) Cart - redux를 이용해서 상태 관리
- SCSS - mix in, include 기능 적용
- 중복되는 함수 (특히 fetch) 하나의 함수로 합치기
인데, scroll event 리팩토링은 끝냈고
이제 redux로 장바구니 상태 관리하기 도전도전~!~!
금방 후다닥 끝낼 줄 알았는데 생각보다 음청 고군분투함.....ㅠㅠ....ㅠ......
store 생성 및 초기 설정
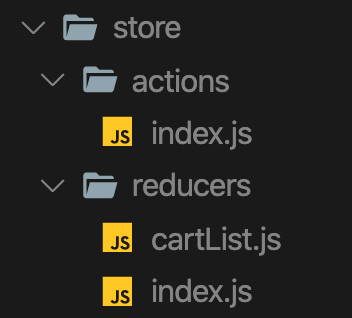
먼저 src 폴더에 이렇게 store 라는 하위 폴더를 만들어주고, actions 와 reducers 폴더를 나눠주었다!
// actions/index.js
export const addCart = (cartInfo) => ({
  type: "ADD_CART",
  payload: cartInfo,
});

export const deleteCart = (itemIndex) => ({
  type: "DELETE_CART",
  itemIndex,
});
장바구니에 추가, 삭제하는 action을 만들어준다!
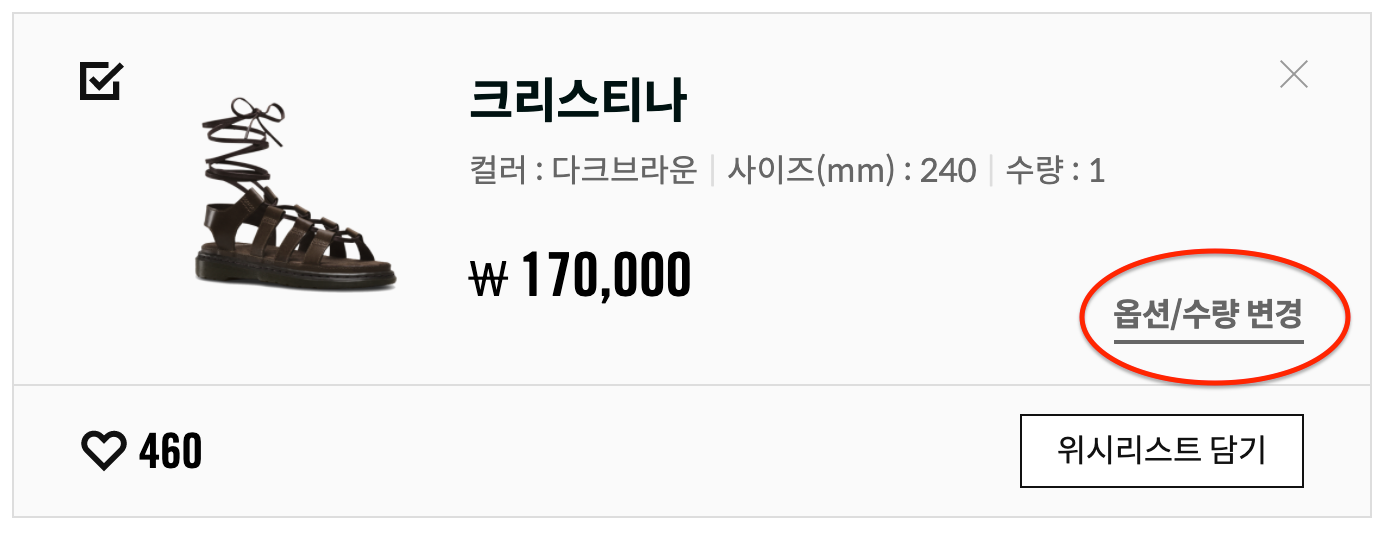
수량 수정도 하고 싶었는데.... 변명 아닌 변명을 해보자면.... 닥터마틴 사이트 자체가
이렇게 옵션/수량 변경 버튼을 누르면 modal 창이 새로 뜨고, 거기서 옵션을 변경하는 방식이라 손이 너무 가서 일단 포기했다.....ㅎㅎ..ㅠㅠ
시간이 된다면, modal 창 대신 그냥
[-] [1] [+]
이런식으로 생긴 간단한 수량 조절 버튼을 구현하고 싶다!
// reducers/cartList.js
const cartList = (state = [], action) => {
  switch (action.type) {
    case "ADD_CART":
      const newCartItem = action.payload;
      return [newCartItem, ...state];
    case "DELETE_CART":
      const delIdx = action.itemIndex;
      const filteredItem = state.filter((_, idx) => {
        return state[idx] !== state[delIdx];
      });
      return filteredItem;
    default:
      return state;
  }
};

export default cartList;
그리고 reducers 에서 각각의 action을 정의해주고, rootReducer 에서 combineReducers 로 합쳐줬다.
마지막으로 store를 생성해준다.
// src/index.js
import React from "react";
import ReactDOM from "react-dom";
import Routes from "./Routes";
import { Provider } from "react-redux";
import { createStore } from "redux";
import rootReducer from "store/reducers";

const store = createStore(rootReducer);

ReactDOM.render(
  <Provider store={store}>
      <Routes />
  </Provider>,
  document.getElementById("root")
);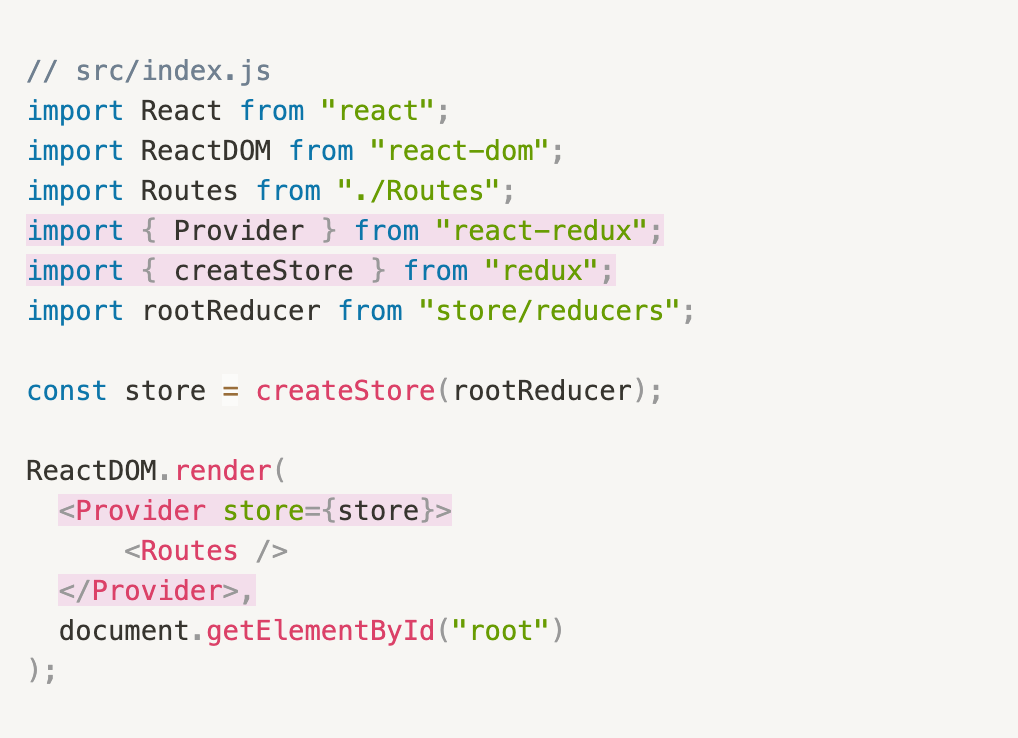
핑크색 밑줄 부분을 보면 된다!
상품을 장바구니에 담기 ADD_CART
장바구니 담기 버튼은 productDetail , cartModal 두개의 컴포넌트에서 사용하는데, 둘의 동작이 조금 다르긴 하지만, 기본적으로 addCart 액션을 실행하는 부분이 같기 때문에 이를 하나의 함수로 따로 빼줬다!
// addCartFunction.js
export const addCartActionHandler = (state, addCart) => {
  const { productData, currentSize, currentQuantity } = state;
  const cartInfo = { ...productData, currentSize, currentQuantity };
  addCart(cartInfo);
  alert("상품이 장바구니에 담겼습니다.");
};
첫번째 파라미터인 state는 각각의 페이지에서 this.state 로 넘겨줄거고, 두번째 파라미터인 addCart 는 actions/index.js 에서 정의한 액션을 고대로 넘겨줄거당
일단 detail page 먼저 고고~
// productDetail.js
import { connect } from "react-redux";
import { addCart } from "store/actions";
import { addCartActionHandler } from "Components/CartModal/addCartFunction";

class Cart extends React.Component {
  addCartHandler = () => {
    const { addCart } = this.props;
    addCartActionHandler(this.state, addCart);
    this.clearCartInfo();
  };

  clearCartInfo = () => {
    const { originPrice, salePrice } = this.state.productData;
    this.setState({
      currentSize: 0,
      currentOrigin: +originPrice,
      currentSale: +salePrice,
      currentQuantity: 1,
    });
  };

render( ){ 어쩌구 저쩌구 상세페이지 코드 }
};

export default connect(null, { addCart })(ProductDetail);
react redux의 connect 이랑 만들어뒀던 addCart action import 해주고~
위에서 만든 addCartActionHandler 함수도 import 해주고~~
addCartHandler 라는 함수를 만들어서 import 해온 addCartActionHandler 에 인자로 this.state 랑 props로 넘겨받은 addCart 액션을 넘겨주고~~
선택한 사이즈, 수량 들을 초기화 해주는 clearCartInfo 함수를 만들어서 마지막에 호출해준다!
이 addCartHandler 함수는 장바구니 버튼에 onClick 으로 걸어준당!
<button onClick={() => this.addCartHandler()}>장바구니</button>그리고 마지막에 connect 로 action 과 ProductDetail 컴포넌트를 묶어준다!
export default connect(null, { addCart })(ProductDetail);cartModal.js 컴포넌트도 동일한데, clearCartInfo 함수 자리에 modal click 상태를 false 로 바꿔주는(= modal 창을 닫아주는) 함수를 호출했다.
상품 장바구니에서 삭제하기 DELETE_CART
store에 저장된 cartList (state)를 이용해서 Cart.js 컴포넌트에서 map 으로 장바구니 아이템들을 뿌려줬고!
가격 총합을 구하는 함수를 따로 만들어서 적용해주었다.
이제 아이템 삭제 기능!!
// CartProductList.js (Cart.js 컴포넌트안에서 map으로 출력되는 item 컴포넌트)
import { connect } from "react-redux";
import { deleteCart } from "store/actions";

class CartProductList extends React.Component {
  selectDelHandler = (itemIndex) => {
    const { deleteCart } = this.props;
    deleteCart(itemIndex);
    alert("선택하신 상품이 장바구니에서 삭제되었습니다.");
  };

render( ){ 어쩌구 저쩌구 장바구니 아이템 코드 }
};

export default connect(null, { deleteCart })(CartProductList);
여기서 selectDelHandler 에 인자로 넘겨주는 itemIndex 는 부모 컴포넌트인 Cart.js 에서 map 함수의 2번째 파라미터인 index를 그대로 넘겨준것!
그 외에는 ADD_CART 랑 똑같아서....

마지막으로 X 버튼에 selectDelHandler 함수를 걸어준다!
<button onClick={() => this.selectDelHandler(itemIndex)} />추가로, Nav.js 컴포넌트에 store에 저장된 cartList 에, cartList.length 로 접근해서 현재 장바구니에 담긴 상품의 갯수를 받아오게끔 해줬다. (코드는 생략!)
persist로 상품 정보를 LocalStorage에 저장
여기까지 하면 Redux는 적용 완료!!
그런데, 새로고침할때마다 소듕한 장바구니 아이템들이 다 날아간다...ㅎㅎ...ㅎㅎ^^....
우리 사이트는 배포되어있지 않은 상태라 서버를 사용할 수 없었고, 서버를 사용하지 않는 방법으로 LocalStorage 에 저장하거나 SessionStorage 에 저장하는 방법이 있는데, 이 중 React Redux 에서 LocalStorage 에 상태를 쉽게 저장할 수 있도록 도와주는 redux-persist 라는 라이브러리를 사용했다!
출처 : _jouz_ryul님 벨로그 를 보고 고대로 따라쳤다. 머쓱타드....
우선 터미널에서
npm install redux-logger --save
npm install redux-persist --save
위 명령어를 통해 redux-logger 와 redux-persist 를 설치해준다!
// src/index.js
import React from "react";
import ReactDOM from "react-dom";
import Routes from "./Routes";
import { Provider } from "react-redux";
import { applyMiddleware, createStore } from "redux";
import logger from "redux-logger";
import { persistStore } from "redux-persist";
import { PersistGate } from "redux-persist/integration/react";
import rootReducer from "store/reducers";

const middlewares = [logger];
const store = createStore(rootReducer, applyMiddleware(...middlewares));
const persistor = persistStore(store);

ReactDOM.render(
  <Provider store={store}>
    <PersistGate persistor={persistor}>
      <Routes />
    </PersistGate>
  </Provider>,
  document.getElementById("root")
);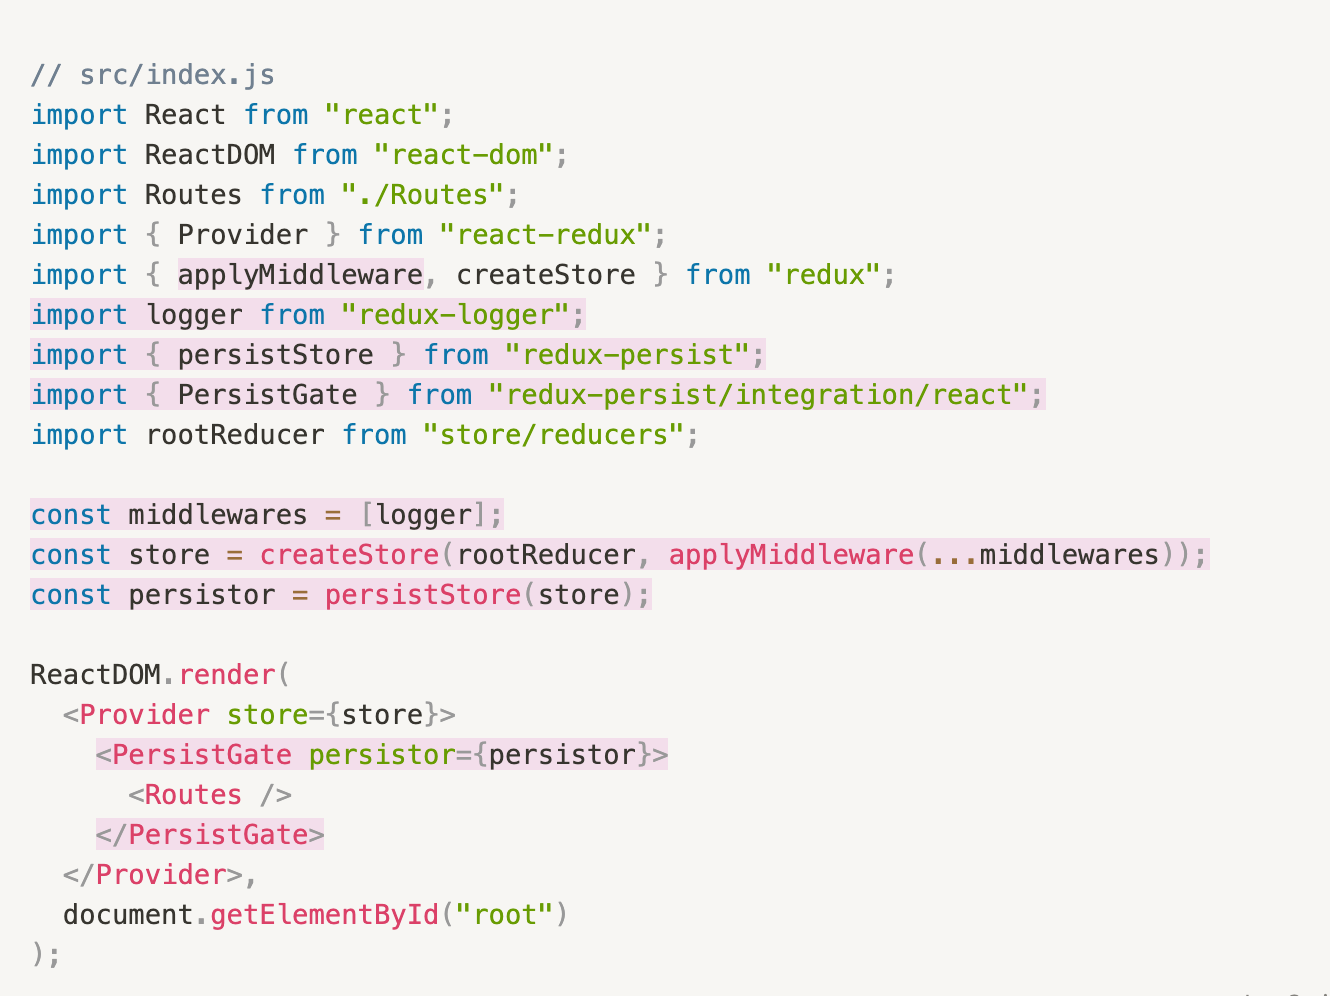
그리고 src/index.js 컴포넌트에 위 코드를 추가해준다!
마지막으로 rootReducer만 수정해주면 끝이다!! 왕간단!!
// reducers/index.js
import { combineReducers } from "redux";
import { persistReducer } from "redux-persist";
import storage from "redux-persist/lib/storage";
import cartList from "./cartList";

const persistConfig = {
  key: "root",
  storage: storage,
  whitelist: ["cartList"],
};

const rootReducer = combineReducers({
  cartList,
});

export default persistReducer(persistConfig, rootReducer);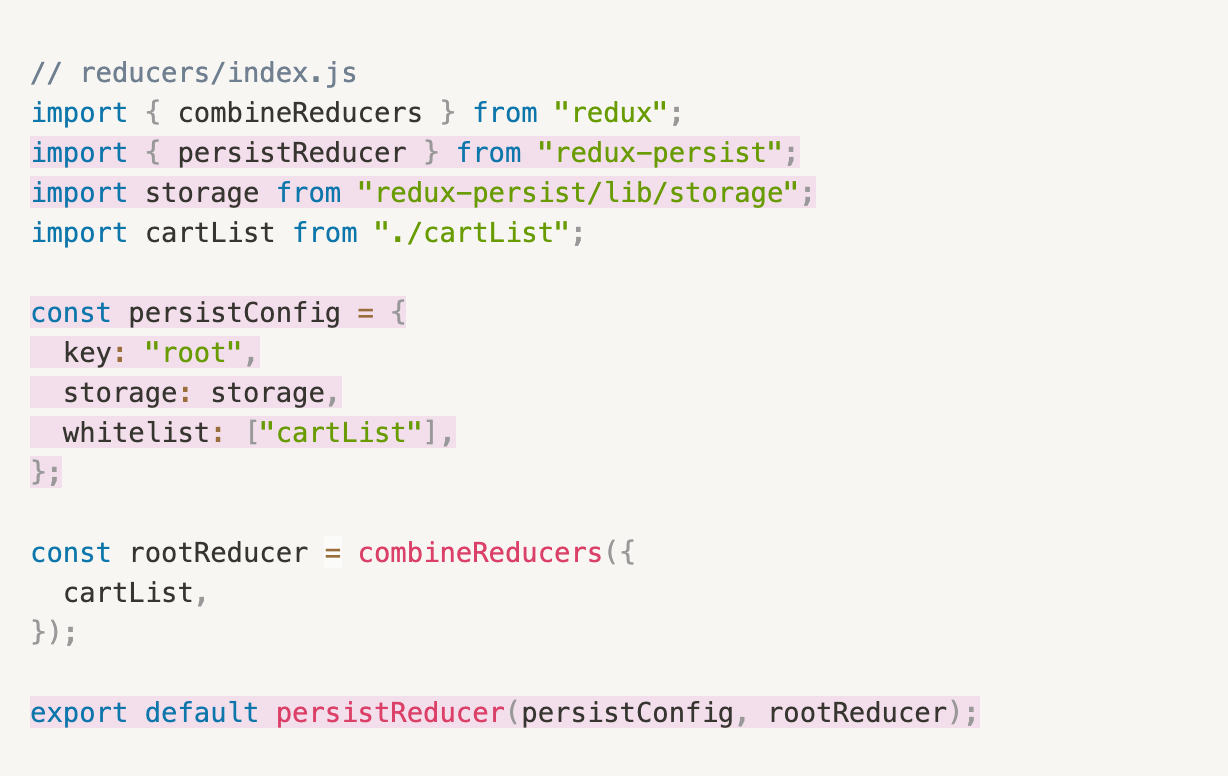
👉 import storage from "redux-persist/lib/storage"; (로덕스..!) 부분을
👉 import storageSession from 'redux-persist/lib/storage/session'; 이렇게 수정해주면 sessionStorage에 저장된다! (세덕스...!)
코드 각 줄의 설명은 _jouz_ryul님 벨로그 이 분 블로그에 쉽게 정리되어있다!😆
(mock data라서 상품 정보는 다 똑같다ㅎㅎㅎㅎ....)
요렇게 동작한다!!
장바구니에도 잘 담기고, nav바 도 잘 바뀌고, 삭제도 잘 된다!
local storage에 저장했기 때문에 새로고침 하거나 브라우저를 아예 닫아도 정보가 저장된다!


와우 벌써 리팩토링까지.. 멋져요 👍🏻