기하학적 연산
화소들의 공간적인 관계를 바꾸는 것을 기하학적 연산이라고 한다.
화소를 재배치하여 화소 사이의 관계를 변환시키는 기하학적 변환은 기하학적 왜곡을 바로잡는데 사용하거나, 영상을 찌그려뜨려 색다른 영상을 얻는 데도 사용하기도 하며, 두 장 이상의 영상이 공통적으로 갖고 있는 특징을 이용하여 영상들을 서로 정합시키는 데 사용하기도 한다.
어파인 변환
이동(Translation), 회전(Rotation), 확대축소(Scaling), 전단변형(Shearing) 등은 어파인 변환에 속하는 데, 영상 상의 에 있는 화소를 으로 옮겨 새로운 영상 를 만들었다고 하면
으로 와 는 기하학적으로 왜곡된 영상 을 만드는 공간 변환 함수이다.
이를 x와 y의 다항식으로 표현할 때, x와 y에 선형인 경우를 어파인 변환이라고 한다.
어파인 변환은 직선은 그대로 직선을 유지하며, 평행한 선들은 평행을 유지한다.
이를 행렬식으로 나타내면
로 나타낼 수 있다.
이를 동종좌표(Homogeneous coordinates)로 표현하면
동종좌표를 쓰면 기하학적 변환이 통일되고 체계적인 형태로 표현할 수 있다. 평면상의 한 점 를 동종좌표로 나타내면 가 된다. 이 때 어느 점의 동종좌표가 로 주어진다면, 평면상의 좌표는 가 된다.
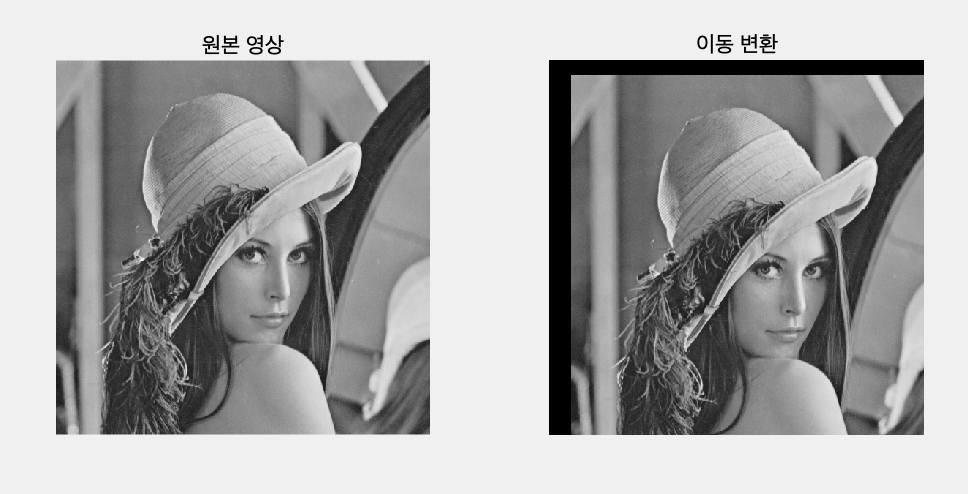
이동 변환
화소를 방향으로 만큼, 방향으로 만큼 이동하는 변환은 다음 식으로 표현 가능하다.
이를 동종 좌표로 쓰면
% affine transform
img=imread("lena512.bmp");
img=rgb2gray(img);
img=im2double(img);
% 1. 영상의 이동
img_new=imtranslate(img,[30,20]);
figure
subplot(1,2,1)
imshow(img)
title("원본 영상")
subplot(1,2,2)
imshow(img_new)
title("이동 변환")
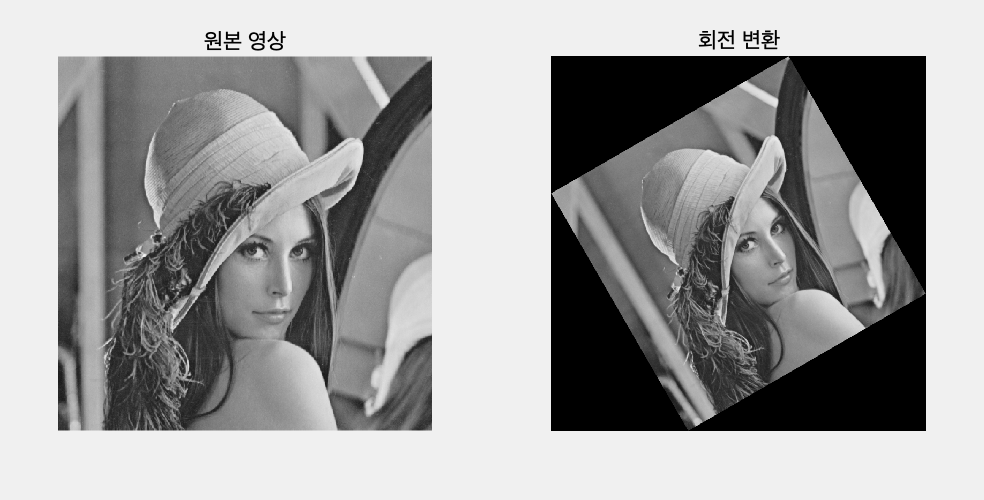
회전 변환
화소 를 원점을 중심으로 반시계 방향으로 만큼 회전 변환한 후 좌표 은
이므로 이를 정리하면
즉,
으로 회전 변환에 관한 행렬식을 얻을 수 있다.

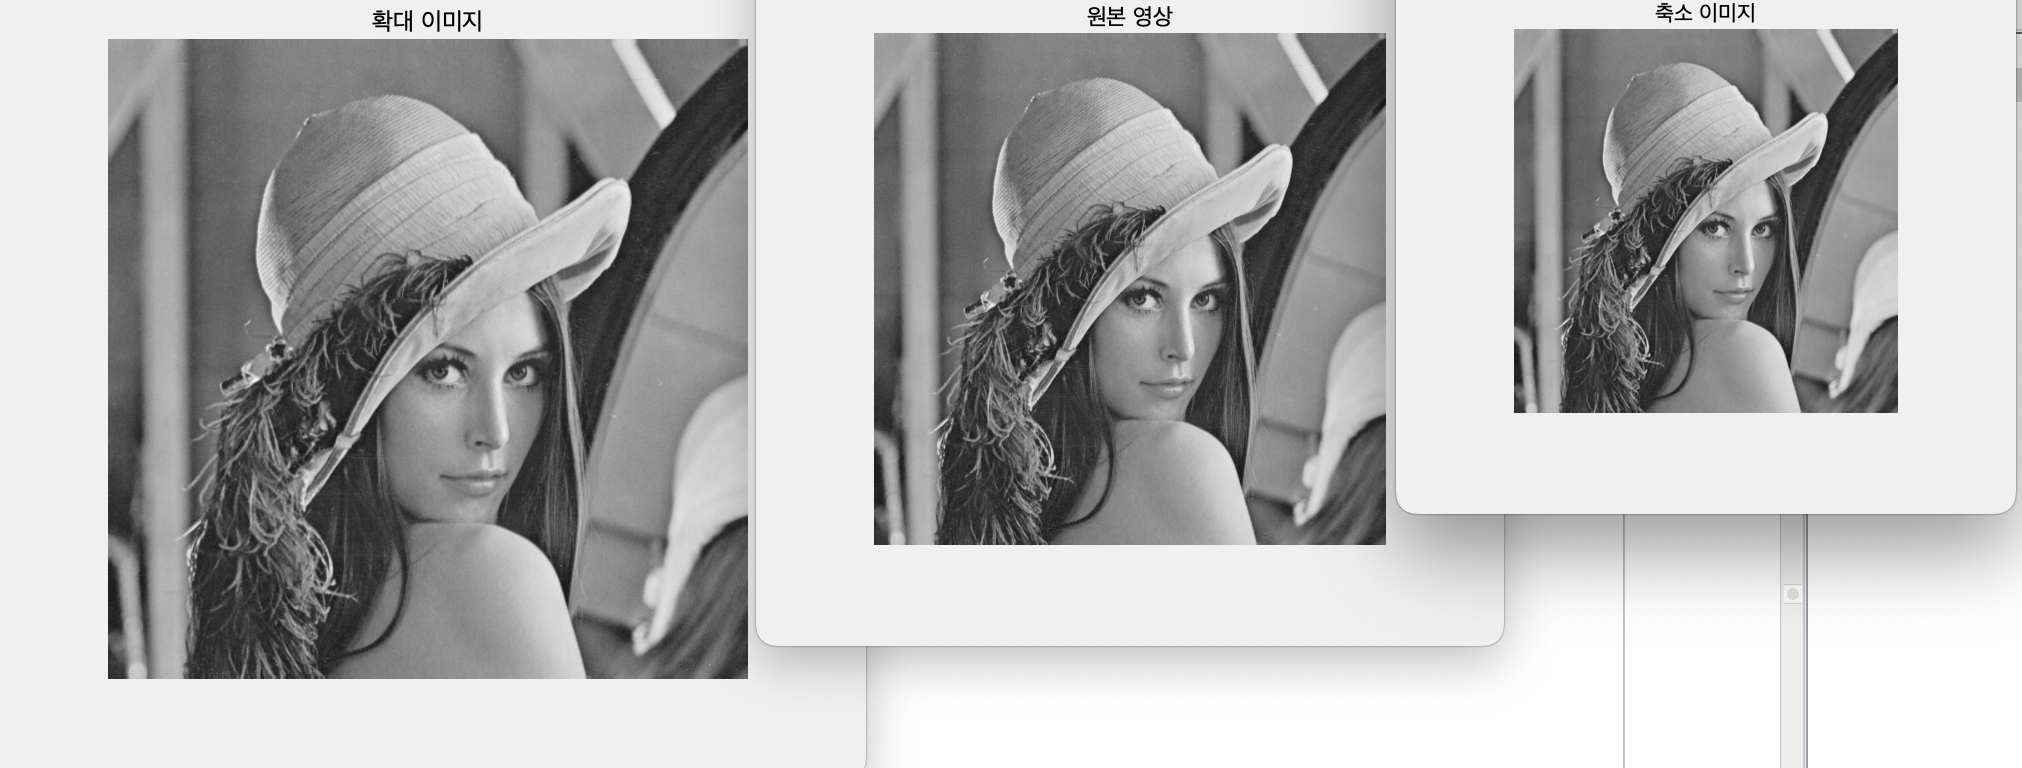
확대 축소
물체를 방향으로 배 확대(축소)하고, 방향을 배 확대(축소)하려면
해당 행렬식을 사용하면 된다. 이 때 와 가 1보다 크면 확대가 되고, 1보다 작으면 축소가 된다.
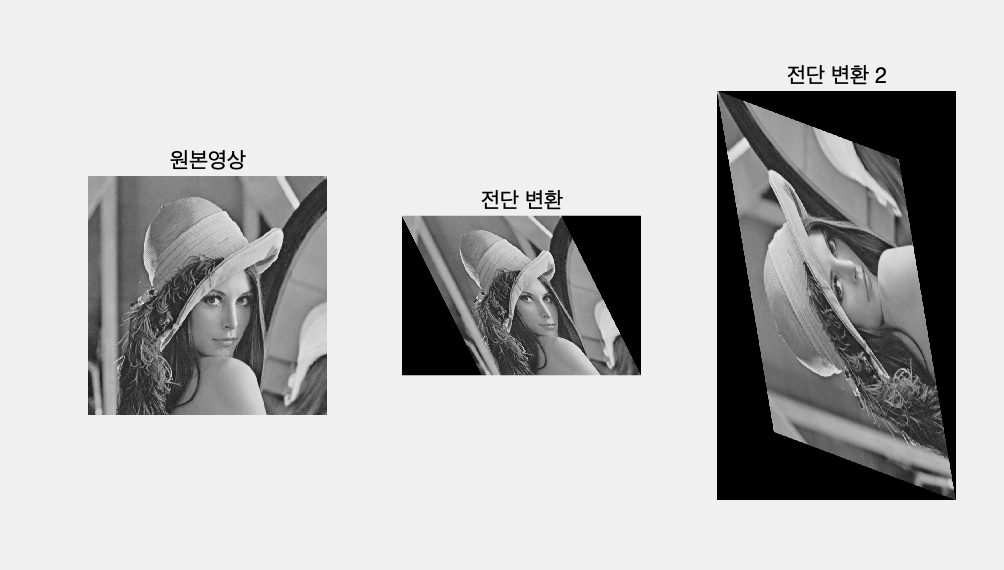
전단 변환
고무판 변환이라고 불리는 전단변환은 고무판을 방향으로 정도로 잡아당겨, 변형을 일으기는 것이라고 볼 수 있다. 전단변환에 대한 행렬 식은
해당 변환 행렬의 조합도 어파인 변환이 되고, 이러한 어파인 변환들의 동종좌표 변환행렬의 특징은 마지막행이 모두 이 된다는 것을 볼 수 있다.
Python 코드
#%% 라이브러리 호출
import cv2
import matplotlib.pyplot as plt
import numpy as np
img=cv2.imread("lena512.bmp")
img=cv2.cvtColor(img,cv2.COLOR_BGR2GRAY)
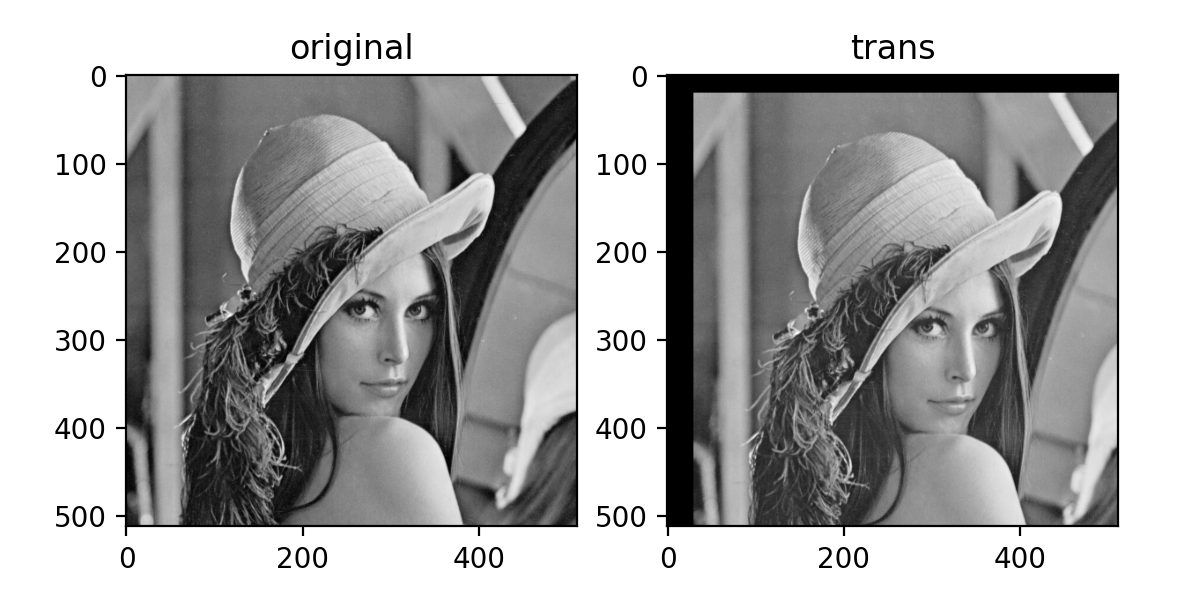
#%% 영상의 이동
# (30,20)만큼 영상 이동할 동종좌표 행렬식을 세우고
trans_arr1=np.float32([[1, 0, 30],[0, 1, 20]])
# 행렬식을 통해 좌표 이동
trans_img=cv2.warpAffine(img,trans_arr1,[img.shape[1],img.shape[0]])
plt.figure()
plt.subplot(1,2,1)
plt.imshow(img,cmap="gray")
plt.title("original")
plt.subplot(1,2,2)
plt.imshow(trans_img,cmap="gray")
plt.title("trans")
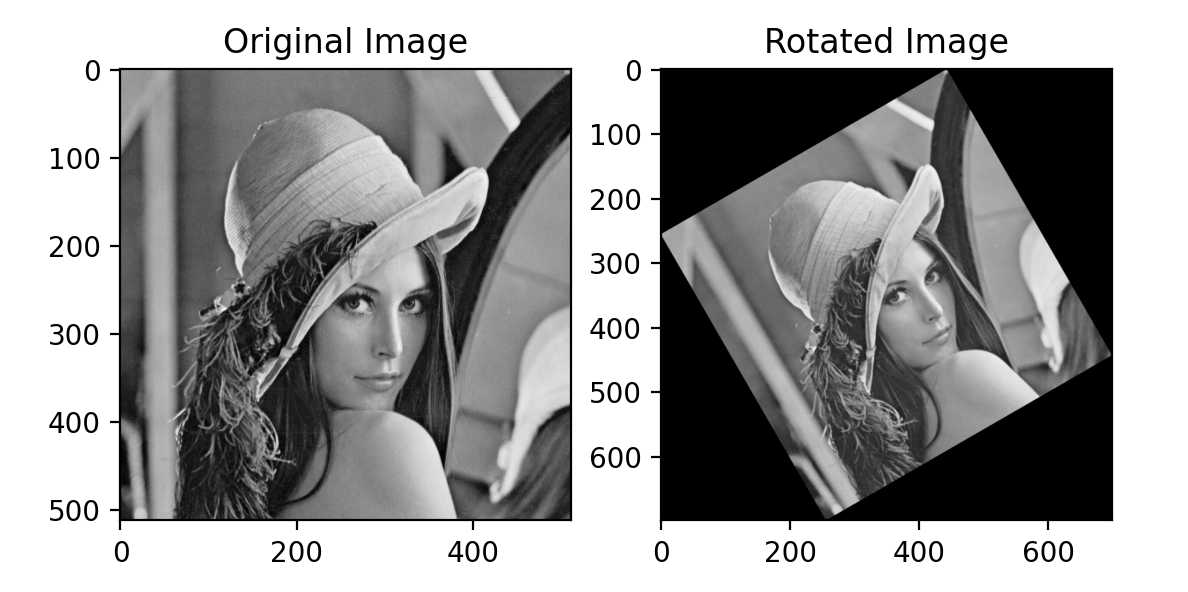
#%% 영상의 회전
# 회전 각도 설정
angle=30
# 회전 중심 설정 (이미지 중심)
center=(img.shape[1]//2,img.shape[0]//2)
# 회전 변환 행렬 생성
rot_matrix=cv2.getRotationMatrix2D(center, angle, 1.0)
# 새로운 이미지 크기 계산
cos_theta=np.abs(rot_matrix[0, 0])
sin_theta=np.abs(rot_matrix[0, 1])
new_width=int((img.shape[1]*cos_theta)+(img.shape[0]*sin_theta))
new_height=int((img.shape[1]*sin_theta)+(img.shape[0]*cos_theta))
# 회전 후에 나오는 빈 공간을 흰색으로 채우기 위한 행렬 생성
rot_matrix[0,2]+=(new_width-img.shape[1])/2
rot_matrix[1,2]+=(new_height-img.shape[0])/2
# 새로운 이미지 생성
img_rotated=cv2.warpAffine(img,rot_matrix,(new_width,new_height),borderValue=0)
# 결과 출력
plt.figure()
plt.subplot(1,2,1)
plt.imshow(img,cmap="gray")
plt.title("Original Image")
plt.subplot(1,2,2)
plt.imshow(img_rotated,cmap="gray")
plt.title("Rotated Image")
plt.show()
#%% 영상의 확대 축소
img_enlarge=cv2.resize(img,None,fx=1.25,fy=1.25)
img_shrink=cv2.resize(img,None,fx=0.75,fy=0.75)
# 결과 출력
plt.figure()
plt.subplot(1,3,1)
plt.imshow(img,cmap="gray")
plt.title("Original Image")
plt.subplot(1,3,2)
plt.imshow(img_enlarge,cmap="gray")
plt.title("enlarged Image")
plt.subplot(1,3,3)
plt.imshow(img_shrink,cmap="gray")
plt.title("shrunk Image")
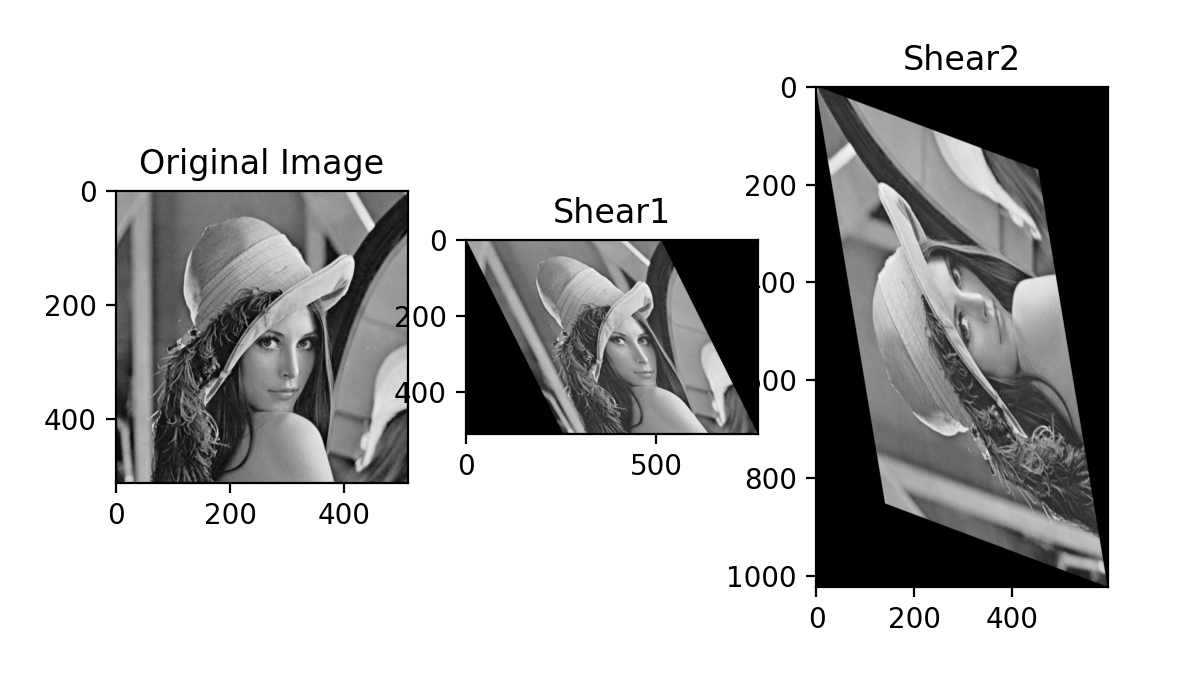
#%% 영상의 전단 변환
shear1 = np.array([[1, 0.5, 0], [0, 1, 0]])
new_width=int((img.shape[1]*shear1[0,0])+(img.shape[0]*shear1[0,1]))
new_height=int((img.shape[1]*shear1[1,0])+(img.shape[0]*shear1[1,1]))
img_shear1=cv2.warpAffine(img,shear1,[new_width,new_height],borderValue=0)
src_pts = np.float32([[0, 0], [6, 3], [-2, 5]])
dst_pts = np.float32([[-1, -1], [0, -10], [4, 4]])
shear2 = cv2.getAffineTransform(src_pts, dst_pts)
shear2[0][2]=int(abs(img.shape[1]*shear2[0][0]))-1
shear2[1][2]=int(abs(img.shape[1]*shear2[1][0]))-1
new_width=int((img.shape[1]*abs(shear2[0][0]))+(img.shape[0]*abs(shear2[0][1])))
new_height=int((img.shape[1]*abs(shear2[1][0]))+(img.shape[0]*abs(shear2[1][1])))
img_shear2 = cv2.warpAffine(img, shear2, [new_width,new_height],borderMode=cv2.BORDER_CONSTANT,borderValue=0)
#%% 결과 출력
plt.figure()
plt.subplot(1,3,1)
plt.imshow(img,cmap="gray")
plt.title("Original Image")
plt.subplot(1,3,2)
plt.imshow(img_shear1,cmap="gray")
plt.title("Shear1")
plt.subplot(1,3,3)
plt.imshow(img_shear2,cmap="gray")
plt.title("Shear2")Python 실행 결과
1. 이동 변환
2. 회전 변환
3. 확대 및 축소
4. 전단 변환