- preview Link : https://velog.io/@suhan0304/Unity-Electricity-5
- gitHub Link : https://github.com/suhan0304/Electricity
사실 먼저 고백하자면.. 전기 흐름 로직을 end Point 부분을 빼고 구현했다. 정리해서 작성하려고 하는데 빼놓은 부분이 있을 수도 있다는 점이 있다..
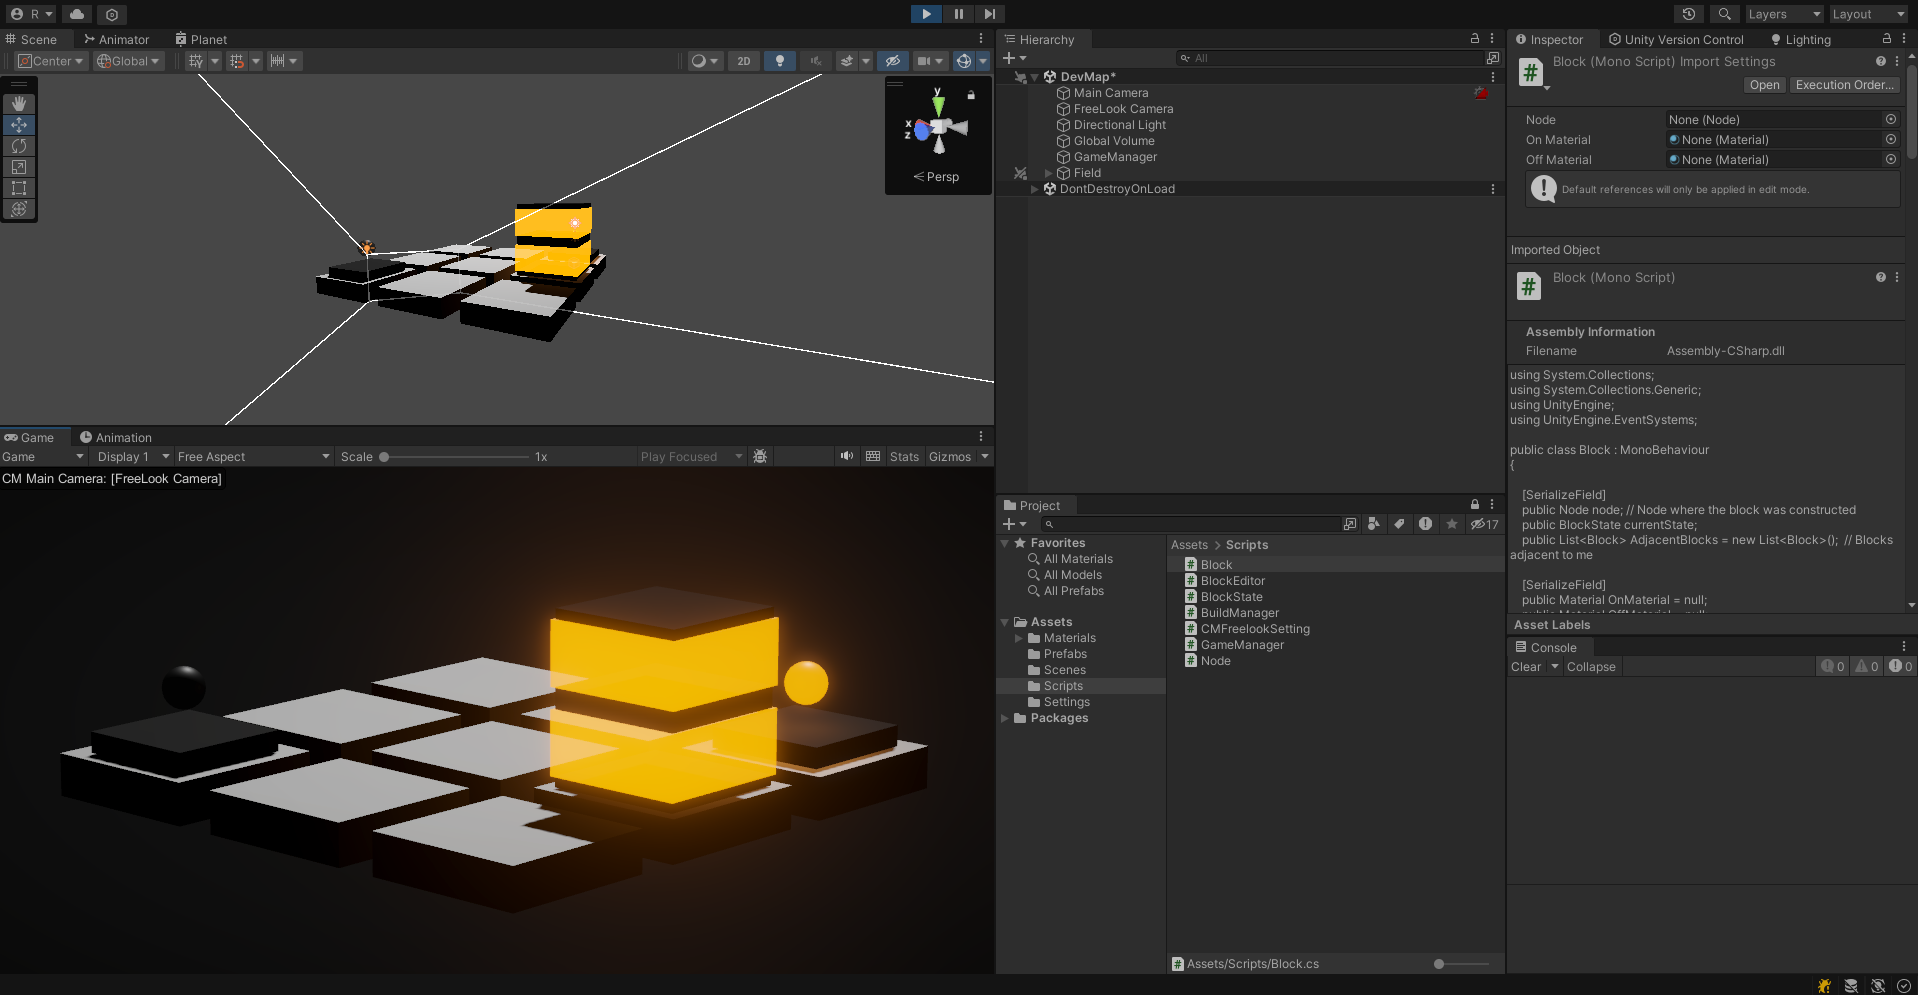
Block Adjacent Block 로직
원래는 저번 개발일지 5편을 보면 아시다시피 Collider를 3개로 해서 (상하좌우앞뒤) 이렇게 6개의 범위 내에 있는 블럭들을 확인해줬다. 작동은 잘 됐지만 문제는 노드에 블럭을 건설할 때 그 노드 위에 있는 블럭을 눌러도 건설이 작동하도록 OnMouse 이벤트로 노드의 Mouse 이벤트를 호출하는 것이 문제였다. 콜라이더가 늘어나다 보니깐 블럭이 아닌 허공에 마우스를 올려놔도 OnMouseEnter 메소드가 실행되었다. 이를 고치려고 Raycast로 6방향으로 Ray를 쏘아서 Collider를 인식하도록 로직을 변경했다.
public List<Block> GetBlockAdjacentBlocks()
{
    Vector3[] directions = {
        Vector3.up,
        Vector3.down,
        Vector3.left,
        Vector3.right,
        Vector3.forward,
        Vector3.back
    };

    List<Block> blocksInRaycast = new List<Block>();
    LayerMask blockLayer = LayerMask.GetMask("Block");

    float rayDistance = 0f;
    foreach (Vector3 direction in directions) {
        Ray ray = new Ray(transform.position, direction);

        if (direction == Vector3.up || direction == Vector3.down)
            rayDistance = 1f;
        else {
            rayDistance = 4f;
        }

        RaycastHit[] hitData = Physics.RaycastAll(ray, rayDistance, blockLayer);
        foreach(RaycastHit hit in hitData) {
            if (hit.collider.CompareTag("startPoint")) {
                ChangeOnState();
            }
            else {
                Block hitBlock = hit.collider.gameObject.GetComponent<Block>();
                //Debug.Log(hit.collider.name); // For Debug Test

                blocksInRaycast.Add(hitBlock);
            }
        }
    }

    return blocksInRaycast;
}
Raycast?
Raycast는 쉽게 설명하면 레이저를 원하는 위치에서 원하는 방향으로 쏴서 충돌하는 Collider를 감지해내는 방법이다. RaycastAll은 Ray와 충돌하는 모든 Collider에 대한 Hit Data를 받아올 수 있다.
더 자세한 정보는 유니티 공식 문서나 gamedevbeginner 블로그 글을 참고하자.
이 외에 블럭이 건설된 이후에 인접한 블럭들에게 리스트에 추가해달라고 하는 부분의 원리는 동일하다.
GameManager & BuildManager
기존에는 Node에서 마우스 이벤트 처리로 build를 했었는데 블럭 건설을 담당할 BuildManager로 옮겨 준후에 BuildManager를 GameMnager에서 초기화해주었다. 이후에 GameManager를 싱글톤 패턴으로 선언해줘서 어디에서나 GameManager에 접근할 수 있도록 해줬다.
GameManager.cs
using System;
using System.Collections;
using System.Collections.Generic;
using UnityEngine;

public class GameManager : MonoBehaviour
{
    [Space(5)]
    [Header("Manager")]
    public BuildManager buildManager;

    [Space(5)]
    [Header("Tag")]
    public String startTag = "startPoint";

    public static GameManager Instance { get; private set; }

    void Awake()
    {
        // 싱글톤 인스턴스 설정
        if (Instance == null)
        {
            Instance = this;
        }
        else
        {
            Debug.LogWarning("Error - Only 1 instance - GameManager.");
            Destroy(gameObject);
        }
    }

    void Start()
    {
        buildManager = GetComponent<BuildManager>();
    }
}
BuildManager.cs
using UnityEngine;

public class BuildManager : MonoBehaviour
{

    public GameObject standardBlockPrefab;

    private void Start()
    {
        blockToBuild = standardBlockPrefab; //For Test
    }

    private GameObject blockToBuild; // blockToBuild GameObject

    /// <summary>
    /// Build Block On Node
    /// - The buildManager holds information about the blocks the player has chosen to build.
    /// </summary>
    public void BuildBlockOnNode(Node node)
    {
        float blockHeight = blockToBuild.transform.localScale.y;
        Vector3 buildPosition = node.transform.position + new UnityEngine.Vector3(0,node.nodeHeight + node.blocksTotalHeight +  (blockHeight/2),0);
        node.blockOnNode = (GameObject)Instantiate(blockToBuild, buildPosition, node.transform.rotation);

        node.blockOnNode.transform.SetParent(node.transform, true); // set Parent
        node.blocksTotalHeight += blockHeight; // Update blocksTotalHeights ( add block height )

        //Debug.Log("Build the Block!"); //For DebugTest
    }
}
Block Material 설정
block이 ON 될때 주변 이웃한 Block들도 ON으로 변경시켜주도록 구현했는데 이 때 Material을 StartPoint의 Light Material과 동일하게 설정해줘서 전기가 동일하게 켜진 느낌을 주도록 구현했다.
Block.cs
/// <summary>
/// Block State change to ON ( befor : OFF )
/// Need to notify adjacent blocks that I have changed to the On state.
/// </summary>
public void ChangeOnState() {
    float delayTime = 0.75f;

    currentState = BlockState.ON;
    ChangePillarMaterial(currentState);

    StartCoroutine(ChangeAdjacentBlockStateON(delayTime));
}

/// <summary>
/// Change Pillar Material
/// </summary>
public void ChangePillarMaterial(BlockState st)
{

    Transform pillar = transform.Find("Pillar");
    //Debug.Log("Change Pillar Material to OnMaterial"); //For Debug Test
    Renderer renderer = pillar.GetComponent<Renderer>();

    if (st == BlockState.ON)
    {
        renderer.material = OnMaterial;
    }
    else if (st == BlockState.OFF)
    {
        renderer.material = OffMaterial;
    }
}

IEnumerator ChangeAdjacentBlockStateON(float delayTime)
{
    yield return new WaitForSeconds(delayTime);

    foreach (Block block in AdjacentBlocks) {
        if (block.currentState == BlockState.OFF) {
            block.ChangeOnState();
        }
    }
}
Block 내부의 Pillar의 Material을 바꿔주었다.
인접한 블럭들의 State를 코루틴으로 돌린 이유는 블럭이 한번에 바로 켜지면 전기가 흐르는 느낌이 들지를 않아서 delayTime만큼 기다렸다가 Material이 바뀌도록 해서 전기가 들어오도록 했다.
추후 계획
end Point에 전기가 들어오면 게임이 클리어되도록 할 예정이라 end Point도 동일하게 전기가 들어오는 로직을 구현해야한다. 그 다음에 맵을 좀 넓혀서 해당 맵 데이터를 저장할 방법을 고안해서 스테이지를 여러개 만들고, UI를 구현할 예정이다.