1. 프로젝트 생성
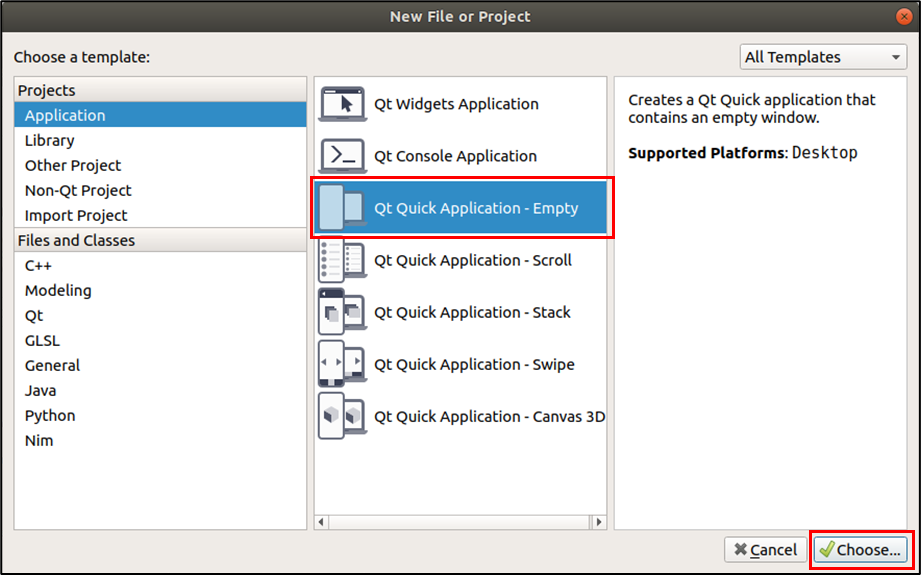
[File] 클릭 > [New File or Project] 클릭 > [Qt Quick Application - Empty] 클릭
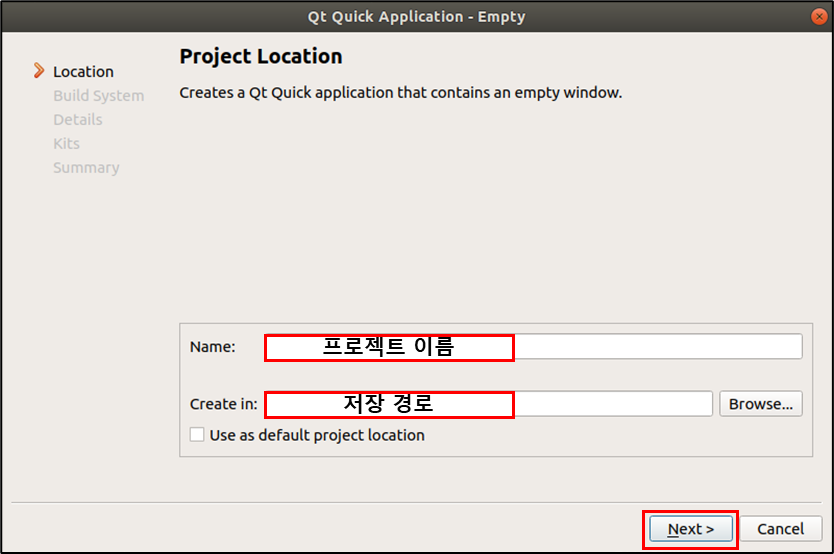
프로젝트 이름 및 저장 경로 설정 후 [Next] 클릭
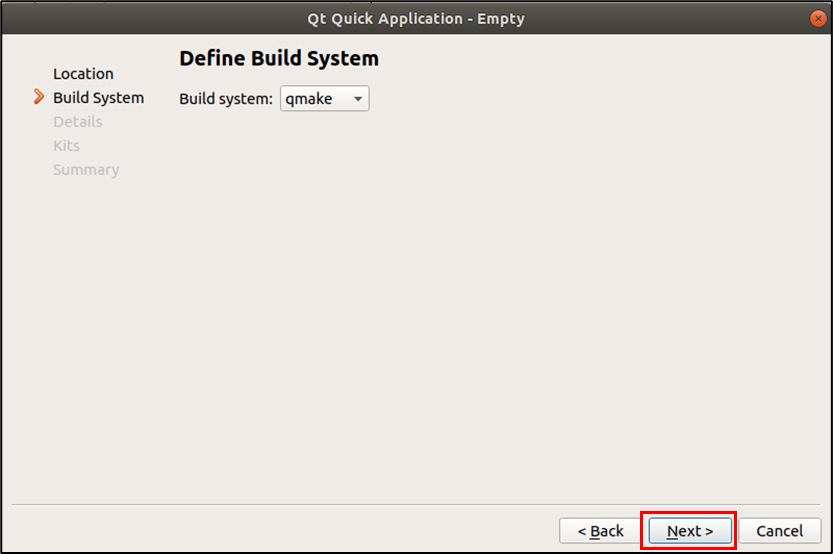
[Next] 클릭
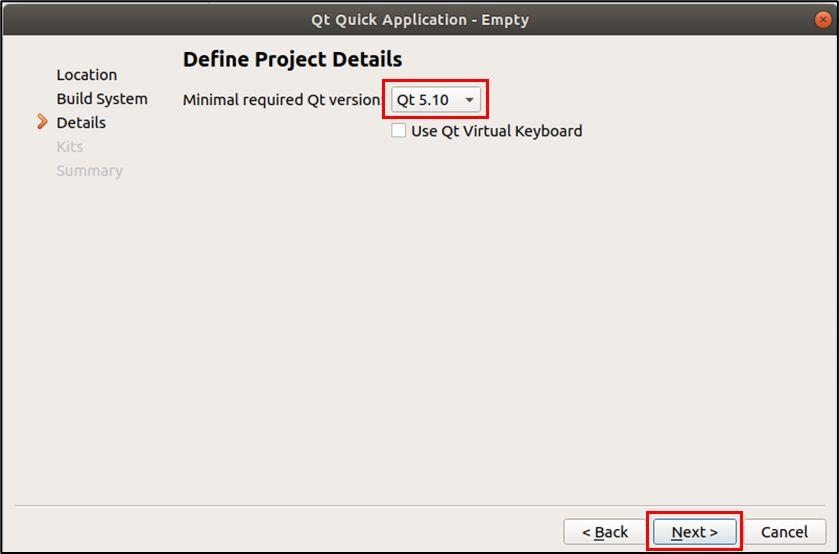
Qt 버전 선택 후 [Next] 클릭
(작성자는 Ubuntu에 QT 5.12.2가 설치된 상황이며, 밑에서는 Qt 5.10을 선택)
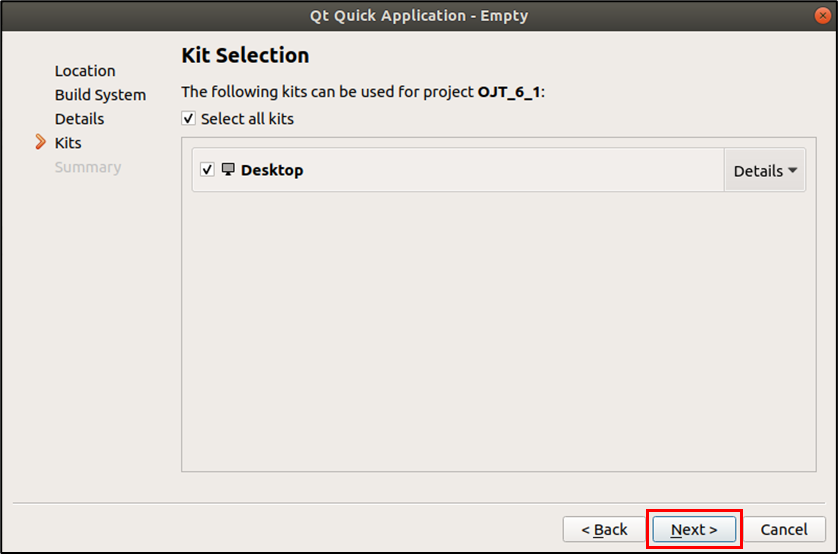
[Next] 클릭
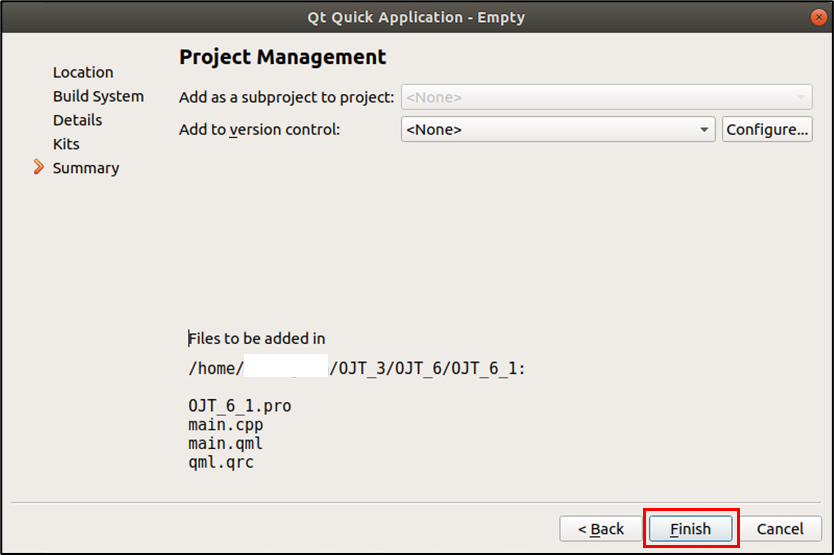
[Finish] 클릭
2. 모듈 Import
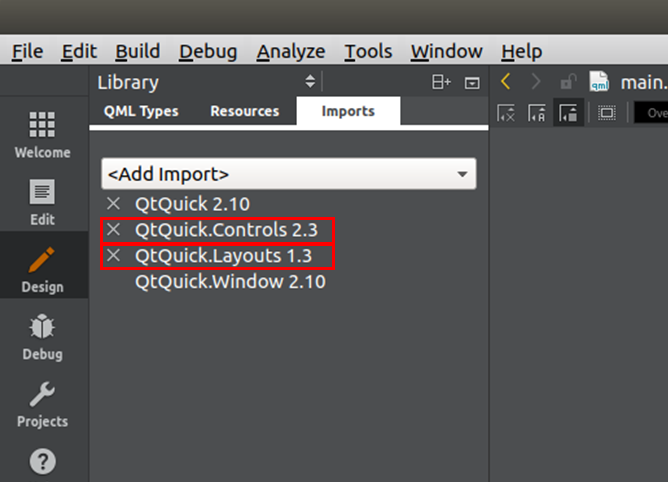
두 모듈을 import하면, Grid Layout 및 Button 사용 가능
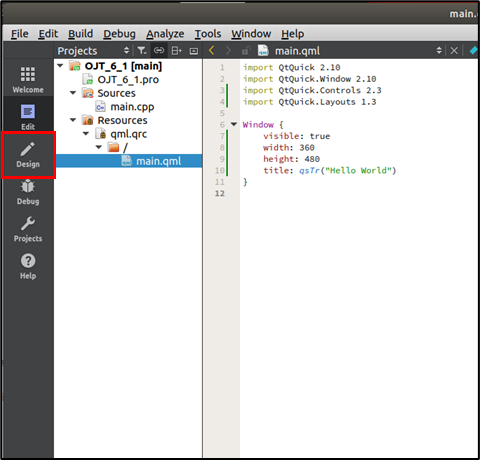
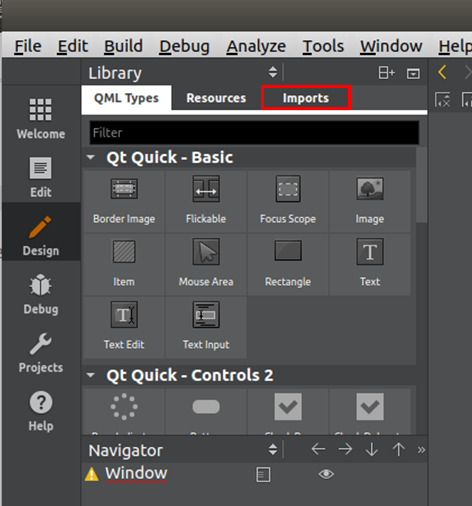
[Design] 클릭
[Imports] 클릭
QtQuick.Controls 2.3 과 QtQuick.Layouts 1.3 선택
3. Window 사이즈 설정
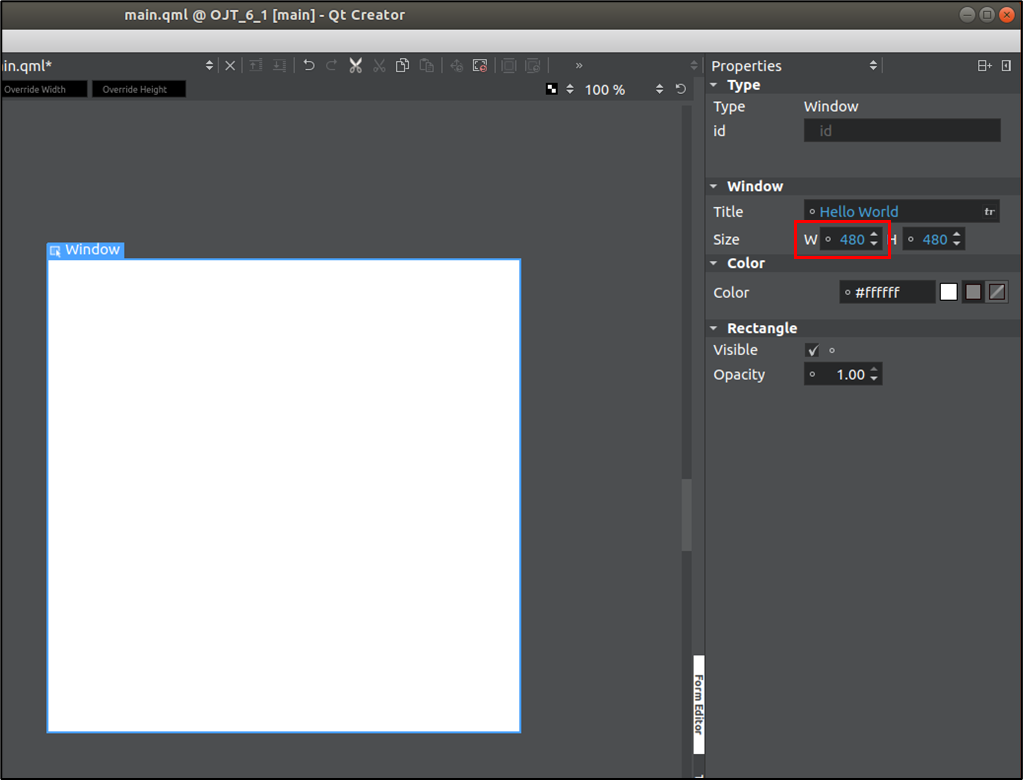
Window를 더블 클릭하면, 윈도우 설정 가능
처음에는 Width가 480으로 되어 있음
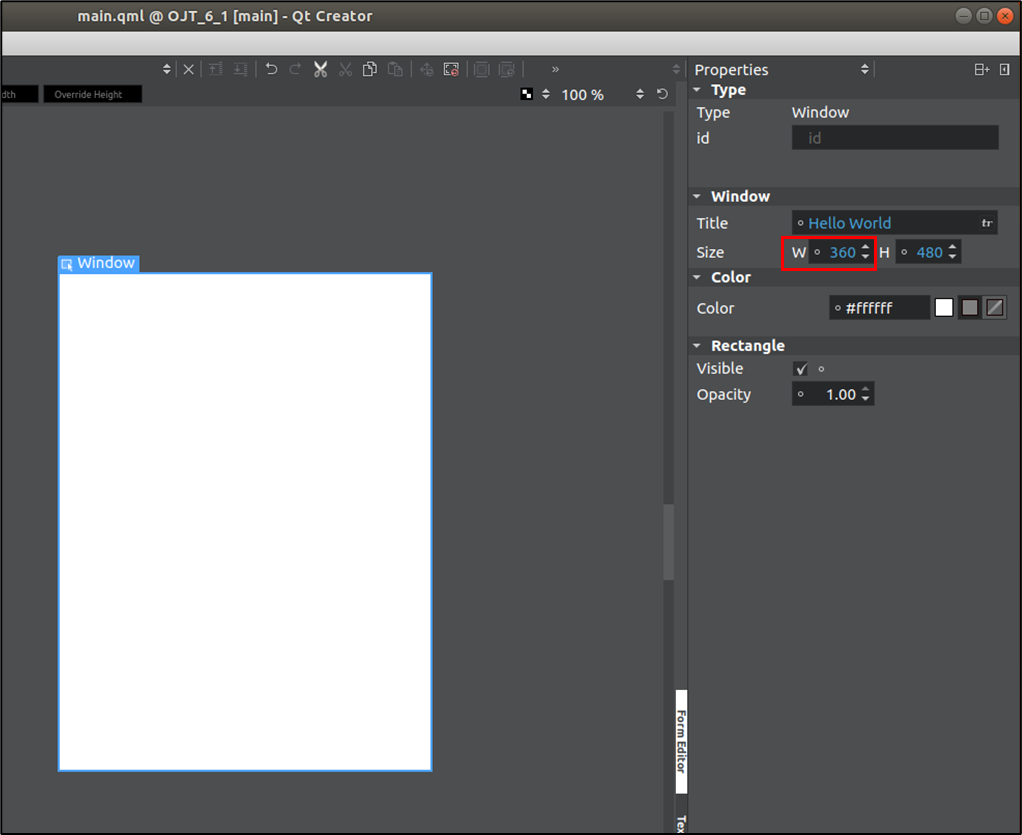
Width를 480에서 360으로 변경
4. qml로 계산기 GUI 구현
ColumnLayout > TextEdit, GridLayout
GridLayout > Button 16개
1) 텍스트 편집이 가능하도록 TextEdit 을 사용
2-2) GridLayout 에서는 rows, colums를 4로 맞추고, 버튼들을 4X4로 배치
3) Button의 사이즈는 Full Width, Full Height로 설정해 GridLayout 사이즈에 맞춰지도록 설정
[main.qml]

import QtQuick 2.10
import QtQuick.Window 2.10
import QtQuick.Controls 2.3
import QtQuick.Layouts 1.3

Window {
    id: window
    visible: true
    width: 360
    height: 480
    title: qsTr("Calculator")

    ColumnLayout {
        id: columnLayout
        spacing: 5
        anchors.fill: parent

        Text {
            id: calculator_text
            height: 120
            Layout.fillWidth: true
            Layout.fillHeight: true
            verticalAlignment: Text.AlignVCenter
            horizontalAlignment: Text.AlignRight
            font.pixelSize: 20
            rightPadding: 15
        }
        GridLayout {
            id: gridLayout
            Layout.fillHeight: true
            Layout.fillWidth: true
            rows: 4
            columns: 4

            Button {
                id: button_7
                text: qsTr("7")
                Layout.fillHeight: true
                Layout.fillWidth: true
            }

            Button {
                id: button_8
                text: qsTr("8")
                Layout.fillHeight: true
                Layout.fillWidth: true
            }

            Button {
                id: button_9
                text: qsTr("9")
                Layout.fillHeight: true
                Layout.fillWidth: true
            }

            Button {
                id: button_add
                text: qsTr("+")
                Layout.fillHeight: true
                Layout.fillWidth: true
            }

            Button {
                id: button_4
                text: qsTr("4")
                Layout.fillHeight: true
                Layout.fillWidth: true
            }

            Button {
                id: button_5
                text: qsTr("5")
                Layout.fillHeight: true
                Layout.fillWidth: true
            }

            Button {
                id: button_6
                text: qsTr("6")
                Layout.fillHeight: true
                Layout.fillWidth: true
            }

            Button {
                id: button_subtract
                text: qsTr("-")
                Layout.fillHeight: true
                Layout.fillWidth: true
            }

            Button {
                id: button_1
                text: qsTr("1")
                Layout.fillHeight: true
                Layout.fillWidth: true
            }

            Button {
                id: button_2
                text: qsTr("2")
                Layout.fillHeight: true
                Layout.fillWidth: true
            }

            Button {
                id: button_3
                text: qsTr("3")
                Layout.fillHeight: true
                Layout.fillWidth: true
            }

            Button {
                id: button_mutiply
                text: qsTr("*")
                Layout.fillHeight: true
                Layout.fillWidth: true
            }

            Button {
                id: button_clear
                text: qsTr("clear")
                Layout.fillHeight: true
                Layout.fillWidth: true
            }

            Button {
                id: button_0
                text: qsTr("0")
                Layout.fillHeight: true
                Layout.fillWidth: true
            }

            Button {
                id: button_equal
                text: qsTr("=")
                Layout.fillHeight: true
                Layout.fillWidth: true
            }

            Button {
                id: button_devide
                text: qsTr("/")
                Layout.fillHeight: true
                Layout.fillWidth: true
            }
        }

    }
}[main.cpp]
#include <QGuiApplication>
#include <QQmlApplicationEngine>
int main(int argc, char *argv[])
{
QCoreApplication::setAttribute(Qt::AA_EnableHighDpiScaling);
QGuiApplication app(argc, argv);
QQmlApplicationEngine engine;
engine.load(QUrl(QStringLiteral("qrc:/main.qml")));
if (engine.rootObjects().isEmpty())
return -1;
return app.exec();
}
(참고)
C/C++은 main함수가 entry point
QGuiApplication : GUI 출력을 위한 애플리케이션 entry point
QQmlApplicationEngine : QML 코드를 해석해서 화면에 표시
engine이 main.qml을 로딩하고 앱이 실행되면, main.qml이 화면에 표시됨
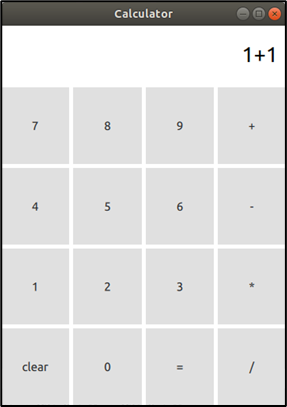
결과 이미지