
!unzip -q ./damage.zip # 압축된 데이터셋 damage.zip을 해제!pip install -q ultralytics opencv-python # YOLO (ultralytics)와 OpenCV 설치import os
import random
import shutil
import cv2
import glob
import json
import numpy as np
import matplotlib.pyplot as plt
import ultralytics
from tqdm import tqdm
from pycocotools import mask as maskUtils# 학습/검증/테스트용 루트 폴더 경로 지정
train_root = f'./train'
valid_root = f'./valid'
test_root = f'./test'
# 클래스(불량 유형) 리스트 정의
cls_list = ['Scratched', 'Crushed', 'Breakage', 'Separated']# train, valid, test 각각에 images/labels 폴더 생성
for folder in [train_root, valid_root, test_root]:
if not os.path.exists(folder): # 폴더가 없으면 생성
os.makedirs(folder)
for s in ['images', 'labels']:
s_folder = f'{folder}/{s}'
if not os.path.exists(s_folder):
os.makedirs(s_folder)# 원천 이미지 데이터 경로 불러오기
data_list = glob.glob('/content/원천데이터/TS_damage/damage/*.jpg')
# 이미지 개수 확인
len(data_list)1200# 첫 번째 이미지 확인
data_list[0]/content/원천데이터/TS_damage/damage/0359094_sc-206072.jpg# 특정 index의 이미지를 불러와 라벨링된 polygon(다각형) 시각화 함수
def draw_polygon_by_index(idx):
image_path = data_list[idx]
# 이미지 읽기 (BGR 형식으로 읽힘)
image = cv2.imread(image_path)
# 이미지에 해당하는 라벨 JSON 경로 생성
# 원천데이터 → 라벨링데이터, TS_damage → TL_damage 로 경로 변환
json_path = image_path.replace('원천데이터', '라벨링데이터').replace('TS_damage', 'TL_damage').replace('.jpg', '.json')
# OpenCV BGR → RGB 변환 (matplotlib 표시용)
image = cv2.cvtColor(image, cv2.COLOR_BGR2RGB)
# JSON 파일 읽기
with open(json_path, 'r') as f:
data = json.load(f)
# annotation 안에 segmentation(다각형 좌표) 정보가 있으면 그리기
for ann in data['annotations']:
if 'segmentation' in ann:
segmentation = ann['segmentation']
if isinstance(segmentation, list):
for seg in segmentation:
if isinstance(seg, list):
# segmentation 좌표 → (x,y) 점 리스트로 변환
points = np.array(seg).reshape(-1, 2).astype(np.int32)
# 이미지 위에 폴리라인(다각형) 그리기
cv2.polylines(image, [points], isClosed=True, color=(255, 0, 0), thickness=2)
# 시각화 출력
plt.figure(figsize=(10, 8))
plt.imshow(image)
plt.axis('off')
plt.title(f'Polygon Overlay: {os.path.basename(image_path)}')
plt.show()# 예시: 10번째 이미지에 polygon 겹쳐서 출력
draw_polygon_by_index(10)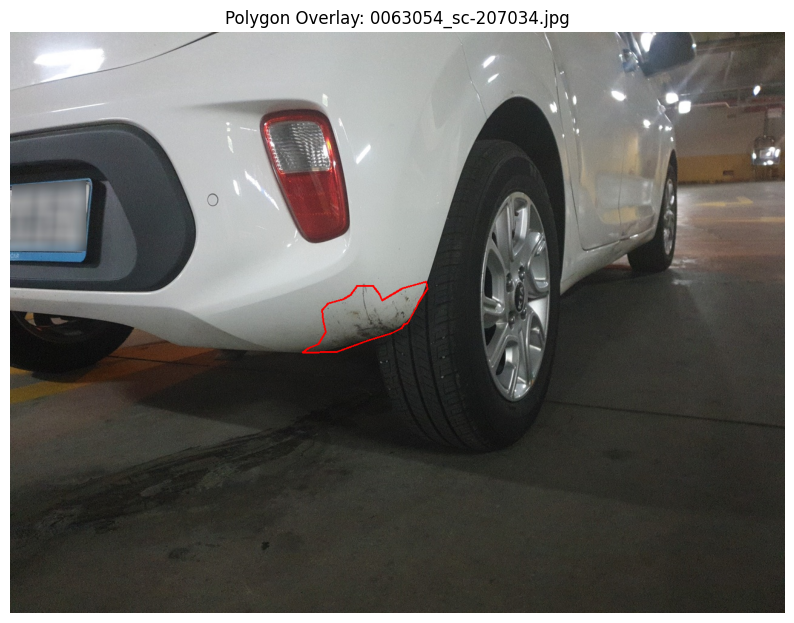
draw_polygon_by_index(15)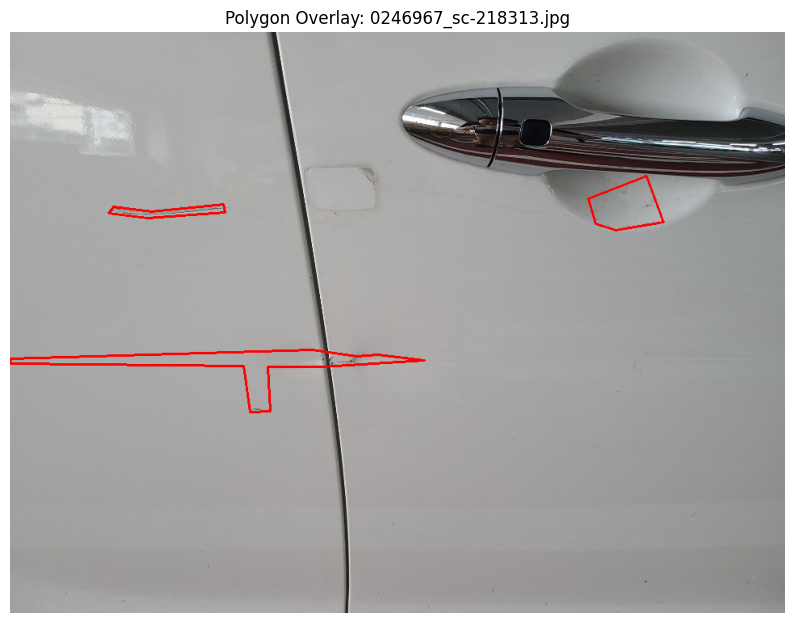
draw_polygon_by_index(20)
# 클래스 이름을 YOLO 라벨 번호(index)와 매핑
damage_classes = {
    "Scratched": 0,
    "Crushed": 1,
    "Breakage": 2,
    "Separated": 3
}
# JSON(라벨링 데이터) → YOLO Segmentation 형식(txt) 변환 함수
def convert_json_to_yolo(json_path, save_dir):
# JSON 파일 열기
with open(json_path, 'r') as f:
data = json.load(f)
# 이미지 크기 정보 가져오기
image_info = data['images']
img_width, img_height = image_info['width'], image_info['height']
yolo_annotations = []
# annotation(객체 라벨 정보) 순회
for ann in data['annotations']:
if 'segmentation' in ann and 'damage' in ann:
# segmentation 좌표 추출
segmentation = ann['segmentation'][0][0]
# 중첩된 리스트(flatten)
if isinstance(segmentation[0], list):
segmentation = [coord for sublist in segmentation for coord in sublist]
# YOLO는 [0~1] 정규화된 좌표 사용 → (x/width, y/height)
normalized_coords = [segmentation[i] / img_width if i % 2 == 0 else segmentation[i] / img_height for i in range(len(segmentation))]
# 클래스 이름을 숫자 라벨로 변환
class_label = damage_classes.get(ann['damage'], -1)
# YOLO 포맷: class x1 y1 x2 y2 ...
yolo_annotations.append(f'{class_label} ' + ' '.join(map(str, normalized_coords)))
# YOLO txt 파일 저장 경로 지정
yolo_filename = os.path.basename(json_path).replace('.json', '.txt')
save_path = os.path.join(save_dir, yolo_filename)
# 변환된 라벨 저장
with open(save_path, 'w') as f:
f.write('\n'.join(yolo_annotations))# 모든 JSON 라벨 파일을 YOLO 포맷(txt)으로 변환
for json_path in tqdm(glob.glob(os.path.join('/content/라벨링데이터/TL_damage/damage', '*.json'))):
if not os.path.exists('./label'):
os.makedirs('./label')
convert_json_to_yolo(json_path, f'./label')
print('YOLO 형식 변환 완료!!')데이터셋 Train/Valid/Test 분할
random.seed(2025)
file_list = glob.glob(f'./label/*.txt')

# 파일 랜덤 셔플
random.shuffle(file_list)

# 비율 설정 (10% test, 10% valid, 나머지 train)
test_ratio = 0.1
num_file = len(file_list)
num_file
test_list = file_list[:int(num_file*test_ratio)]
valid_list = file_list[int(num_file*test_ratio):int(num_file*test_ratio)*2]
train_list = file_list[int(num_file*test_ratio)*2:]
# 분할된 데이터셋 개수 확인 (960, 120, 120)
len(train_list), len(valid_list), len(test_list)(960, 120, 120)# './label/0051632_sc-164684.txt'
test_list파일을 YOLO 구조에 맞게 복사
# Test set
for i in tqdm(test_list):
    label_name = i.split('/')[-1]
    shutil.copyfile(i, f'{test_root}/labels/{label_name}')
    img_name = i.split('/')[-1].replace('txt', 'jpg')
    img_path = f'/content/원천데이터/TS_damage/damage/{img_name}'
    shutil.copyfile(img_path, f'{test_root}/images/{img_name}')
# Validation set
for i in tqdm(valid_list):
label_name = i.split('/')[-1]
shutil.copyfile(i, f'{valid_root}/labels/{label_name}')
img_name = i.split('/')[-1].replace('txt', 'jpg')
img_path = f'/content/원천데이터/TS_damage/damage/{img_name}'
shutil.copyfile(img_path, f'{valid_root}/images/{img_name}')# Train set
for i in tqdm(train_list):
label_name = i.split('/')[-1]
shutil.copyfile(i, f'{train_root}/labels/{label_name}')
img_name = i.split('/')[-1].replace('txt', 'jpg')
img_path = f'/content/원천데이터/TS_damage/damage/{img_name}'
shutil.copyfile(img_path, f'{train_root}/images/{img_name}')데이터셋 정보(YAML) 작성
import yaml

data = dict()

data['train'] = train_root
data['val'] = valid_root
data['test'] = test_root
data['nc'] = len(cls_list)
data['names'] = cls_list

# car_damage.yaml 파일 저장
with open(f'car_damage.yaml', 'w') as f:
  yaml.dump(data, f)
YOLO 모델 학습
from ultralytics import YOLO# 모델, 네트워크 구조와 하이퍼파라미터를 정의한 YAML 파일
model = YOLO('yolov8s-seg.yaml')# 모델 학습
results = model.train(
data = 'car_damage.yaml', # 데이터셋 정의 파일
epochs = 100, # 학습 epoch
imgsz = 224, # 입력 이미지 크기
batch = 16, # 배치 크기
device = 0, # GPU. 0번 사용
name = 'damage_s' # 결과 저장 이름
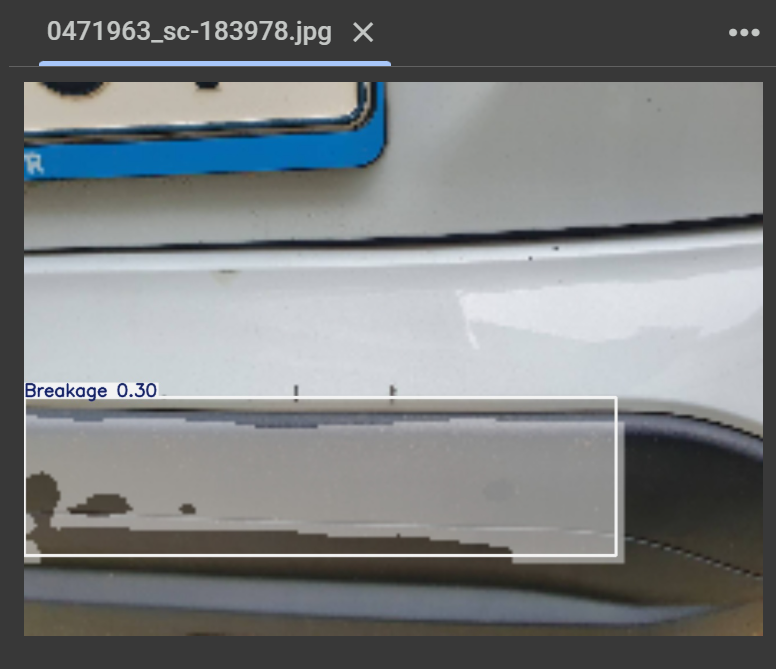
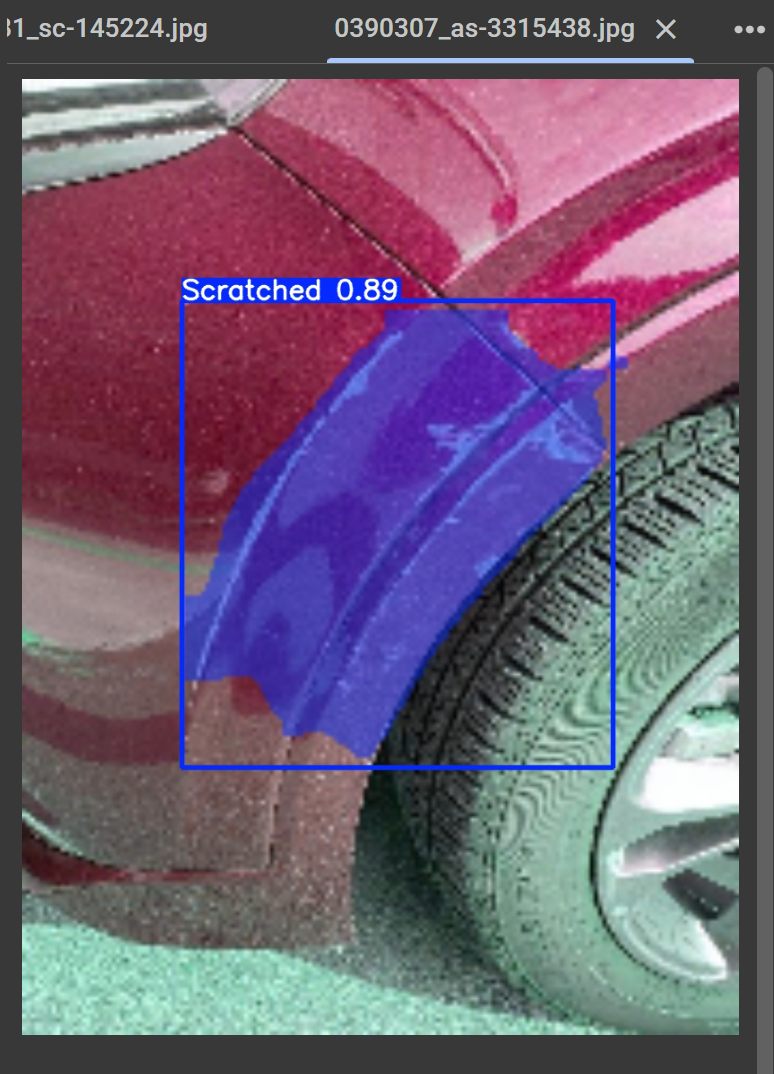
)학습된 모델 불러오기 및 추론
# best.pt → 가장 성능 좋은 가중치
model = YOLO('/content/runs/segment/damage_s2/weights/best.pt')

# 테스트 이미지에 대해 예측 실행
results = model.predict(
    source='/content/test/images',  # 테스트 이미지 경로
    imgsz=224,                      # 입력 크기
    conf=0.25,                      # confidence threshold
    device=0,                       # GPU. 0번
    save=True,                      # 결과 이미지 저장
    save_conf=True                  # confidence score 저장
)

The light shines in the darkness.