- preview Link : https://velog.io/@suhan0304/Unity-Electricity-15
- gitHub Link : https://github.com/suhan0304/Electricity
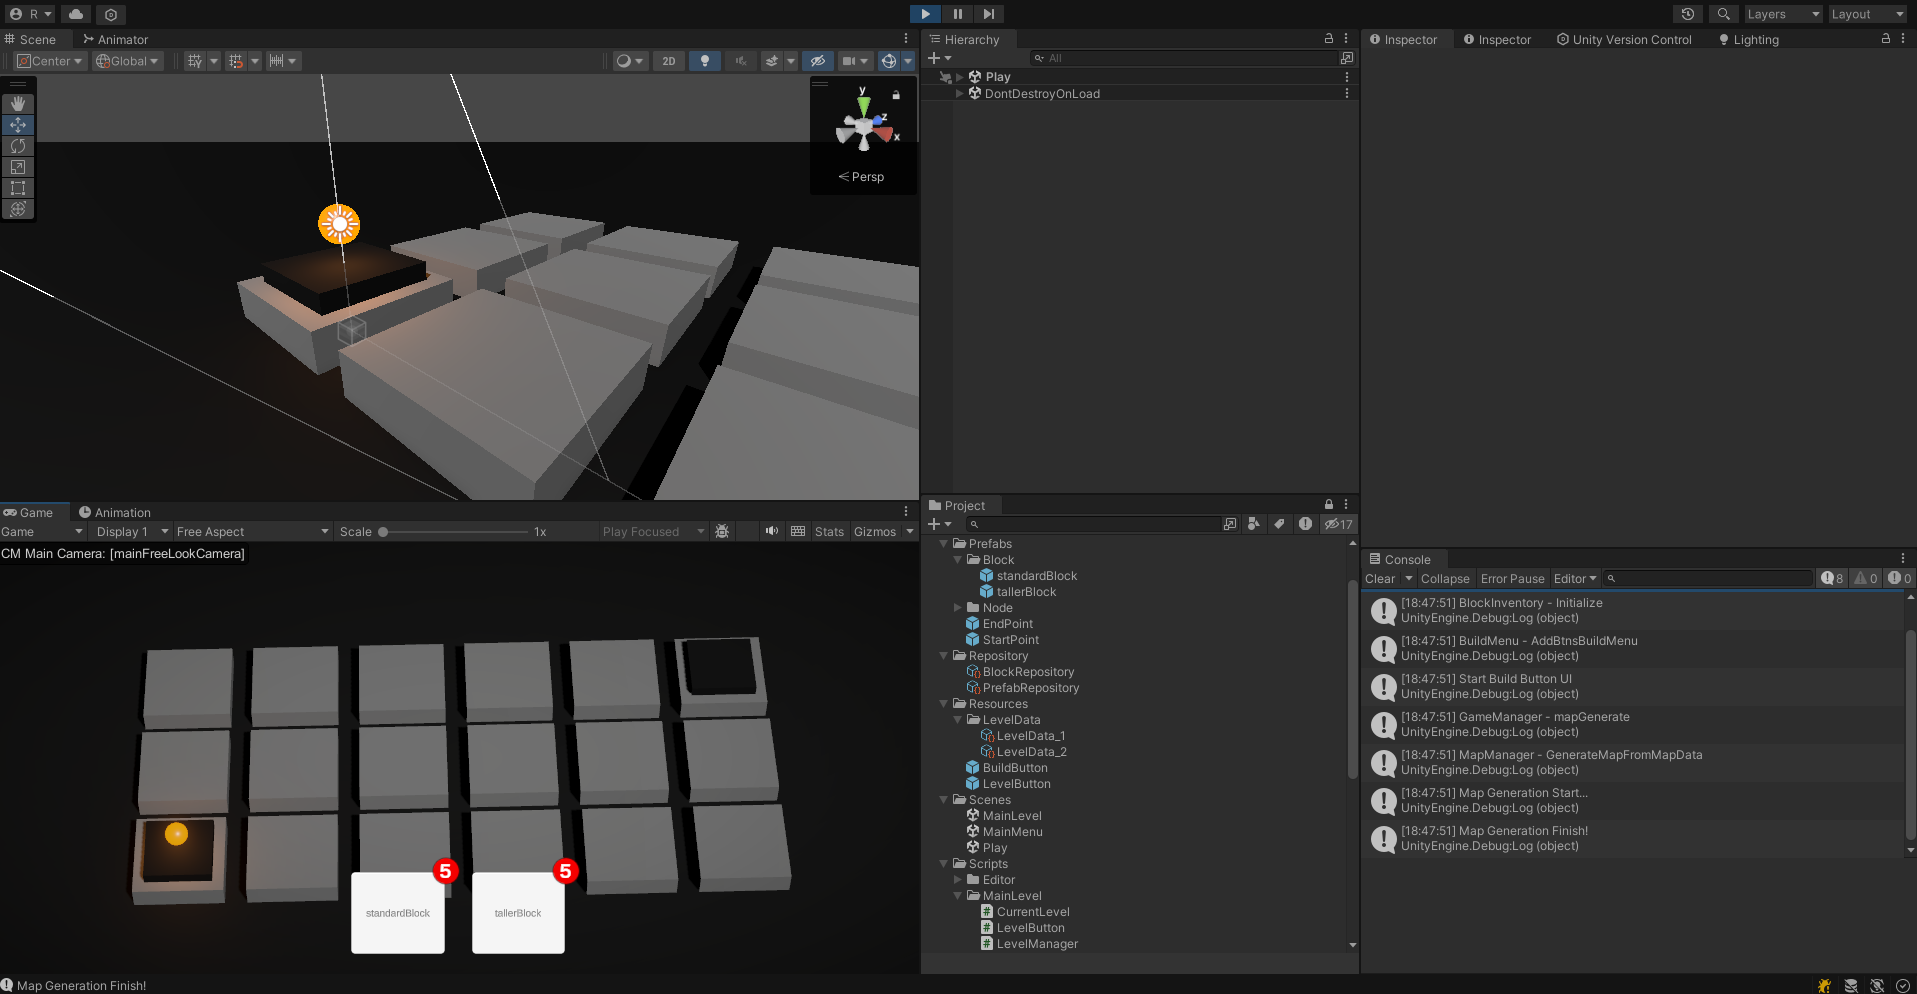
Choosed
현재 선택중인 버튼에 토글 기능을 넣어보자
BuildButton.cs
public void OnClickBlockButton() {
    if (buildMenu.SelectedButton != null) {
        buildMenu.SelectedButton.GetComponent<Image>().color = InitialColor;
    }

    if (buildMenu.SelectedButton == this.gameObject) {
        buildMenu.SelectedButton = null;
        buildMenu.DeselectBlock();
    }
    else {
        buildMenu.SelectedButton = this.gameObject;
        GetComponent<Image>().color = SelectedColor;
        buildMenu.SelectBlock(BlockInventory.blockData.blockType);
    }
}
BuildMenu.cs
public void DeselectBlock() {
Debug.Log($"Block Deseelected");
TransparentBlockManager.Instance.SetSelectedBlockType(-1);
BuildManager.Instance.SetBlockToBuild(-1);
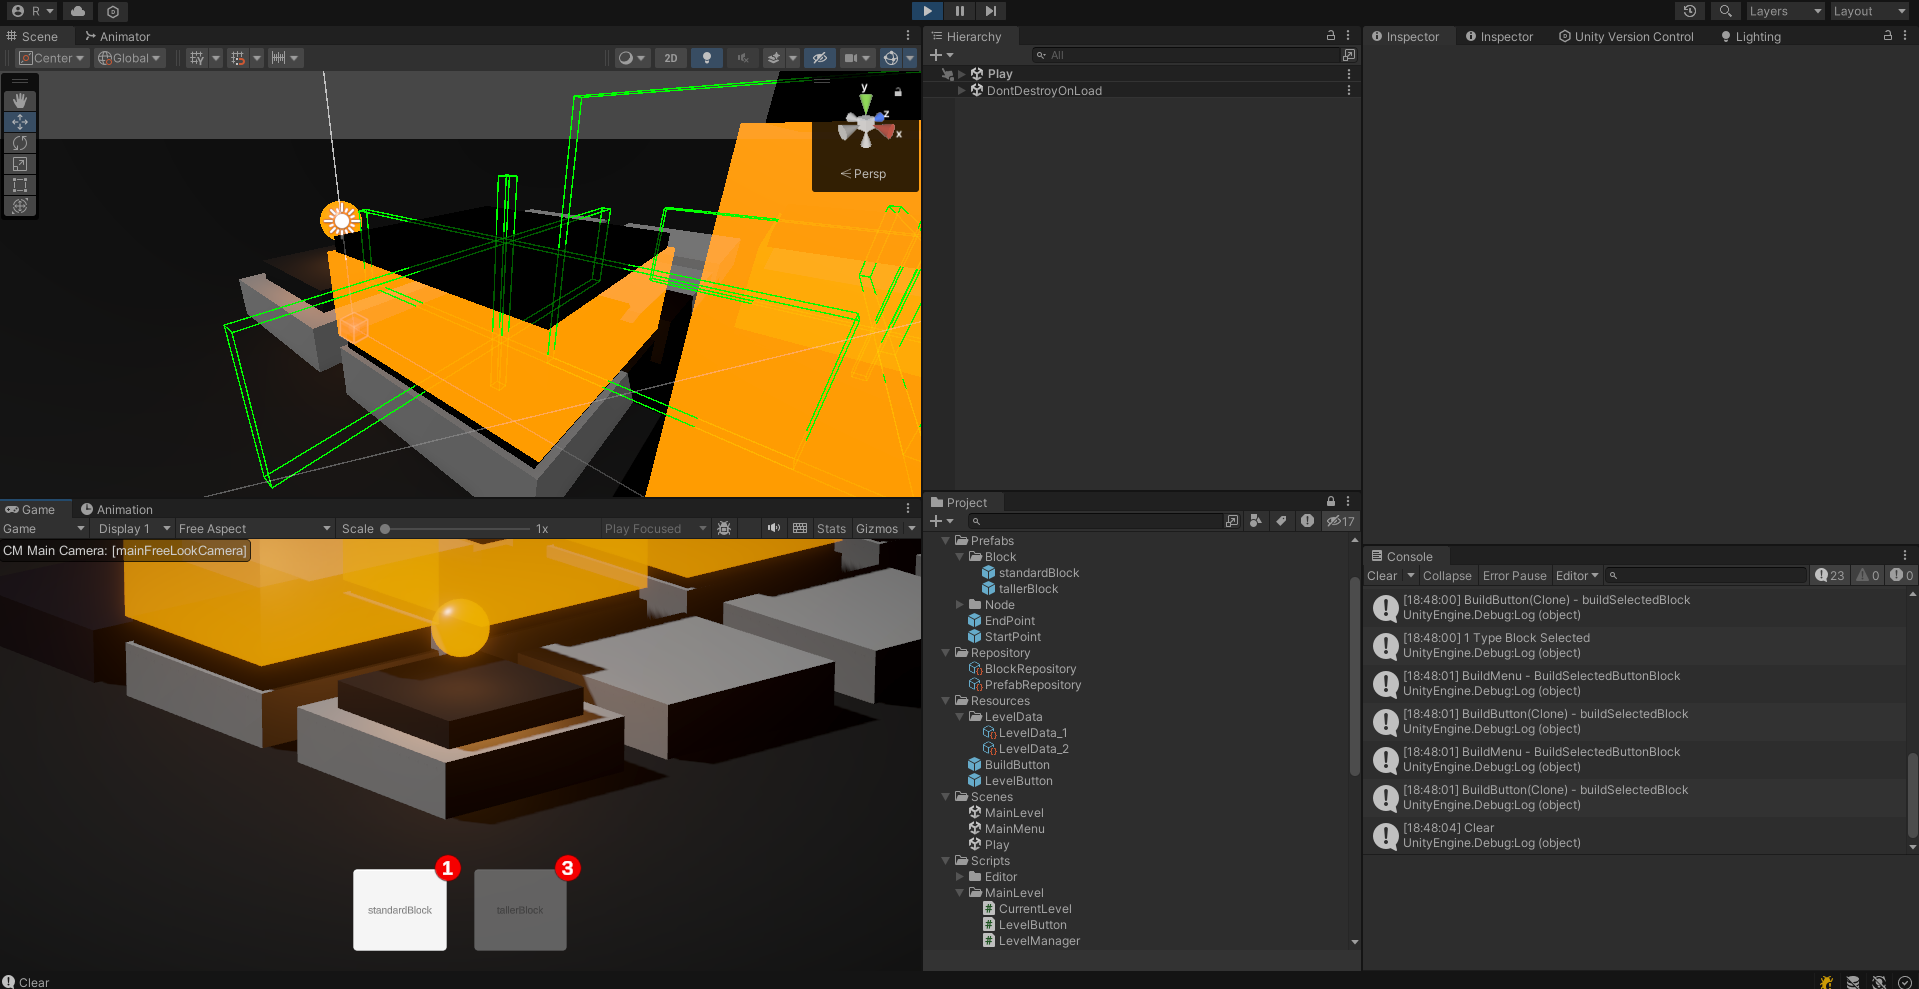
}누르면 색이 변하면서 Toggle되고 다시 누르면 해제되면서 Untoggle 된다. Toggle 된 상태에서만 블럭을 build 할 수있다.
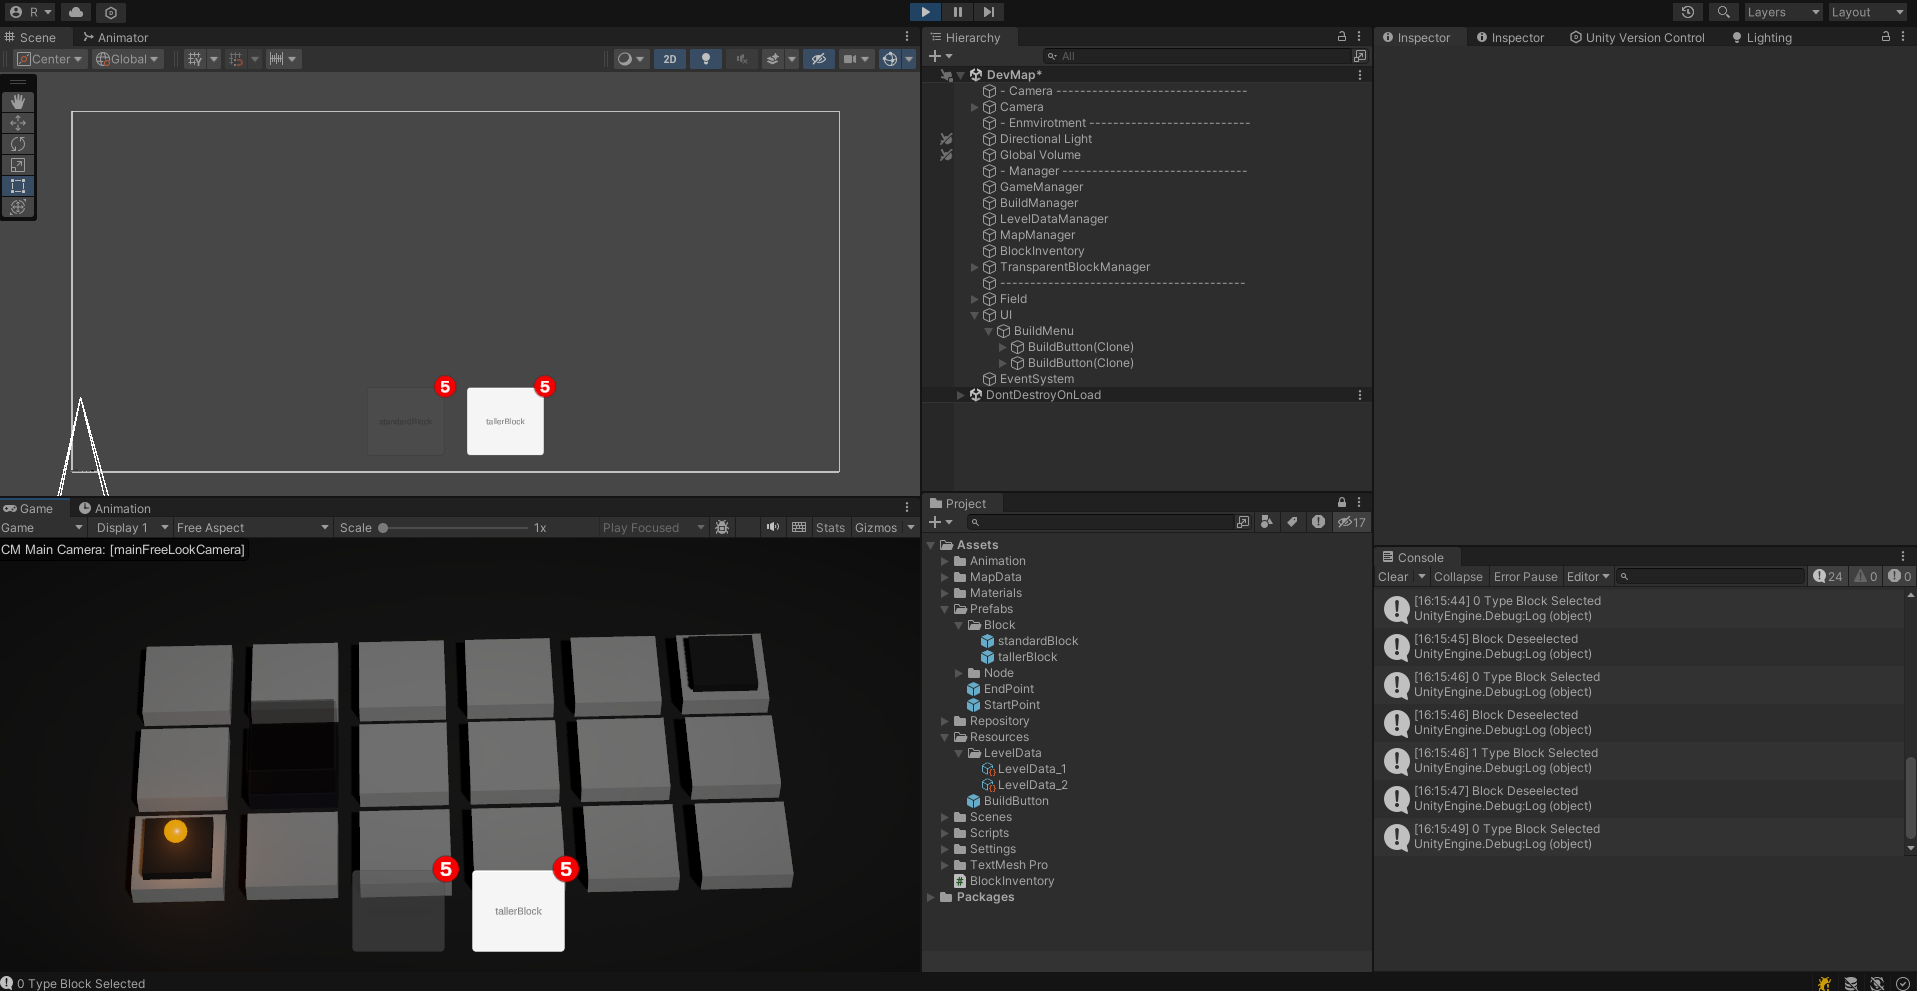
Count 기능
이제 건설하면 Count가 --되게 설정해보자. 버튼에 blockInventory에 대한 데이터가 있고 해당 데이터 안에 버튼이 어떤 블럭 타입에 대한 버튼인지를 파악할 수 있다. 따라서 블럭을 선택한 상태에서 건설을 하면 빌드 버튼의 인벤토리의 개수를 줄이고 텍스트를 갱신해주면 된다.
BuildManager.cs
public void BuildBlockOnNode(Node node)
{
    float blockHeight = blockToBuild.transform.localScale.y;
    Vector3 buildPosition = node.transform.position + new Vector3(0,node.nodeHeight + node.blocksTotalHeight + (blockHeight/2),0);
    node.blockOnNode = Instantiate(blockToBuild, buildPosition, node.transform.rotation, node.transform.parent);

    node.blocksTotalHeight += blockHeight; // Update blocksTotalHeights ( add block height )

    buildMenu.BuildSelectedButtonBlock();

    //Debug.Log("Build the Block!"); //For DebugTest
}
BuildMenu.cs
public void BuildSelectedButtonBlock() {
    Debug.Log($"{this.name} - BuildSelectedButtonBlock");

    SelectedButton.GetComponent<BuildButton>().buildSelectedBlock();
}
BuildButton.cs
public void buildSelectedBlock() {
    Debug.Log($"{this.name} - buildSelectedBlock");

    _blockInventory.blockCount--;
    blockCountText.text = _blockInventory.blockCount.ToString();

    if (_blockInventory.blockCount == 0) {
        GetComponent<Button>().interactable = false;
        buildMenu.DeselectBlock();
    }
}
이제 노드를 클릭해서 build를 하면 개수가 줄어들고 0이 되면 deselected 되면서 버튼이 비활성화된다.
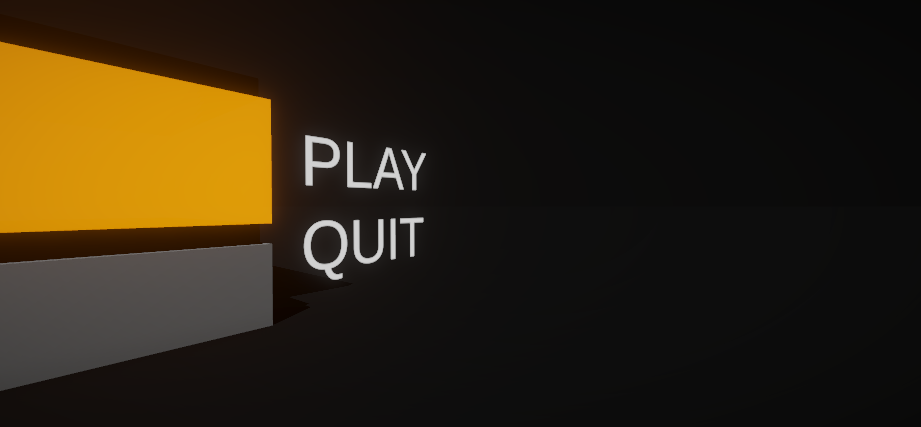
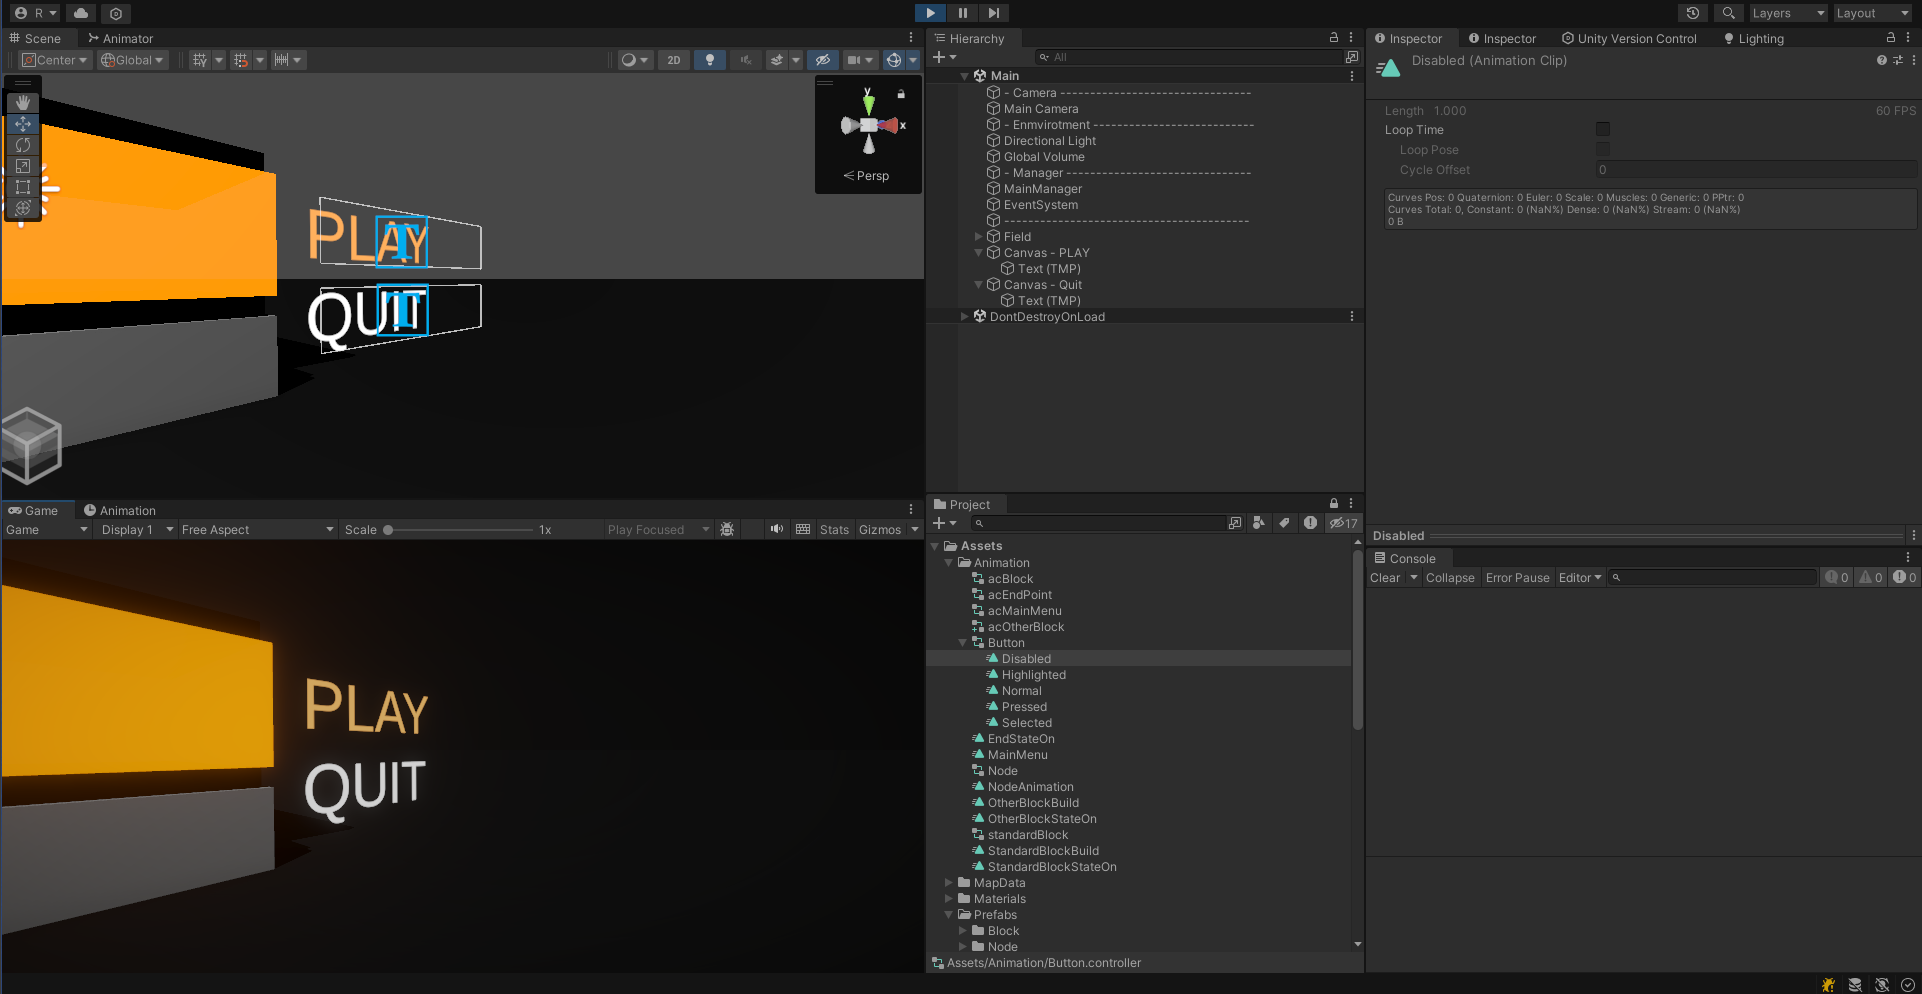
MainMenu Scene
노드랑 블럭을 하나씩 설치해두고 적절한 뷰를 잡고 카메라를 선택한 후에 GameObject > Align with View를 해서 뷰를 설정해줬다.
노드에는 별도로 MainMenu 애니메이션을 하나 만들어서 시간을 두고 전기가 켜졌다 꺼졌다를 반복하도록 했다.
그런 다음 Play, Quit를 적절히 만들어서 배치해두자.
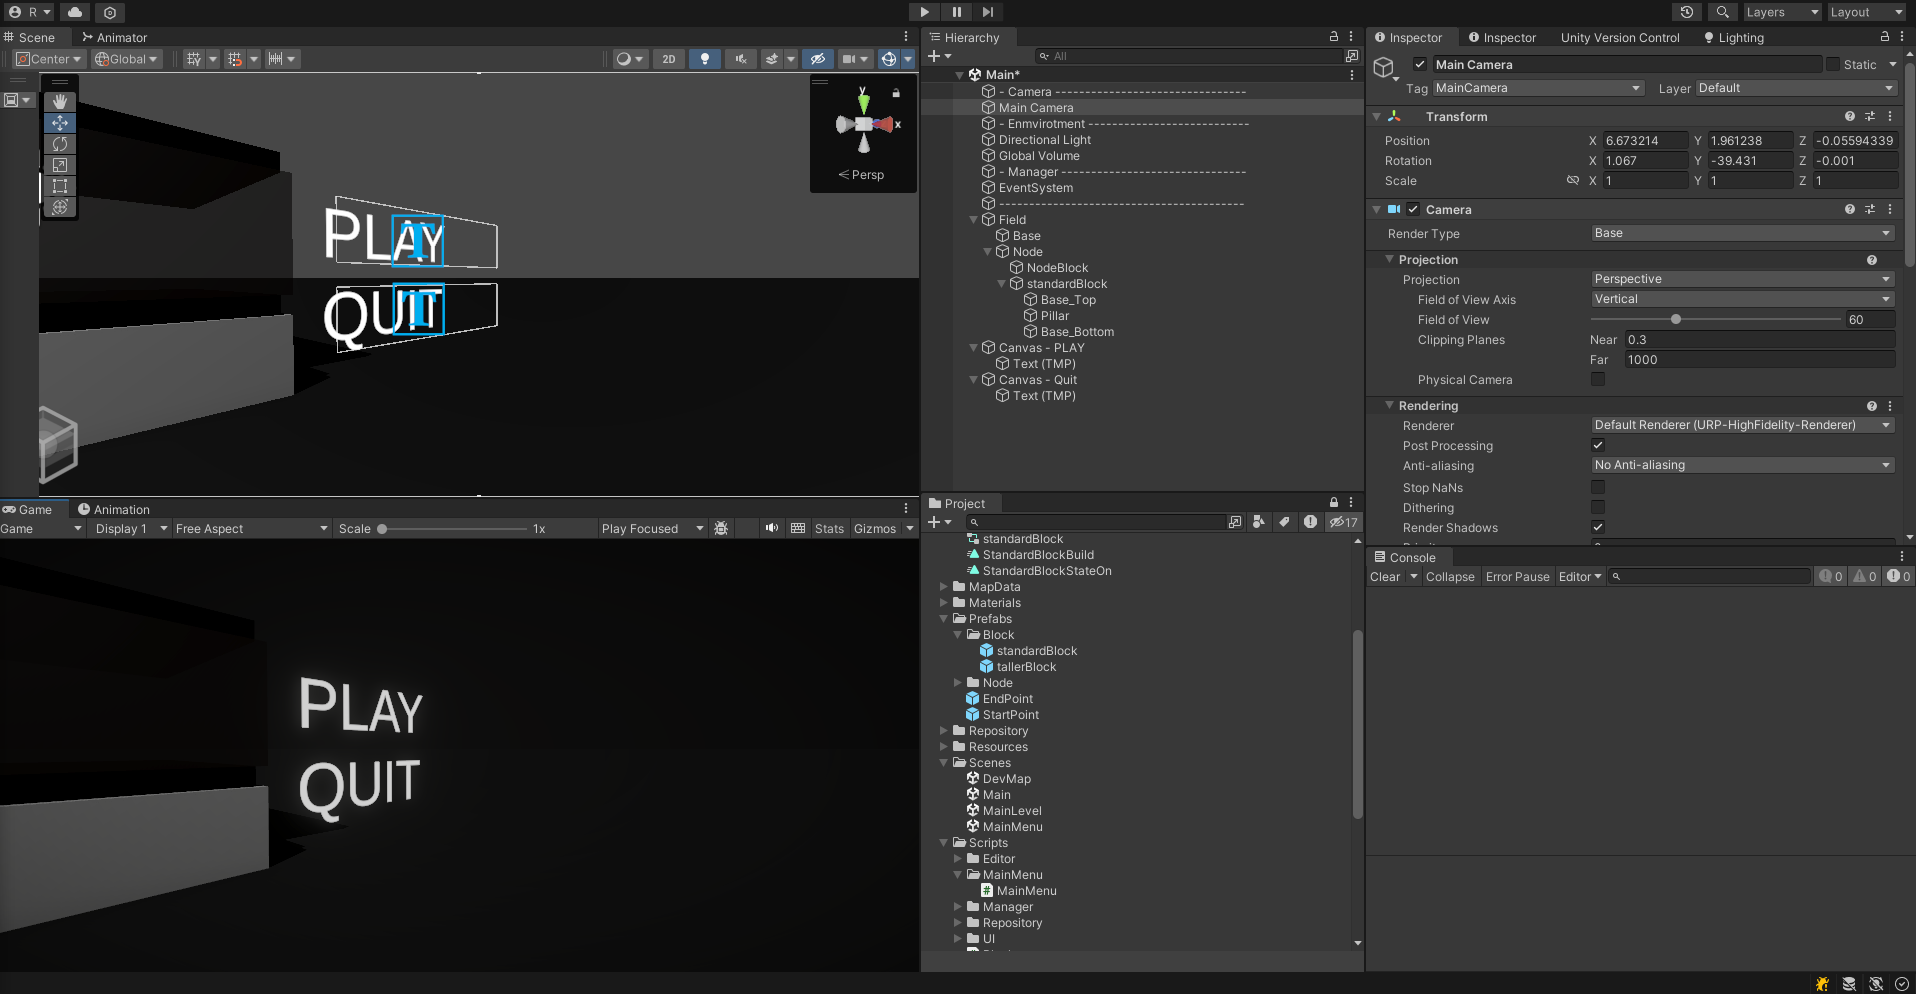
그런 다음 SceneManager로 연결해준다. MainLevel Scene도 추후에 만들어줄 예정이다.
MainMenu.cs
using System.Collections;
using System.Collections.Generic;
using UnityEngine;
using UnityEngine.SceneManagement;
public class MainMenu : MonoBehaviour
{
public static string MenuToLoad = "Main";
public static string levelToLoad = "MainLevel";
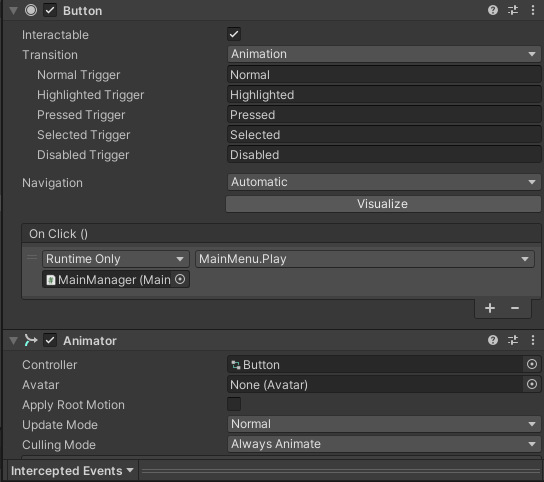
public void Play() {
SceneManager.LoadScene(levelToLoad);
}
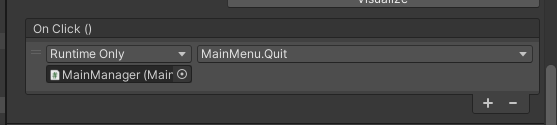
public void Quit() {
Debug.Log("Exiting...");
Application.Quit();
}
}
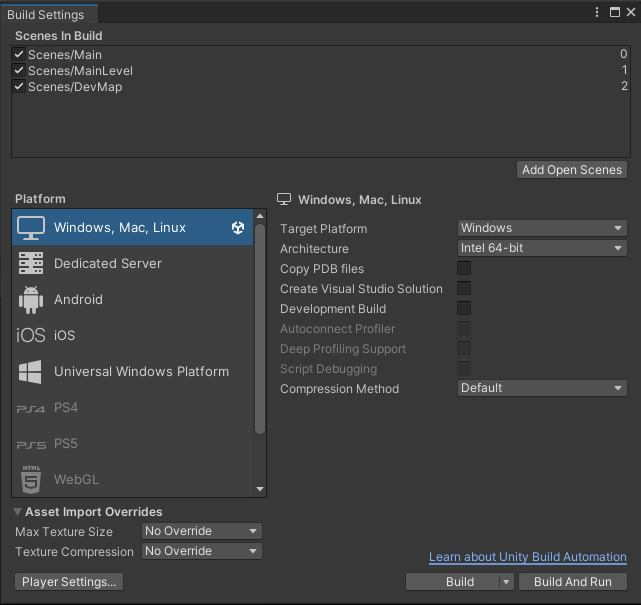
File > buildSettings를 꼭 설정해주자. 이 때 MainMenu를 0번으로 해줘야 제일 먼저 Load 된다.
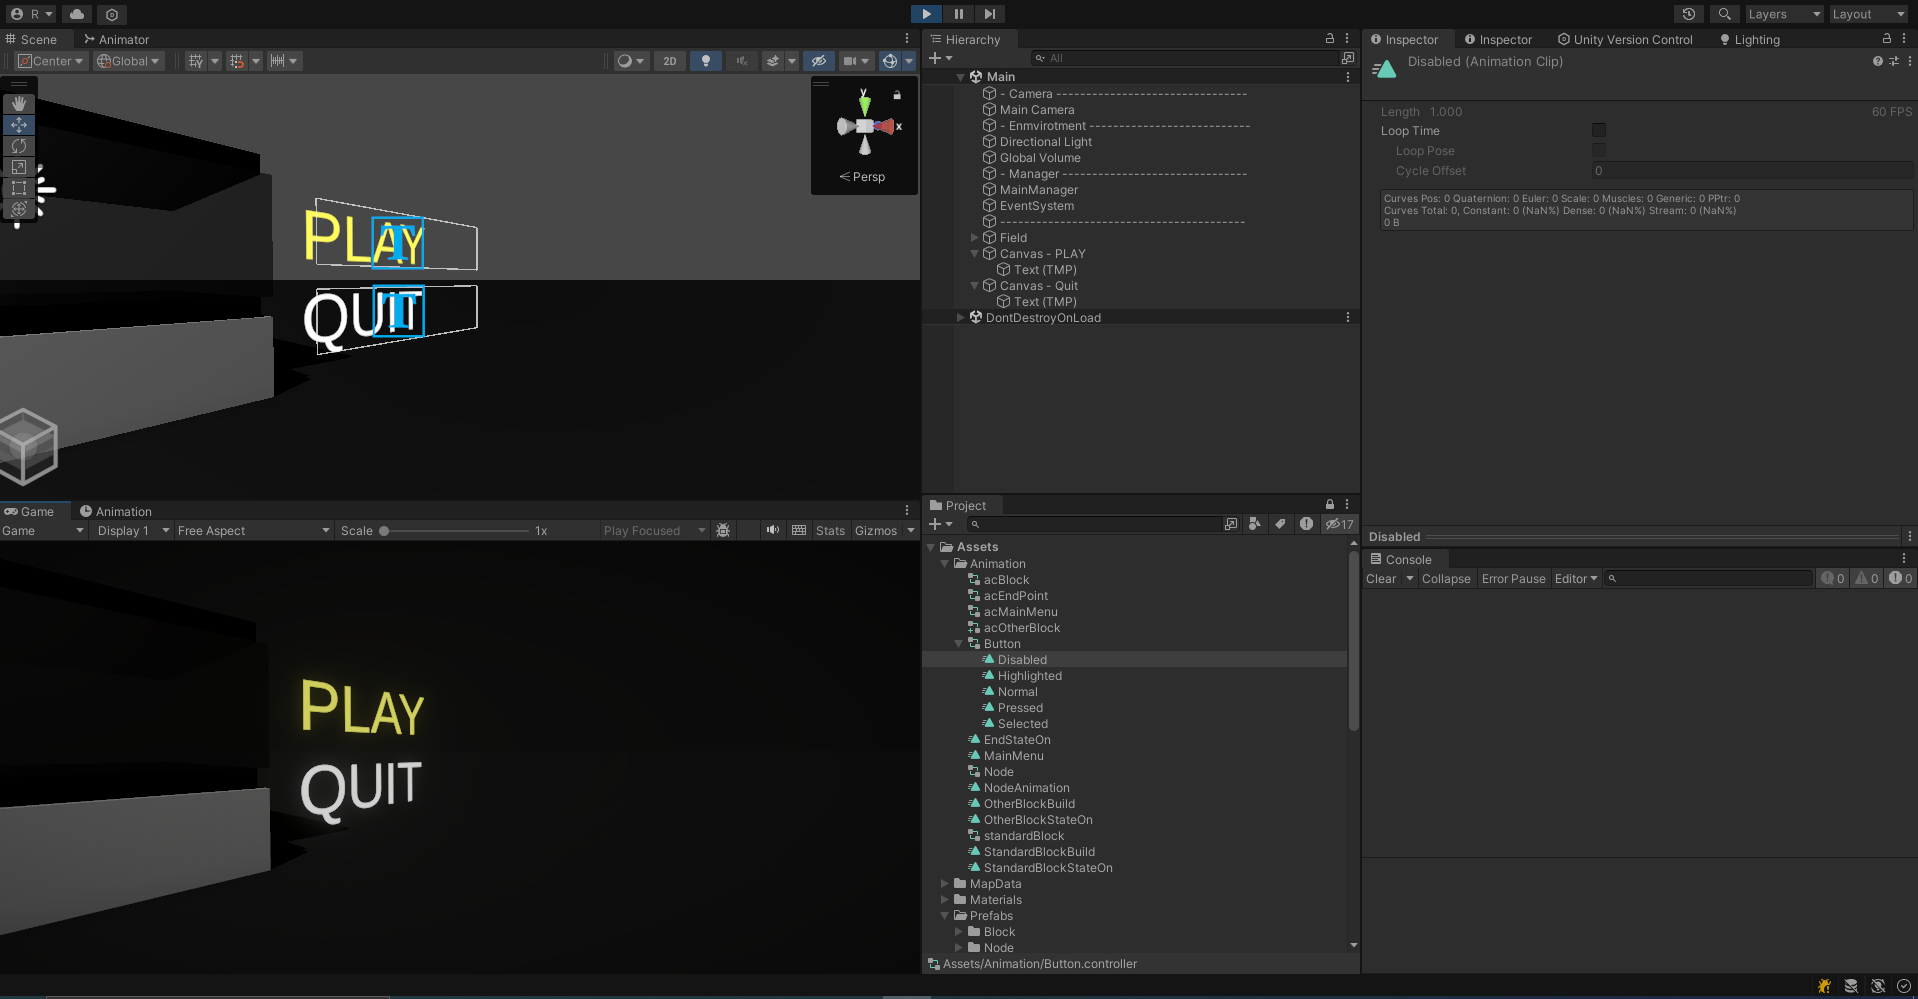
Button Animation
버튼 애니메이션을 제작해주었다.
UNITY EDITOR
QUIT GAME 누르면 UNITY EDITOR도 종료되도록 아래와 같이 수정했다.
public void Quit() {
    Debug.Log("Exiting...");

#if UNITY_EDITOR
    if (EditorApplication.isPlaying)
    {
        EditorApplication.isPlaying = false;
    }
#else
    Application.Quit();
#endif
}
MainLevel
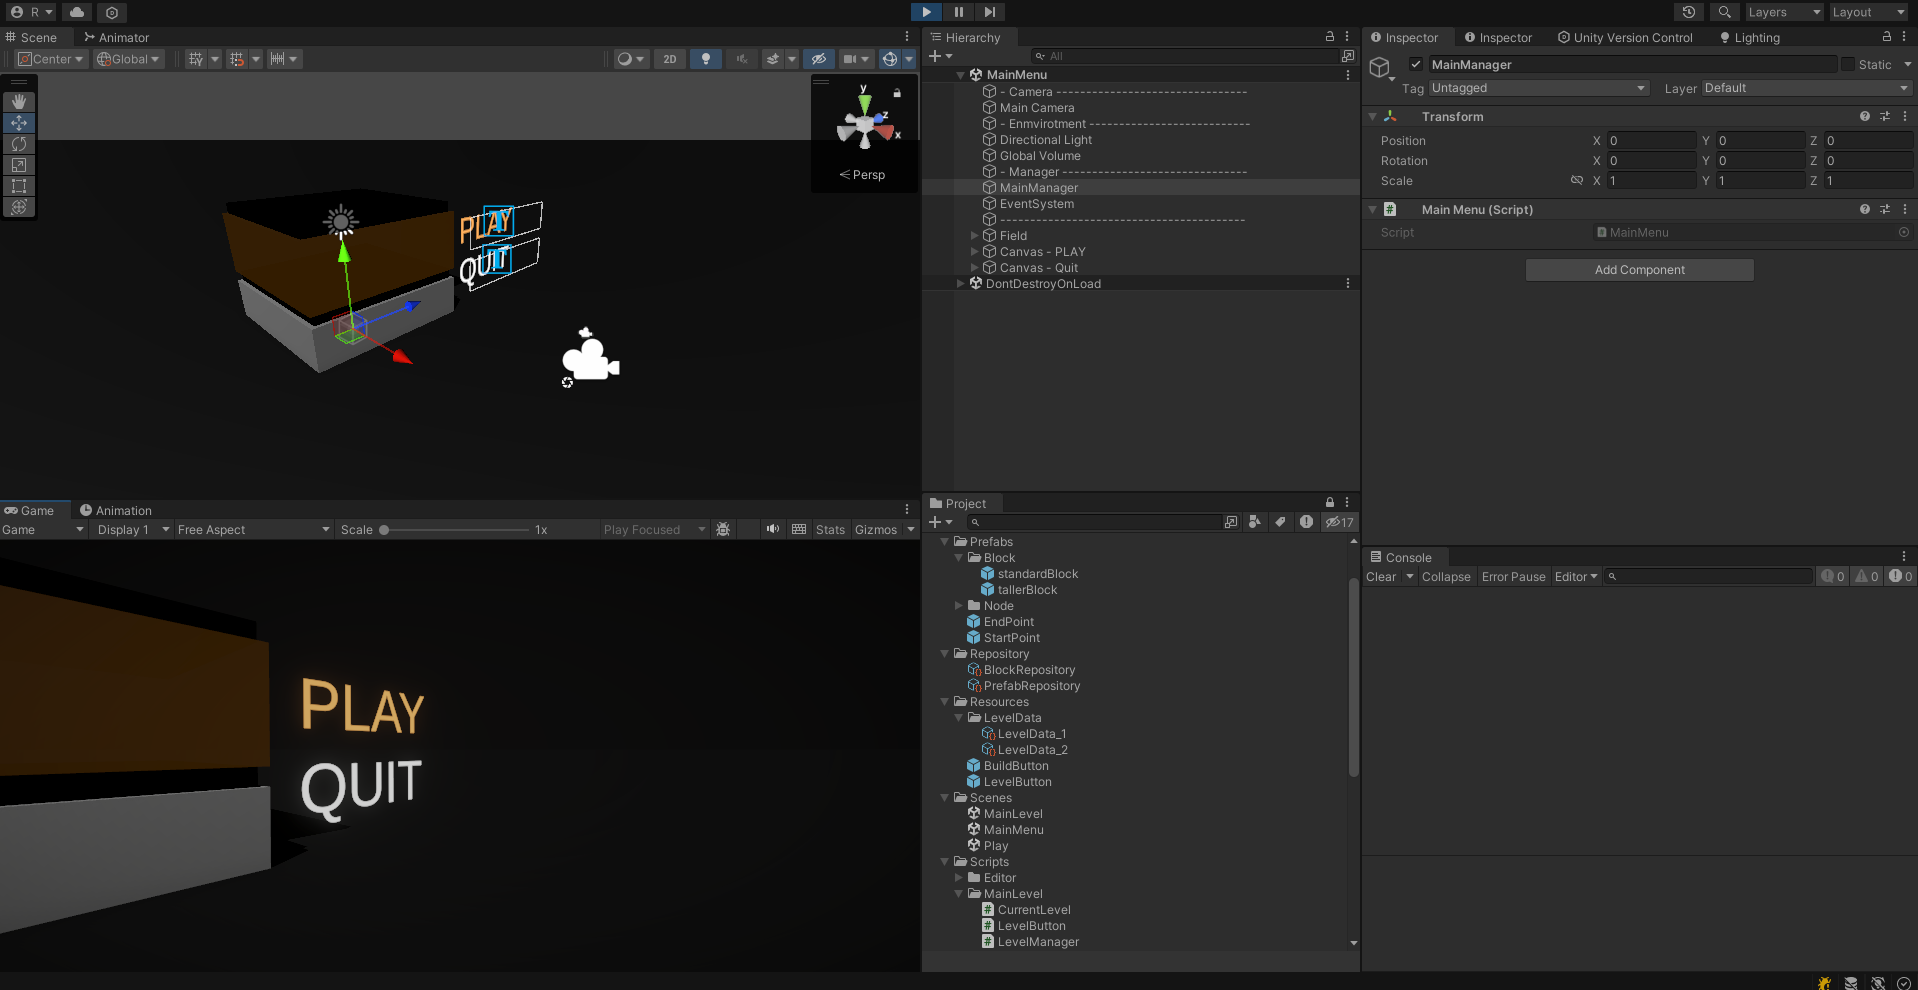
Main Level 씬을 만들어보자. 자동으로 레벨 데이터를 불러와서 레벨 데이터 수만큼 버튼을 만들고 해당 레벨 인자를 보내면서 Play 씬을 로드하는 메소드를 버튼의 Onclick에 수동으로 연결되도록 한다.
LevelManager.cs
using System.Collections;
using System.Collections.Generic;
using UnityEngine;
using UnityEngine.UI;
public class LevelManager : MonoBehaviour
{
public GameObject buttonRrefab;
public Transform buttonContents;
void Start() {
buttonRrefab = Resources.Load<GameObject>("LevelButton");
if (buttonRrefab == null) {
Debug.LogWarning("No Level Button Prefab in Resources/");
return;
}
LoadLevelData();
}
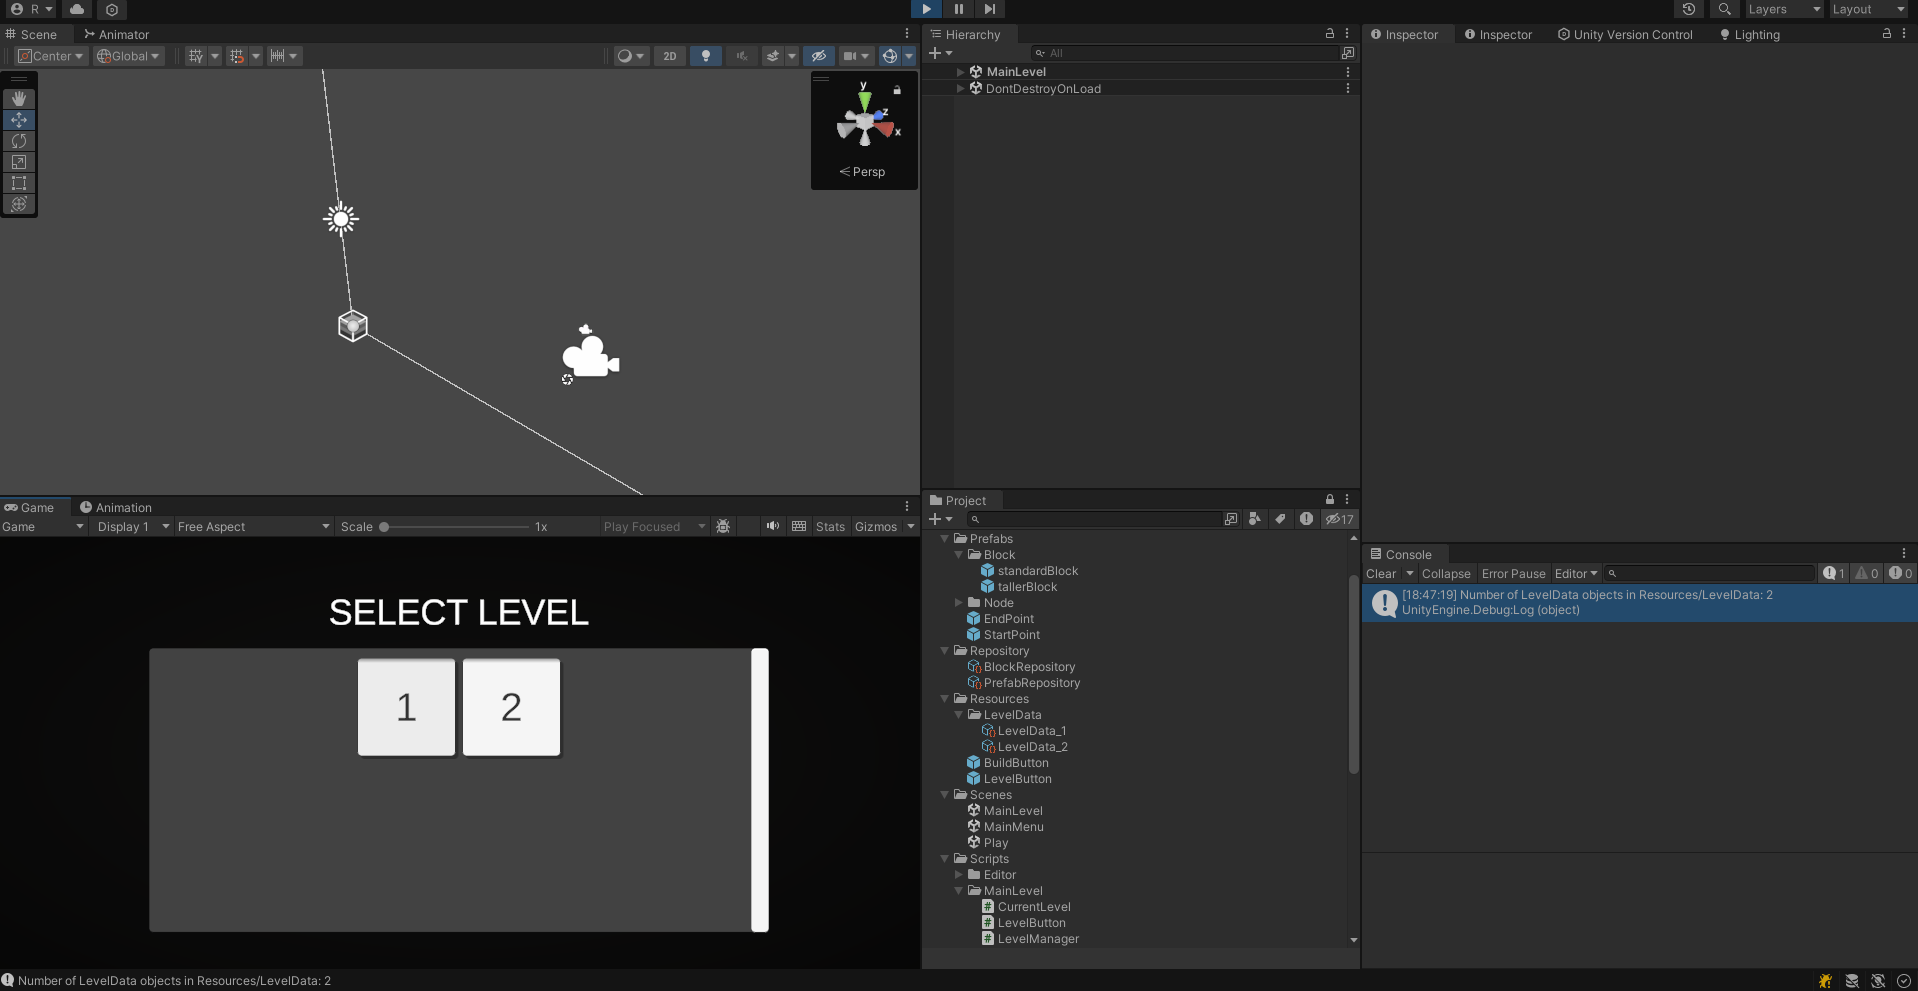
void LoadLevelData() {
LevelData[] levelDatas = Resources.LoadAll<LevelData>("LevelData");
Debug.Log($"Number of LevelData objects in Resources/LevelData: {levelDatas.Length}");
for (int i=0; i<levelDatas.Length; i++) {
GameObject levelButton = Instantiate(buttonRrefab, buttonContents);
levelButton.GetComponent<LevelButton>().Initialize(i+1);
}
}
}
아래는 레벨 버튼 프리팹에 추가되는 스크립트이다.
LevelButton.cs
using System.Collections;
using System.Collections.Generic;
using TMPro;
using UnityEngine;
using UnityEngine.UI;
using UnityEngine.SceneManagement;

public class LevelButton : MonoBehaviour
{
    public static string MenuToLoad = "PLAY";
    public TMP_Text levelText;

    public void Initialize(int mapLevel) {
        levelText.text = mapLevel.ToString();
        transform.GetComponent<Button>().onClick.AddListener(() => OnLevelButtonClick(mapLevel));
    }

    private void OnLevelButtonClick(int mapLevel) {
        CurrentLevel.curLevel = mapLevel;
        SceneManager.LoadScene(MenuToLoad);
    }
}
씬들 간의 레벨 데이터를 가지고 있는게 좋을것 같아서 아래와 같이 스크립트를 하나 만들어줬다.
public static class CurrentLevel
{
    public static int curLevel = 0;
}
이제 MainMenu에서부터 MainLevel 씬, 그리고 PLAY 씬까지 잘 이동되고 선택한 레벨을 잘 불러와서 mapGenerate와 blockInventory까지 잘 생성하는 것을 확인할 수 있다.
추후 계획
클리어 로직도 좀 개선해서 클리어 시에 레벨 해금, 그리고 클리어시 여러 로직도 스탑시키도록 개선 시킬 예정이다.
PLAY 씬에서 R을 눌렀을때 다시 초기화하고 ESC 눌렀을때 옵션 창(계속, 레벨 선택창 돌아가기), 그리고 사운드 정도? 구현하면 게임의 로직 부분은 모두 구현이 완료된다. 그 이후에는 블럭의 종류를 늘려나가면서 map을 여러개 만들고 각 맵에 맞는 levelData만 설정해주는 방법으로 쉽게 확장 가능하다.
- 가능하다면 Fade 효과도 주는것도 좋을것 같다.