ROS2 Humble 환경에서 NAV2 및 Gazebo를 활용한 시뮬레이션 환경을 구축하는 내용입니다.
참고한 자료는 포스트 맨 하단에 URL을 기록했습니다.
PC 환경
- 우분투 22.04 LTS 설치
- CPU 유형 : x64
- NVIDIA 그래픽카드 장착
ROS2 설치[1]
지역 설정
sudo apt update && sudo apt upgrade
sudo apt install locales

sudo locale-gen en_US en_US.UTF-8
sudo update-locale LC_ALL=en_US.UTF-8 LANG=en_US.UTF-8
export LANG=en_US.UTF-8
소스 설정
sudo apt update && sudo apt install curl gnupg2 lsb-release
sudo curl -sSL https://raw.githubusercontent.com/ros/rosdistro/master/ros.key  -o /usr/share/keyrings/ros-archive-keyring.gpg

echo "deb [arch=$(dpkg --print-architecture) signed-by=/usr/share/keyrings/ros-archive-keyring.gpg] http://packages.ros.org/ros2/ubuntu $(lsb_release -cs) main" | sudo tee /etc/apt/sources.list.d/ros2.list > /dev/null
패키지 설치
sudo apt update
sudo apt install ros-humble-desktop-full ros-humble-rmw-fastrtps* ros-humble-rmw-cyclonedds*
ROS 개발 툴 설치
sudo apt update && sudo apt install -y \
build-essential \
cmake \
git \
libbullet-dev \
python3-colcon-common-extensions \
python3-flake8 \
python3-pip \
python3-pytest-cov \
python3-rosdep \
python3-setuptools \
python3-vcstool \
wget

python3 -m pip install -U \
argcomplete \
flake8-blind-except \
flake8-builtins \
flake8-class-newline \
flake8-comprehensions \
flake8-deprecated \
flake8-docstrings \
flake8-import-order \
flake8-quotes \
pytest-repeat \
pytest-rerunfailures \
pytest

sudo apt install --no-install-recommends -y \
libasio-dev \
libtinyxml2-dev \
libcunit1-dev

echo "source /opt/ros/humble/setup.bash" >> ~/.bashrc
NAV2 설치
apt를 이용한 설치
sudo apt install ros-humble-navigation2
sudo apt install ros-humble-nav2-bringup
소스코드를 이용한 설치
- workspace 위치는 사용자가 원하는 위치로 수정해서 사용하는 것을 권합니다.
WORKSPACE_PATH="Documents/simulation_ws"

mkdir -p $HOME/$WORKSPACE_PATH/src
cd $HOME/$WORKSPACE_PATH/src
git clone https://github.com/ros-planning/navigation2.git --branch humble-devel
cd $HOME/$WORKSPACE_PATH
rosdep install -y -r -q --from-paths src --ignore-src --rosdistro humble
colcon build --symlink-install
Gazebo 설치
sudo apt install -y ros-humble-gazebo-ros-pkgs
echo "source /usr/share/gazebo/setup.sh" >> ~/.bashrc
AWS Small warehouse 설치
- workspace 위치는 사용자가 원하는 위치로 수정해서 사용하는 것을 권합니다.
소스 코드 Git Clone 후 Build
source /opt/ros/humble/setup.bash
mkdir -p ~/Documents/simulation_ws/src
cd ~/Documents/simulation_ws/src
git clone -b ros2 https://github.com/aws-robotics/aws-robomaker-small-warehouse-world.git
#sudo rosdep init
#rosdep update
cd ~/Documents/simulation_ws
rosdep install --from-paths src --ignore-src -r -y
colcon build --symlink-install
테스트 실행
cd ~/Documents/simulation_ws
source /opt/ros/humble/setup.bash
source install/setup.bash
ros2 launch aws_robomaker_small_warehouse_world no_roof_small_warehouse_launch.py
Turtlebot3 설치[2]
- workspace 위치는 사용자가 원하는 위치로 수정해서 사용하는 것을 권합니다.
패키지 설치 및 소스코드 Git Clone 후 Build
sudo apt-get install ros-humble-turtlebot3 -y

cd ~/Documents/simulation_ws/src
git clone -b humble-devel https://github.com/ROBOTIS-GIT/turtlebot3_simulations.git
cd ~/Documents/simulation_ws
rosdep install --from-paths src --ignore-src -r -y
colcon build --symlink-install
원활한 테스트를 위한 라이다 측정 거리 수정
- 코드 수정
vi ~/Documents/simulation_ws/src/turtlebot3_simulations/turtlebot3_gazebo/models/turtlebot3_waffle/model.sdf<sensor name="hls_lfcd_lds" type="ray">
<always_on>true</always_on>
<visualize>true</visualize>
<pose>-0.064 0 0.121 0 0 0</pose>
<update_rate>5</update_rate>
<ray>
<scan>
<horizontal>
<samples>360</samples>
<resolution>1.000000</resolution>
<min_angle>0.000000</min_angle>
<max_angle>6.280000</max_angle>
</horizontal>
</scan>
<range>
<min>0.120000</min> <!-- 라이다 인식 최소 거리(m)-->
<max>3.5</max> <!-- 라이다 인식 최대 거리(m)-->
<resolution>0.015000</resolution>
</range>
<noise>
<type>gaussian</type>
<mean>0.0</mean>
<stddev>0.01</stddev>
</noise>
</ray>
<plugin name="turtlebot3_laserscan" filename="libgazebo_ros_ray_sensor.so">
<ros>
<!-- <namespace>/tb3</namespace> -->
<remapping>~/out:=scan</remapping>
</ros>
<output_type>sensor_msgs/LaserScan</output_type>
<frame_name>base_scan</frame_name>
</plugin>
</sensor>
테스트 실행
cd ~/Documents/simulation_ws
source /opt/ros/humble/setup.bash
source install/setup.bash
export TURTLEBOT3_MODEL=waffle
ros2 launch turtlebot3_gazebo turtlebot3_world.launch.py
AWS warehouse 환경에 Turtlebot3 waffle 적용하기
코드 수정
- world 파일 열기
vi ~/Documents/simulation_ws/src/aws-robomaker-small-warehouse-world/worlds/no_roof_small_warehouse/no_roof_small_warehouse.world- Turtlebot3 Waffle 적용을 위한 world 파일 수정
    <?xml version='1.0' encoding='utf-8'?>
    <sdf version="1.6">
      <world name="default">

        <gravity>0 0 -9.8</gravity>
        <physics default="0" name="default_physics" type="ode">
          <max_step_size>0.001</max_step_size>
          <real_time_factor>1</real_time_factor>
          <real_time_update_rate>1000</real_time_update_rate>
        </physics>

            <!--model name="aws_robomaker_warehouse_RoofB_01_001">
            <include>
                <uri>model://aws_robomaker_warehouse_RoofB_01</uri>
            </include>
            <pose frame="">0.0 0.0 0 0 0 0</pose>
        </model-->

            <model name="aws_robomaker_warehouse_ShelfF_01_001">
            <include>
                <uri>model://aws_robomaker_warehouse_ShelfF_01</uri>
            </include>
            <pose frame="">-5.795143 -0.956635 0 0 0 0</pose>
        </model><pose frame="">-1.2196 9.407 -0.015663 0 0 1.563871</pose>
        </model>

         ....

        <gui fullscreen='0'>
          <camera name='user_camera'>
            <pose frame=''>-4.70385 10.895 16.2659 -0 0.921795 -1.12701</pose>
            <view_controller>orbit</view_controller>
            <projection_type>perspective</projection_type>
          </camera>
        </gui>

    <!-- ================================ -->
    <!-- 아래 코드를 동일 위치에 삽입 -->

        <include>
          <pose>-2.0 -0.5 0.01 0.0 0.0 0.0</pose>
          <uri>model://turtlebot3_waffle</uri>
        </include>
    <!-- ================================ -->

      </world>
    </sdf>
Build
    cd ~/Documents/simulation_ws
    colcon build --symlink-install
테스트 실행
cd ~/Documents/simulation_ws
source /opt/ros/humble/setup.bash
source install/setup.bash
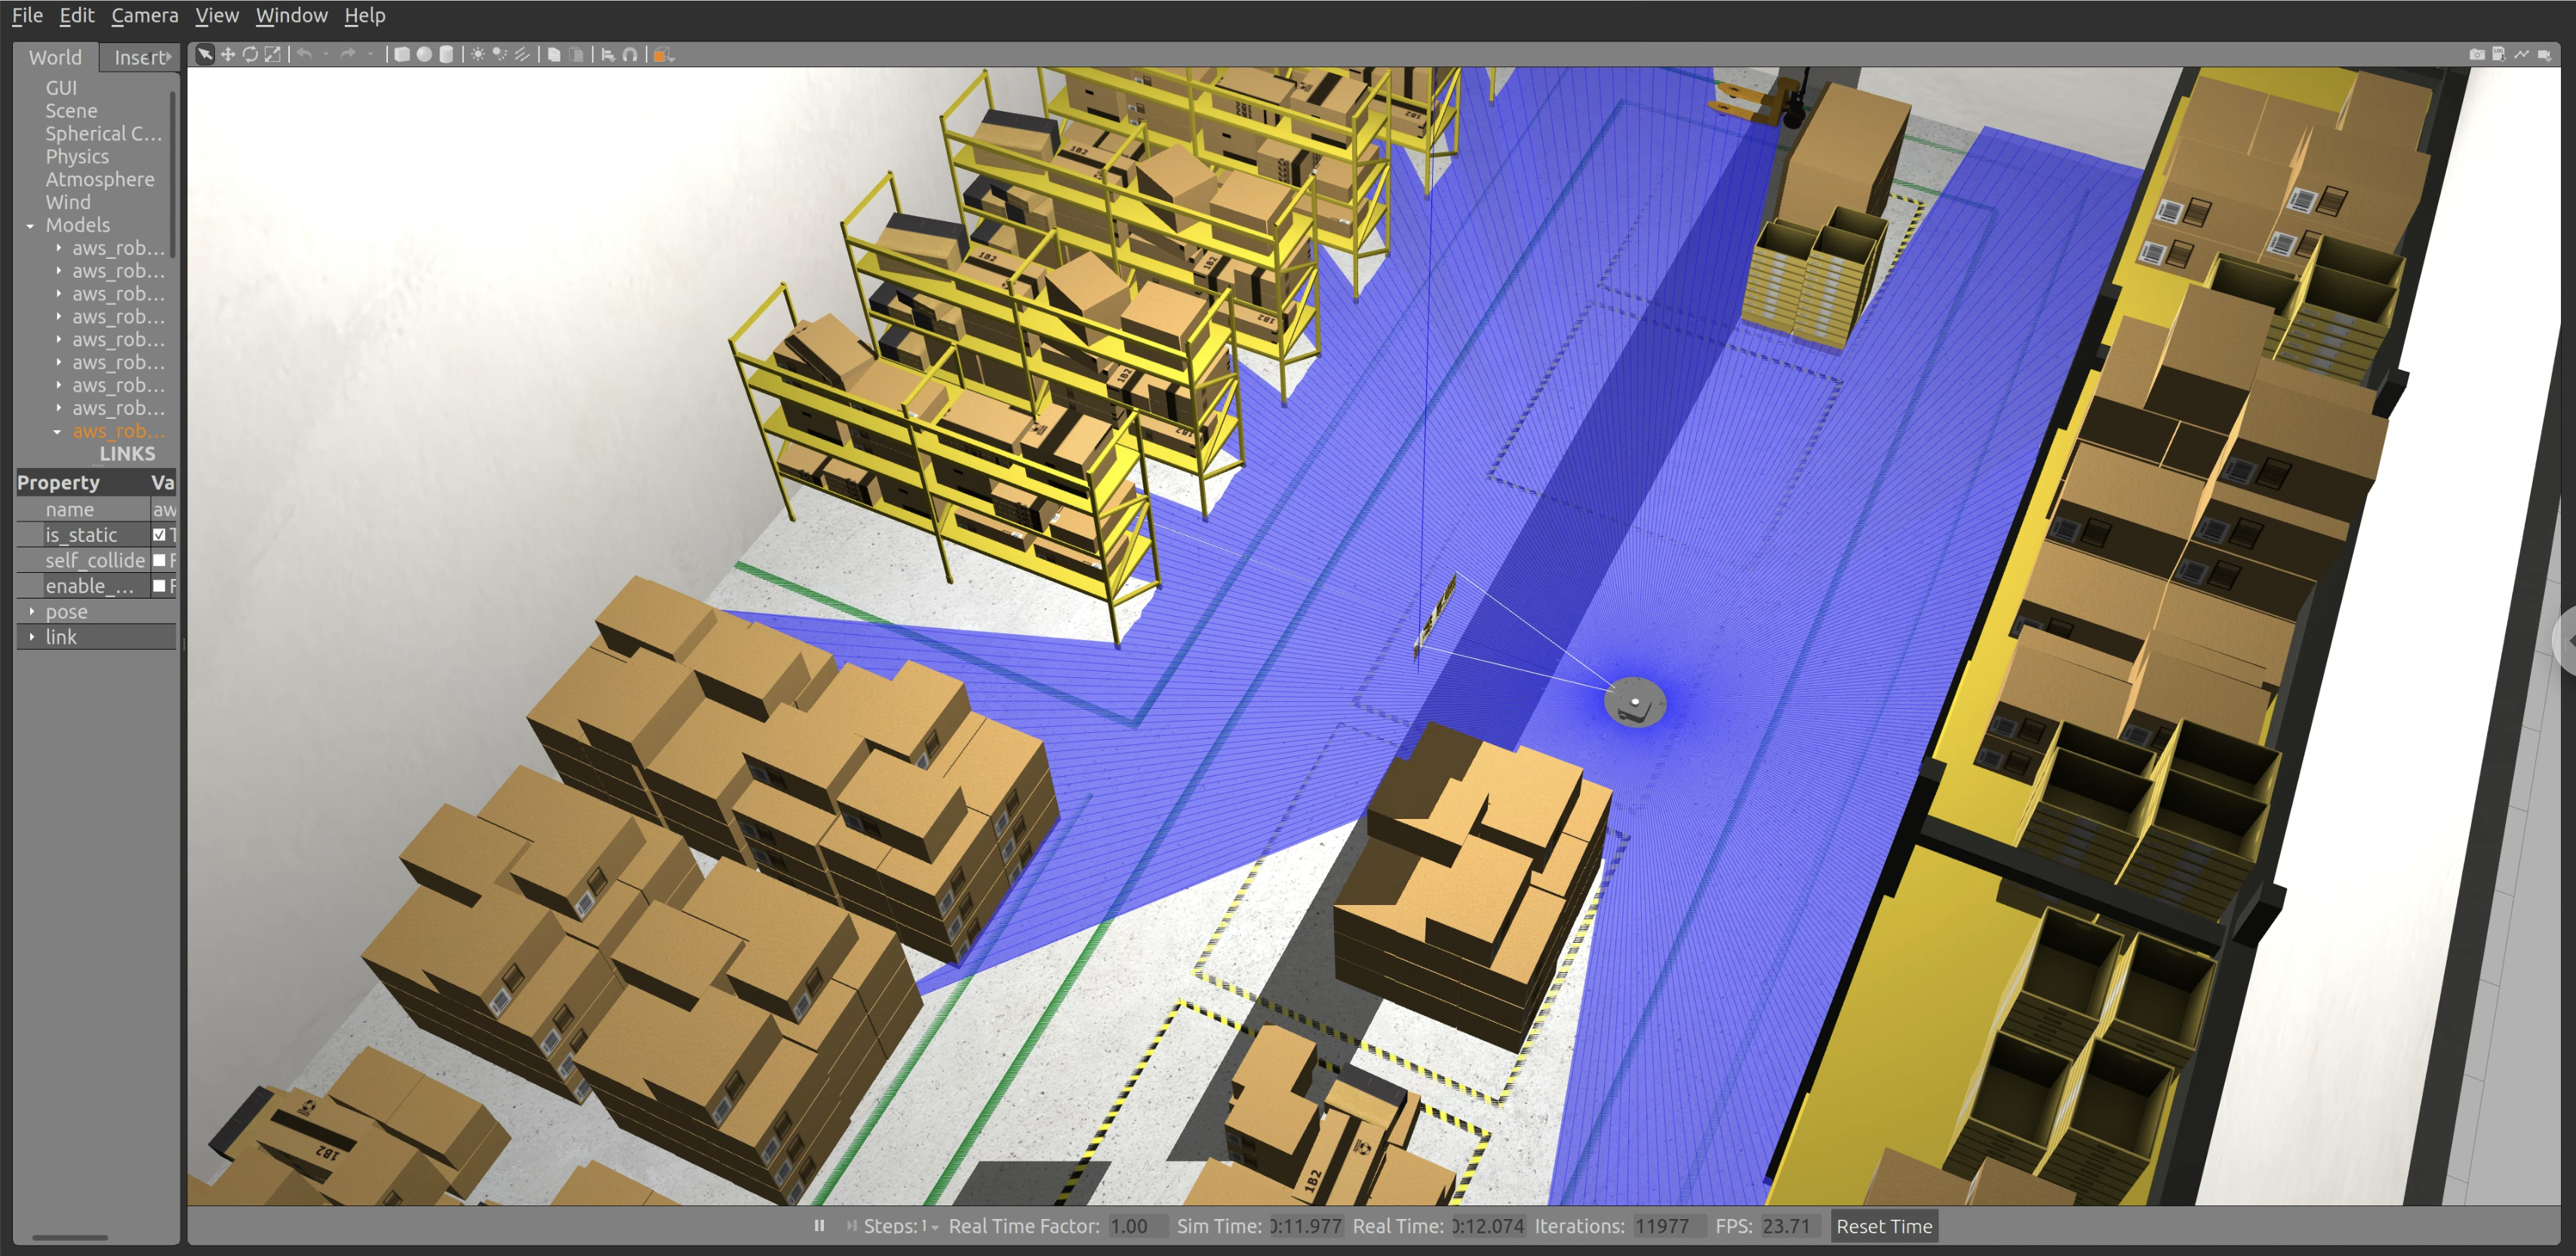
ros2 launch aws_robomaker_small_warehouse_world no_roof_small_warehouse.launch.py적용 완료 화면
테스트
키보드를 이용하여 로봇 움직이기
패키지 설치
sudo apt-get install ros-humble-teleop-twist-keyboard패키지 실행
- Gazebo 등이 실행되고 있는 Terminal과 다른 별도의 Terminal에서 실행해야 합니다.
source /opt/ros/humble/setup.bash
ros2 run teleop_twist_keyboard teleop_twist_keyboard
지금까지 ROS2 Humble, NAV2, Gazebo, Turtlebot Waffle을 활용하여 시뮬레이션 환경을 구축하는 내용을 설명했습니다.
다음은 이 환경을 이용하여 실내 자율 주행을 위해 맵을 제작하는 방법을 설명하겠습니다.
[1] https://cafe.naver.com/openrt/25288
[2] https://emanual.robotis.com/docs/en/platform/turtlebot3/simulation/

더 나은 결과물을 위한 작은 공간