MATLAB-Automated Driving Toolbox-Select Waypoints for Unreal Engine Simulation
MATLAB/Simulink
이번에는 MATLAB-Automated Driving Toolbox의 'Select Waypoints for Unreal Engine Simulation' 예제에 대한 공부 기록이다.
📌 공부 기록용이라 틀린 내용이 매우 많을 것이다.
이 예제를 통해 waypoint를 내가 원하는 대로 지정하는 방법과 vehicle이 움직이는 경로를 visualize 하는 방법을 배울 수 있다.
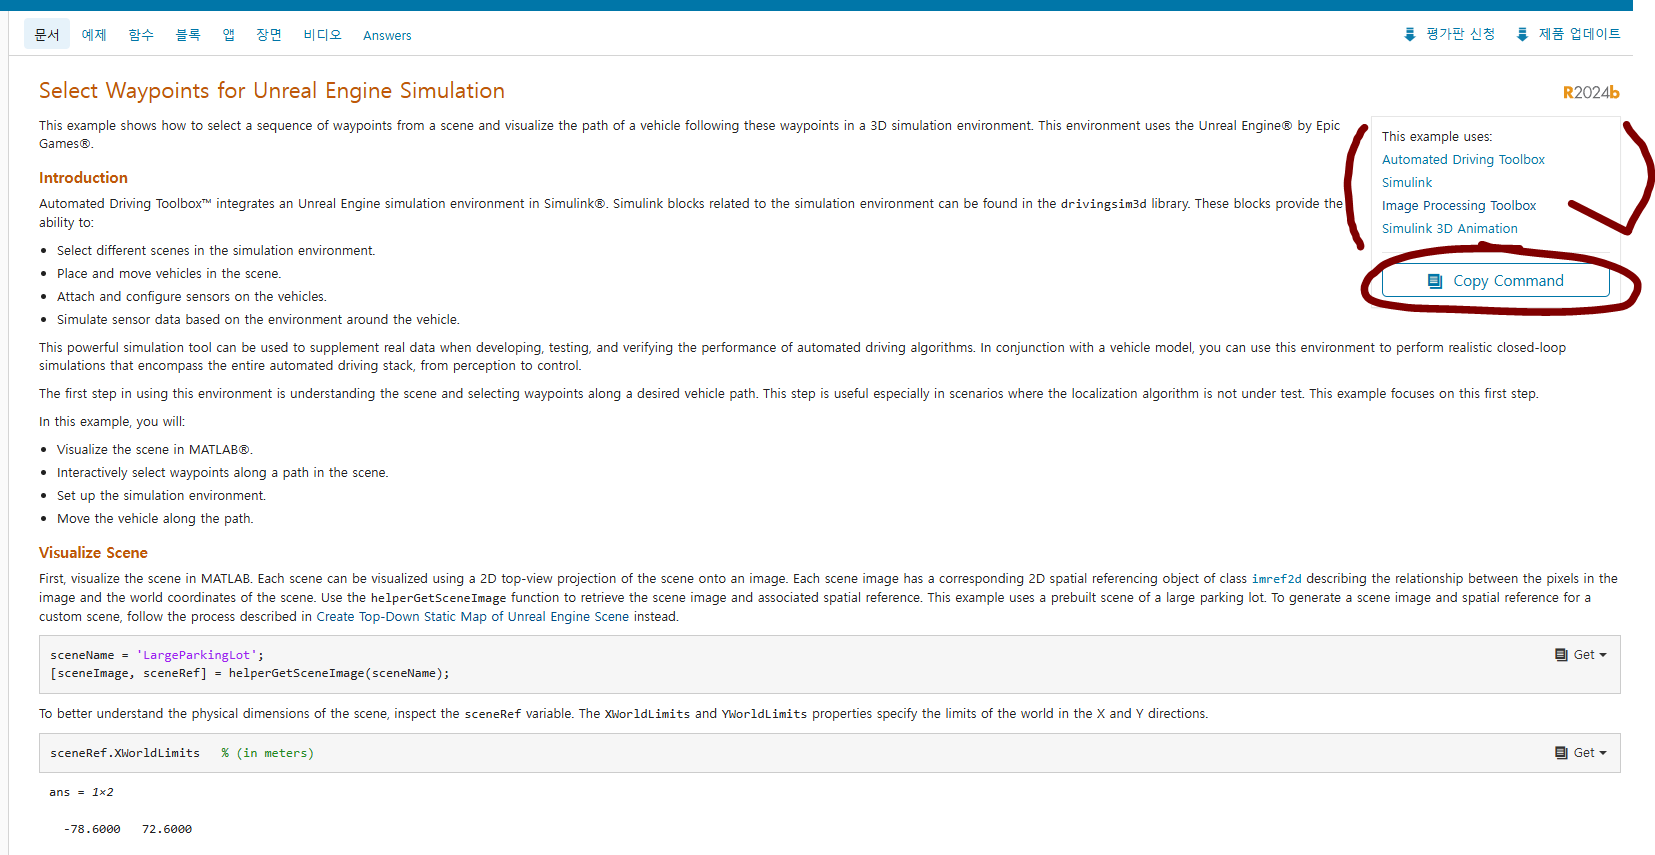
필요한 Toolbox를 전부 설치하고, Copy Command해서 필요한 파일들을 로컬 컴퓨터에 저장해준다.

📌코드 설명
helperGetSceneImage(sceneName) 함수는
C:\Program Files\MATLAB\R2024b\toolbox\driving\drivingutilities 에 존재하는 함수이다.
function [sceneImage, sceneRef] = helperGetSceneImage(sceneName)
%helperGetSceneImage Retrieve scene image and spatial reference
%   [sceneImage, sceneRef] = helperGetSceneImage(sceneName) retrieves the
%   image and spatial reference associated with the scene specified by
%   sceneName. sceneName must be a string scalar or character vector
%   specifying the name of a scene. sceneImage is a truecolor RGB image.
%   sceneRef is a spatial referencing object of type imref2d describing the
%   relationship between intrinsic image coordinates and world coordinates.
%
%   Notes
%   -----
%   sceneName must be the name of a valid 3D simulation engine scene and
%   can be one of the following:  "LargeParkingLot", "ParkingLot",
%   "DoubleLaneChange", "USCityBlock", "USHighway", "CurvedRoad",
%   "VirtualMCity", "StraightRoad", "OpenSurface".
%
%   Example : Read and display image for Virtual M-City
%   ---------------------------------------------------
%   % Get scene image and spatial reference for Virtual M-City
%   sceneName = 'VirtualMCity';
%   [sceneImage, sceneRef] = helperGetSceneImage(sceneName);
%
%   % Display image
%   figure
%   imshow(sceneImage, sceneRef)
%   xlabel('X (m)')
%   ylabel('Y (m)')
%   title(sceneName)
%
%   % Set Y-direction back to normal
%   set(gca, 'YDir', 'normal')
%
%   See also imref2d.

% Copyright 2019 The MathWorks, Inc.

% Validate scene name
supportedScenes = {'LargeParkingLot', 'ParkingLot', 'DoubleLaneChange', ...
    'USCityBlock', 'USHighway', 'CurvedRoad', 'VirtualMCity', 'StraightRoad', ...
    'OpenSurface'};

sceneName = validatestring(sceneName, supportedScenes, mfilename, 'sceneName');

% Read image
imageName = strcat('sim3d_', sceneName, '.jpg');
sceneImage = imread(imageName);

% Read spatial reference
data = load('sim3d_SpatialReferences.mat');
sceneRef = data.spatialReference.(sceneName);
end
🍎 sceneImage 는 Truecolor RGB image 이고, sceneRef는
이미지 내부 좌표계와 실제 3D 세상 좌표계 사이의 관계를 설명하는 imref2d 타입의 객체이다.
실제 코드를보면, 유효성 검사를 진행한 다음, Top-down 이미지와 공간 참조를 읽어와 반환한다.
🍎 C:\Program Files\MATLAB\R2024b\toolbox\driving\drivingdata 경로에 들어가보면
해당 파일명의 Top-down image(.jpg 형식)이 존재한다.
이 코드를 실행하면 sceneImage에는 scene의 Top-down 이미지가, sceneRef 에는 좌표계 사이의 관계를 정의하는 imref2d 타입의 객체가 저장된다.
*유효성 검사 코드때문에 예제에서 제공하는 scene들에 대해서만 사용할 수 있는 함수이다.
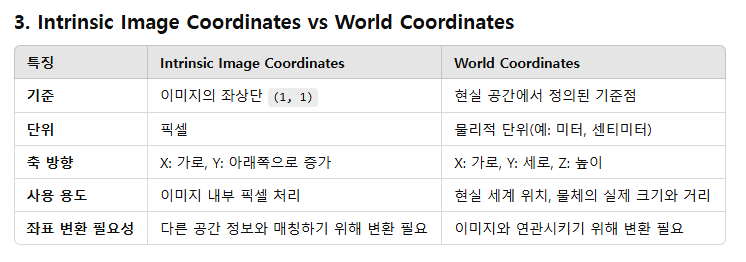
🍎 Intrinsic Image Coordinates vs World Coordinates
🍎 참고로 MATLAB에서 홈탭-애드온 받기 로 설치한 Toolbox의 파일들은 전부 MATLAB의 path에 자동으로 추가되니, path에 대해 신경쓰지 않아도 된다.
📌코드 설명
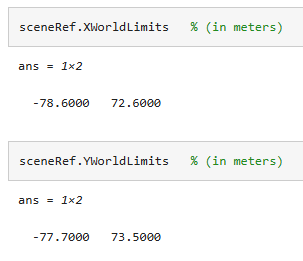
실제 세상 좌표계의 X축 범위와 Y축 범위를 미터 단위로 출력하는 코드이다.
X축 범위는 -78.6~72.6 이고, Y축 범위는 -77.7~73.5 이다.
📌코드 설명
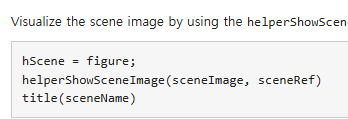
sceneImage와 sceneRef를 이용해서 기존의 scene 에다가 범례를 추가해서 새로운 figure를 통해 visualize하는 코드이다.

위와 같은 figure가 생성된다.

📌코드 설명
내가 직접 waypoint를 수정할 수 있도록 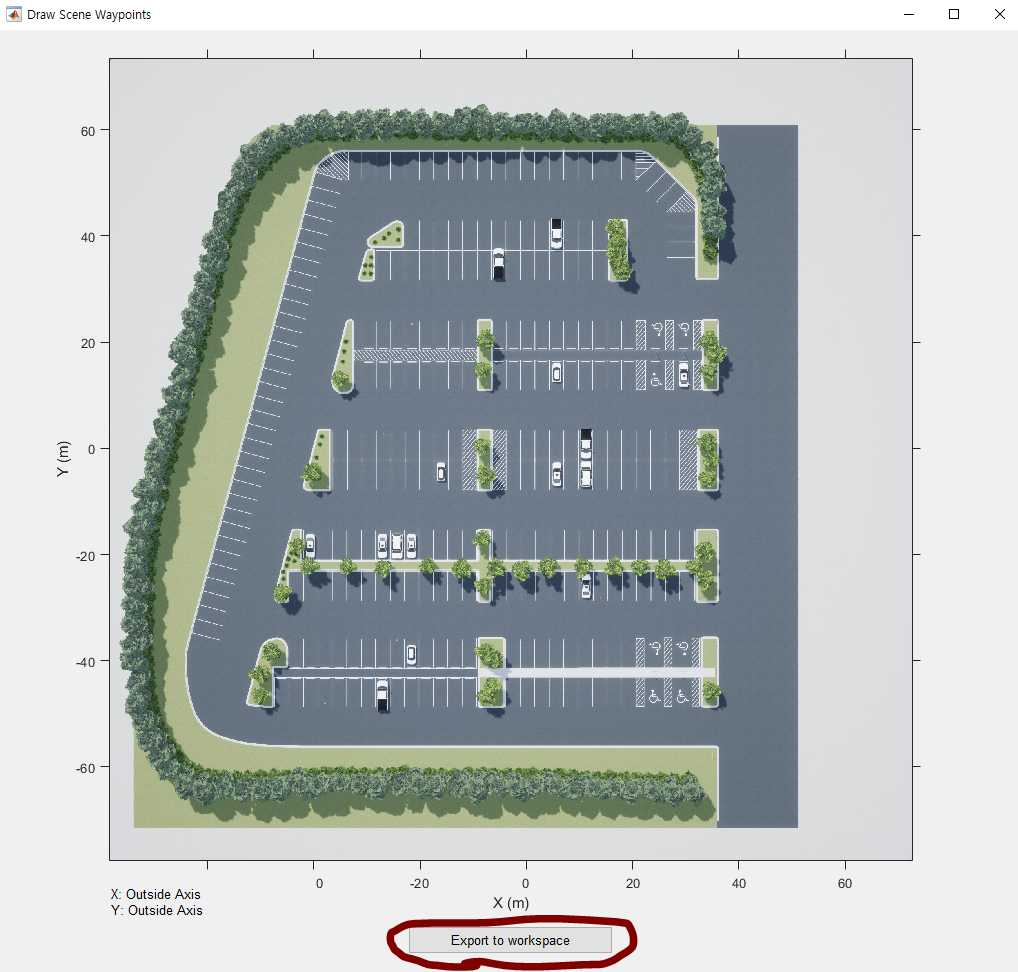
이렇게 'Export to workspace' 버튼이 생긴다.
좌클릭해서 직선을 이어가는 식으로 경로를 설정할 수 있다. 경로 설정이 끝난 후에는 우클릭하고 -> Export to workspace -> '확인' 누르면
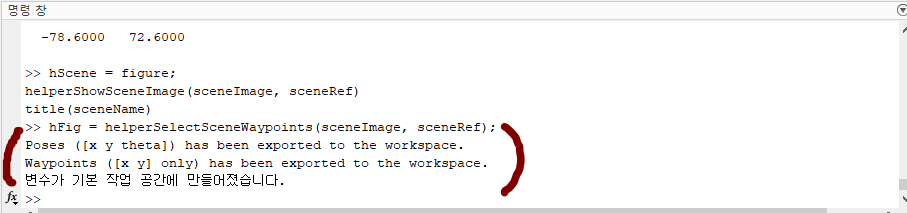
내가 정한 waypoint의 위치와 차량의 위치 및 방향이 현재 workspace의 변수에 저장된다.
🍎Workspace는 현재 세션에서 사용 중인 변수와 데이터를 저장하고 관리하는 작업 공간으로,
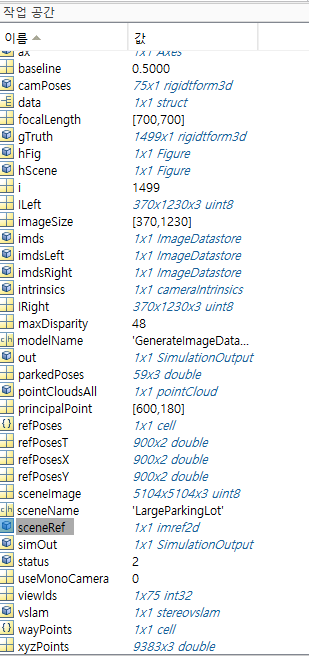
이 부분을 의미한다.
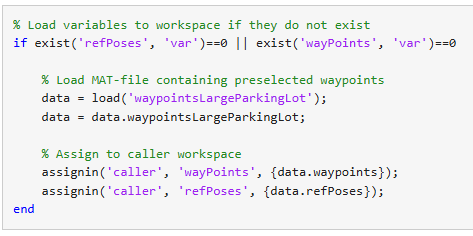
📌코드 설명
waypointsLargeParkingLot을 불러와서 그 안에 waypoints와 refPoses에
방금 내가 새롭게 정한 waypoint의 위치와 차량의 위치 및 방향을 저장한다.

📌코드 설명
내가 새롭게 정한 차량의 이동 경로를 smooth하게 변환 해주는 코드이다.

📌코드 설명
VisualizeVehiclePathIn3DSimulation 이름의 Simulink Model 파일을 연다.
📌코드 설명
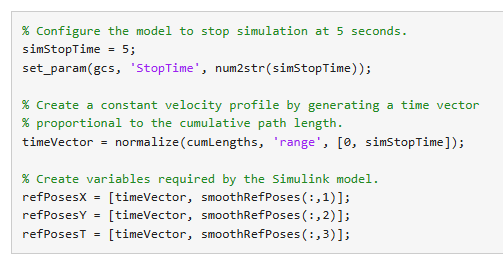
시뮬레이션 진행 시간을 설정하고, 속도를 일정하게한다.
또한 앞서 smooth하게 만든 차량의 이동 경로를 작업 공간내의 각 변수에 저장한다.
VisualizeVehiclePathIn3DSimulation 이름의 Simulink Model은 내 작업공간의
각 변수에맞게 알아서 설정된다.(From Workspace 블록을 이용한다는데 이게 뭔지는 나중에 알아봐야겠다)
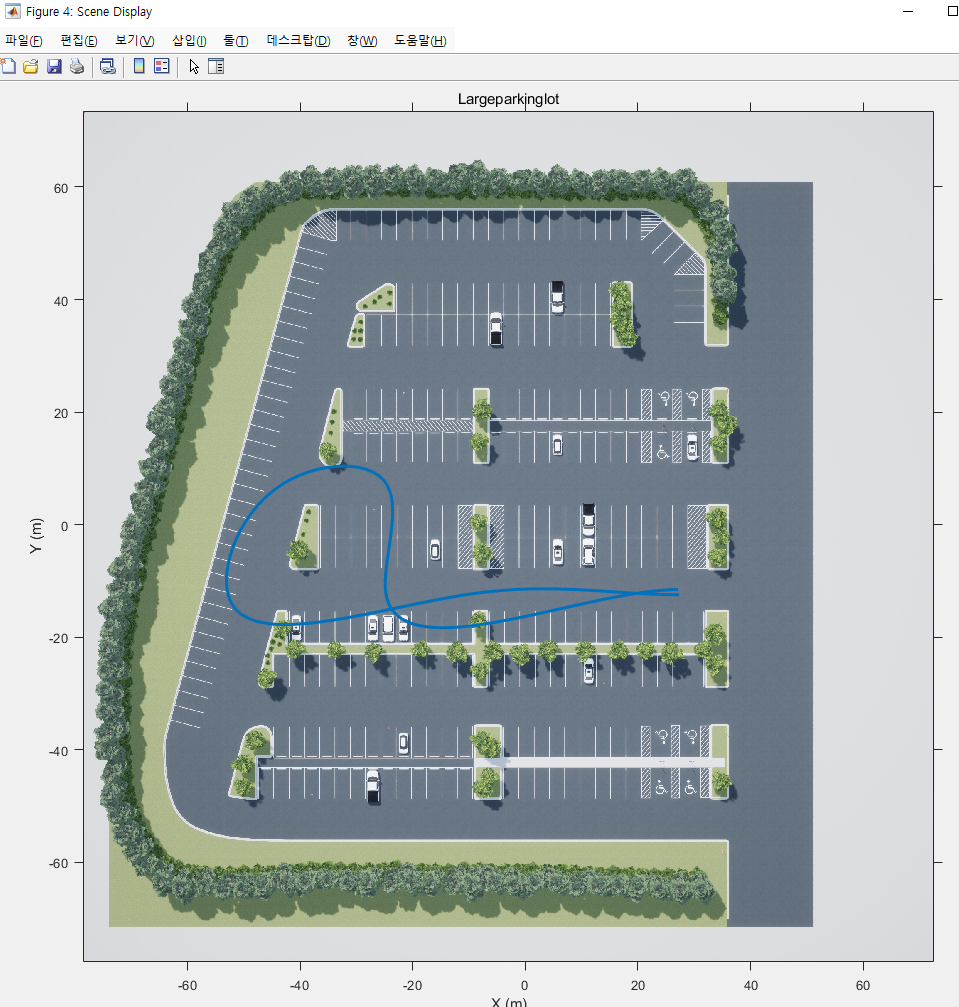
내가 새롭게 정한 웨이포인트 +
Smooth하게 만든 차량의 이동 경로가 반영된 것을 확인할 수 있다.
📌코드 설명
시뮬레이션을 실행한다.
📌코드 설명
figure, simulink model, scene 등을 전부 종료한다.