지금까지 배운 simulation 기초를 모두 활용해볼 프로젝트가 과제로 나왔다!
simulation을 배우는 건 처음인데 너무너무 재미있다. 잘 배워서 나중에 다양한 로봇과 환경에서 활용해보고 싶다.
무엇보다 너무 좋은 강의해주시는 신승렬강사님 너무 감사합니다! ><
- 과제를 수행한 것이라 모든 내용은 내가 직접 했다 😊
- 나는 프로그래머스 Planning & Control 1기 과정을 진행중이다 ㅎㅎ
- 내가 프로젝트를 수행하면서 과정을 기록한 내용이기 때문에 뒤로 갈수록 코드에 변화가 생겼다.
이걸보고 비슷하게 진행해보고 싶은 사람은 나의 github에 올라와있는 코드(=최종본)를 보는 것이 이해하는데 더 편할 것 같다.
프로젝트 - 시뮬레이터 기초편 전체 활용
개발 환경 준비하기
새 ROS 패키지 만들기
- 프로젝트와 관련한 모든 것을 수행할 mid_project라는 새 패키지 생성
- 지금까지 작성했던 dependency들을 잘 활용할 것
그동안 배운 simulation 기초를 모두 활용해보는 과제이므로
지금까지 이용한, 그리고 지금 프로젝트에 필요한 dependency를 모두 추가해서 package를 만들었다.
.
.
cd ~/sim_ws/src
catkin_create_pkg mid_project rospy roscpp urdf xacro gazebo gazebo_ros gazebo_plugins
.
.
새로운 world 만들기
Launch 파일과 world 파일 만들기
(가이드)
~/sim_ws/src/mid_project/launch/gazebo.launch
~/sim_ws/src/mid_project/launch/spawn.launch
~/sim_ws/src/mid_project/models/custom_mid_obj
	(이 directory에 model.config와 model.sdf 포함)
일단 나는 헷갈릴까봐 모든 폴더를 다 만들어 두었다.
mkdir -p ~/sim_ws/src/mid_project/launch
mkdir -p ~/sim_ws/src/mid_project/models/custom_mid_obj
mkdir -p ~/sim_ws/src/mid_project/worlds
mkdir -p ~/sim_ws/src/mid_project/
World 만들기 (walls.world)
code ~/sim_ws/src/mid_project/worlds/walls.world
code ~/sim_ws/src/mid_project/launch/gazebo.launch
Gazebo에서 기본으로 제공하는 shape들을 활용해 custom_mid_obj 만들기
강의에서 주어진 모델은 이렇게 생겼다. 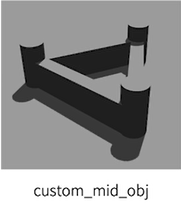
기본으로 제공되는 box와 cylinder를 이용해서 shape을 만들어 주었다.
- 만드는 파일 : model.sdf & model.config
만들고 나서 /.gazebo/models에 폴더 자체를 추가해주는 것 잊지 말자~
* 나중에 로봇이 라이더로 돌아다닐 예정이므로 collision 설정도 해주어야 한다!
.
.[Error] : [parser.cc:759] XML Attribute[length] in element[cylinder] not defined in SDF, ignoring.
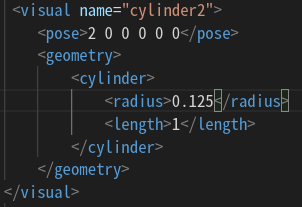
.sdf 파일에서 cylinder 태그를 아래와 같이 radius와 length를 적어서 만들어졌었는데 내가 원하는대로 반지름이나 길이가 반영이 안되서 터미널을 보니 에러가 나고 있었다.
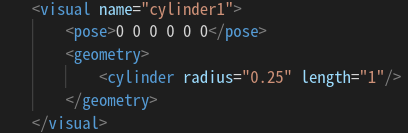
[Solution] 아래처럼 태그로 달아주면 해결~
.
.
.sdf 파일에서 정해주는 model name이 앞으로 world에서 include 할 때 적는 이름이니까 잘 설정해두자 :)
<model.sdf>
<?xml version='1.0'?>
<sdf version="1.4">
    <model name="custom_mid_obj">
        <pose>0 0 0.5 0 0 0</pose>
        <static>false</static>
        <link name="link">
            <inertial>
                <mass>1.0</mass>
                <inertia>
                    <ixx>0.083</ixx>
                    <ixy>0.0</ixy>
                    <ixz>0.0</ixz>
                    <iyy>0.083</iyy>
                    <iyz>0.0</iyz>
                    <izz>0.083</izz>
                </inertia>
            </inertial>

            <!-- collision -->
            <collision name="collision1_box1">
                <pose>1.55 1 0 0 0 0.523</pose>
                <geometry>
                    <box>
                        <size>0.3 2 0.5</size>
                    </box>
                </geometry>
            </collision>

            <collision name="collision2_box2">
                <pose>1 0 0 0 0 0</pose>
                <geometry>
                    <box>
                        <size>2 0.3 0.5</size>
                    </box>
                </geometry>
            </collision>

            <collision name="collision3_box3">
                <pose>0.55 1 0 0 0 1.0472</pose>
                <geometry>
                    <box>
                        <size>2 0.3 0.5</size>
                    </box>
                </geometry>
            </collision>


            <collision name="collision4_cylinder1">
                <pose>0 0 0 0 0 0</pose>
                <geometry>
                    <cylinder>
                        <radius>0.25</radius>
                        <length>1</length>
                    </cylinder>
                </geometry>
            </collision>


            <collision name="collision5_cylinder2">
                <pose>2 0 0 0 0 0</pose>
                <geometry>
                    <cylinder>
                        <radius>0.25</radius>
                        <length>1</length>
                    </cylinder>
                </geometry>
            </collision>


            <collision name="collision6_cylinder3">
                <pose>1 2 0 0 0 0</pose>
                <geometry>
                    <cylinder>
                        <radius>0.25</radius>
                        <length>1</length>
                    </cylinder>
                </geometry>
            </collision>


            <!-- visual -->
            <visual name="box1(left)">
                <pose>1.55 1 0 0 0 0.523</pose>
                <geometry>
                    <box>
                        <size>0.3 2 0.5</size>
                    </box>
                </geometry>
            </visual>
            <visual name="box2(xaxis)">
                    <pose>1 0 0 0 0 0</pose>
                    <geometry>
                        <box>
                            <size>2 0.3 0.5</size>
                        </box>
                    </geometry>
            </visual>

	        <visual name="box3(right)">
                <pose>0.55 1 0 0 0 1.0472</pose>
                <geometry>
                    <box>
                        <size>2 0.3 0.5</size>
                    </box>
                </geometry>
            </visual>

            <visual name="cylinder1">
                <pose>0 0 0 0 0 0</pose>
                <geometry>
                    <cylinder>
                        <radius>0.25</radius>
                        <length>1</length>
                    </cylinder>
                </geometry>
            </visual>
             <visual name="cylinder2">
                <pose>2 0 0 0 0 0</pose>
                <geometry>
                    <cylinder>
                        <radius>0.25</radius>
                        <length>1</length>
                    </cylinder>
                </geometry>
            </visual>
             <visual name="cylinder3">
                <pose>1 2 0 0 0 0</pose>
                <geometry>
                    <cylinder>
                        <radius>0.25</radius>
                        <length>1</length>
                    </cylinder>
                </geometry>
            </visual>
        </link>
    </model>
</sdf>
<model.config>
<?xml version="1.0"?>

<model>
    <name>Custom Model</name>
    <version>1.0</version>
    <sdf version="1.6">model.sdf</sdf>

    <author>
        <name>yujin</name>
        <email>aaaa@gmail.com</email>
    </author>

    <description>
        custom object
    </description>
</model>
.
.
.
Gazebo Model Library에서 제공하는 "grey_wall"을 활용해 벽 세우기 (20mx20m의 정사각형)
<walls.world> 에 population으로 벽을 만들어주었다.
벽이 규격대로 사각형이 딱 맞게 나타나는 것이 아니라서
일단 위치를 맞춘 후에 보면서 약간의 미세 조정이 필요하다. (약간 오래 걸림)
(그래서 20x20이지만 xy의 좌표가 10,-10만 있는 것은 아님)
가능하면 Gazebo ui 상에서 벽을 배치한 후 .world파일로 저장하는 것이 편할 것 같다.
(나는 virtual machine을 쓰고 있어서 그런지 world를 저장하면 자꾸 UI가 멈춰서..... population으로 만들어줬다.)
<walls.world>
<?xml version="1.0" ?>
<sdf version="1.5">
    <world name="default">

        <!-- A global light source -->
        <include>
            <uri>model://sun</uri>
        </include>

        <!-- A ground plane -->
        <include>
            <uri>model://ground_plane</uri>
        </include>

        <!-- +X barriers -->
        <population name="grey_wall">
            <model name="grey_wall_1">
                <include>
                    <static>true</static>
                    <uri>model://grey_wall</uri>
                </include>
            </model>
            <pose>3 10 0.3 0 0 0</pose>
            <box>
                <size>20 20 0.01</size>
            </box>
            <model_count>3</model_count>
            <distribution>
                <type>linear-x</type>
            </distribution>
        </population>

        <!-- -X barriers -->
        <population name="grey_wall">
            <model name="grey_wall_2">
                <include>
                    <static>true</static>
                    <uri>model://grey_wall</uri>
                </include>
            </model>
            <pose>2.8 -10.6 0.3 0 0 0</pose>
            <box>
                <size>20 20 0.01</size>
            </box>
            <model_count>3</model_count>
            <distribution>
                <type>linear-x</type>
            </distribution>
        </population>

        <!-- +Y barriers -->
        <population name="grey_wall">
            <model name="grey_wall_3">
                <include>
                    <static>true</static>
                    <uri>model://grey_wall</uri>
                    <pose>0 0 0 0 0 1.57</pose>
                </include>
            </model>
            <pose>10 3 0.3 0 0 0</pose>
            <box>
                <size>20 20 0.01</size>
            </box>
            <model_count>3</model_count>
            <distribution>
                <type>linear-y</type>
            </distribution>
        </population>

        <!-- -Y barriers -->
        <population name="grey_wall">
            <model name="grey_wall_4">
                <include>
                    <static>true</static>
                    <uri>model://grey_wall</uri>
                    <pose>0 0 0 0 0 1.57</pose>
                </include>
            </model>
            <pose>-11 3 0.3 0 0 0</pose>
            <box>
                <size>20 20 0.01</size>
            </box>
            <model_count>3</model_count>
            <distribution>
                <type>linear-y</type>
            </distribution>
        </population>

    </world>
</sdf>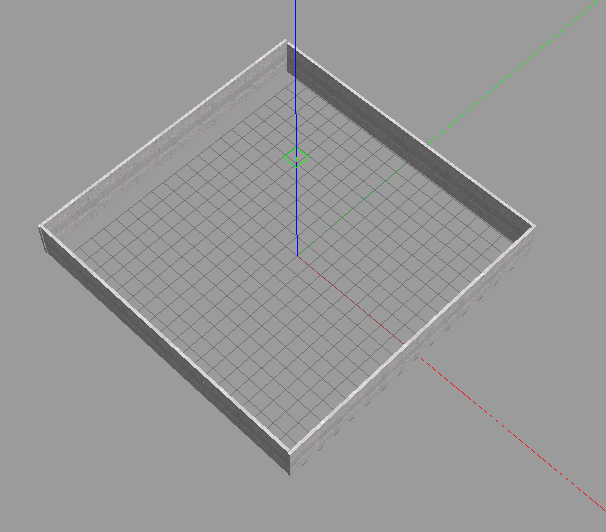
.
.
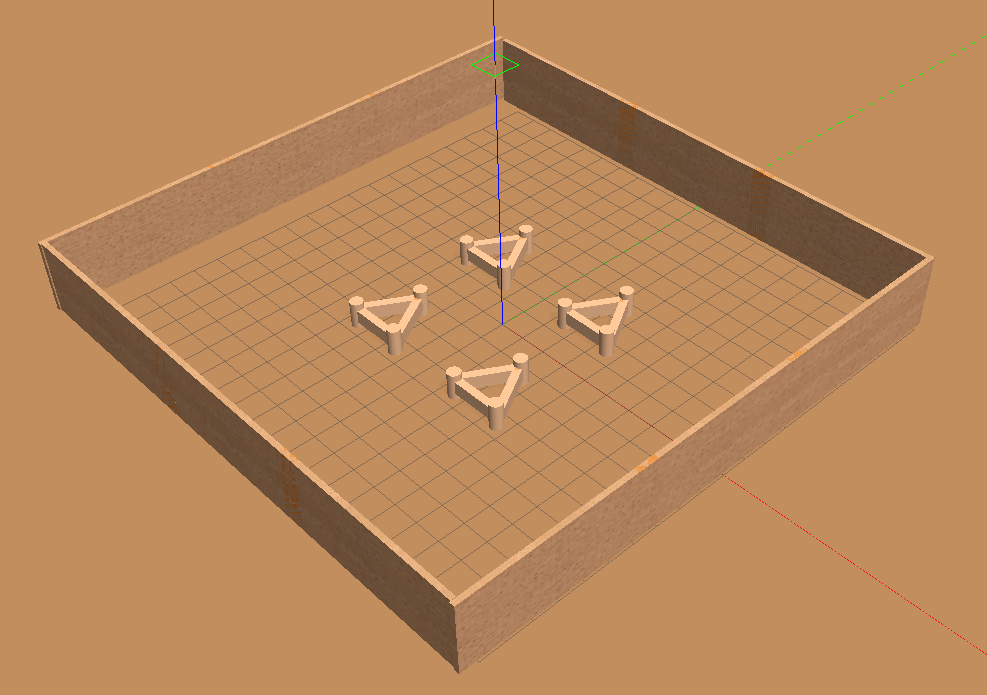
벽 내부에 생성한 custom_mid_obj 4개를 10mx10m의 영역에 균일하게 배치(정적 장애물 4개)
population에서 distribution tag는 Population of model를 참고해 uniform으로 설정했다.
아래 코드를 위에서 작성한 walls.world에 넣어주면 된다.
<+walls.world>
        <!-- custom_mid_obj -->
        <population name="custom_mid_obj">
            <model name="custom_mid_obj">
                <include>
                    <static>true</static>
                    <uri>model://custom_mid_obj</uri>
                </include>
            </model>
            <pose>-1 -1 0 0 0 0</pose>
            <box>
                <size>10 10 0.01</size>
            </box>
            <model_count>4</model_count>
            <distribution>
                <type>uniform</type>
            </distribution>
        </population>
/
성공!
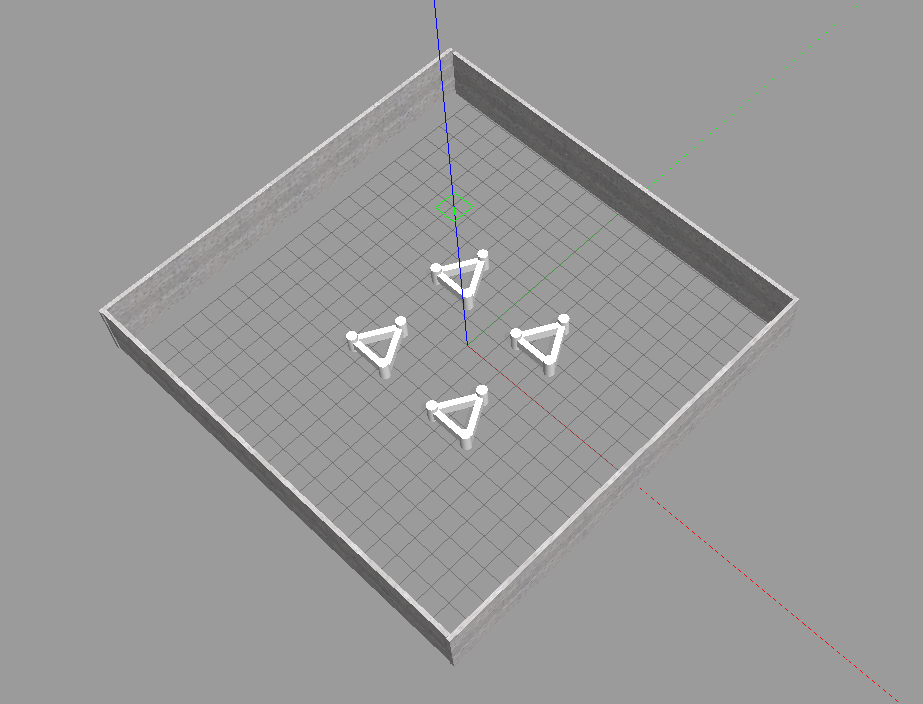
collision 설정도 잘 된 것을 확인했다.
.
.
.
.
.
Model Plugin 작성하기
관련 파일 준비하기
- Plugin 파일 만들기
~/sim_ws/src/mid_project/src/moving_plugin.cc- 새 Plugin을 컴파일할 수 있도록 CMakeList.txt 파일 수정
Plugin 작성하기
고정해놨던 custom object 외에 동적 장애물 만들기 (동적 장애물 4개)
moving_plugin.cc 작성
plugin을 만들어서 모델을 world에 올렸더니 이렇게 신나게 날아다니고 있었다.
의도한 바는 바닥에 붙어서 얌전히 움직이는 것이었는데.. 해결방법은 아직 찾는중이다. 🤣
.
.
.
.
로봇 가져오기
관련 file 준비하기
- urdf 디렉터리와 파일 만들기
~/sim_ws/src/mid_project/urdf/robot.xacro
~/sim_ws/src/mid_project/urdf/robot.gazebo
Robot 구성하기
- 로봇은 4개의 wheel을 보유
- 이전 강의에서 만들었던 로봇보다 작아야함 (장에물 회피에 용이)
- skid steering drive를 활용하여 로봇을 제어하고 odometry 데이터를 읽음
- 장애물을 피하기 위해 laser scan을 배치
- 부드러운 움직임을 위해 마찰 계수 조절하기
간단한 장애물 회피 알고리즘 구현하기
obstacle_aviodance.py 작성하기
- 아래 쪽의 sample_script를 개선한 프로그램 작성하기
- 로봇이 장애물에 접근하는 경우, 후진을 해야할 수 있음
- 알고리즘은 laser scan topic을 읽어 callback 함수에서 범위별 측정한 평균값을 지정
- 로봇을 충분한 여유 공간이 있을 때마다 전진하고, 장애물에 가까워지며 왼쪽으로 방향을 전환하면서 이동
결과확인
export GAZEBO_MODEL_PATH=~/sim_ws/src/mid_project/models:$GAZEBO_MODEL_PATH
roslaunch mid_project gazebo.launch
roslaunch mid_project spawn.launch
rosrun mid_project obstacle_aviodance.py